How to create an indoor vertical garden using repurposed plastic bottles and LED grow lights
Creating an indoor vertical garden is an excellent way to enhance your living space, contribute to the environment, and enjoy fresh greens year-round. With urban living on the rise and outdoor gardening space dwindling, many are searching for innovative solutions to bring nature indoors. A vertical garden allows you to maximize your space and create visually appealing living art by upcycling materials like plastic bottles.
This DIY project not only promotes sustainability by repurposing items that would typically end up in a landfill, but it also provides numerous benefits. A vertical garden can improve air quality, reduce stress, and boost your mood. Plus, growing your own herbs, vegetables, or decorative plants can reduce grocery costs and give you the satisfaction of nurturing your own food.
For beginners, this project is quite manageable and does not require any advanced gardening skills. If you're a DIY enthusiast looking to explore the world of gardening, this step-by-step guide will help you create a beautiful indoor vertical garden using just repurposed plastic bottles and LED grow lights.
So roll up your sleeves, gather your tools, and prepare to transform your living space into a lush indoor oasis!
Tools Needed
1. Utility Knife or Scissors: Essential for cutting the plastic bottles to create the planting pots. Ensuring you have a sharp blade will make the task easier and safer.
2. Drill with Bits: Used to create drainage holes in your bottles. Proper drainage is crucial for the health of your plants, making this tool a necessity for your project.
3. Ruler or Measuring Tape: Helps in measuring the height and spacing of your vertical garden. Accurate measurements will make assembly streamlined and aesthetically pleasing.
4. Screwdriver: Needed for assembling any wall brackets or supports for your vertical garden structure. A Phillips and flathead screwdriver might be handy depending on your choice of mounting hardware.
5. Marker or Pen: Useful for marking cut lines on your bottles to ensure that your cuts are straight and precise.
6. Gloves: Protects your hands while working with potentially sharp edges of the plastic bottles. Safety should always be a priority during DIY projects.
7. Watering Can or Spray Bottle: For watering your plants without making a mess. Keeping a consistent watering routine is vital for plant health.
8. Plant Labels: Optional but helpful for identifying your plants. This is especially useful for beginners as it helps you remember which herbs or flowers you've planted.
Materials Needed
1. Plastic Bottles (10-15): Repurpose standard-sized bottles, such as soda or water bottles. The exact amount will depend on the size of your vertical garden.
2. Wooden Pallet or a Sturdy Frame: One can use an old wooden pallet or build a frame to support the bottles. This serves as the foundational structure for your vertical garden.
3. Potting Soil (1-2 bags): Choose a high-quality potting mix to provide the essential nutrients your plants require.
4. Plants or Seeds (6-10): Select herbs or small plants appropriate for indoor gardening, like basil, mint, lettuce, or succulents.
5. LED Grow Lights (1-2): Vital for ensuring your plants receive adequate light for photosynthesis, especially if you don’t have a sunny window.
6. Mounting Brackets or Hooks (4-6): To secure the wooden pallet or frame to the wall. Choose ones that can support the weight of both frame and plants.
7. Plastic Mesh or Screen: Optional, but great for separating soil from water drainage, preventing clogging.
8. Water-Resistant Paint or Sealant (optional): If you're using wood for your frame, applying a sealant protects it from moisture damage.
9. Fertilizer (1 bag): Organic choice preferred. Regular feeding helps sustain plant growth throughout the year.
10. Small Trowel or Hand Tool: To help with planting and caring for the plants in your vertical garden.
Getting Started
Now that you have gathered all the necessary tools and materials, it’s time to dive into the project. Follow these detailed steps for a successful indoor vertical garden creation:
### 1. Choose and Prepare Your Location
What: The first step in creating your vertical garden is deciding where you want to install it.
How: Look for a spot indoors that receives ample indirect sunlight, or consider using LED grow lights if natural light is insufficient. The vertical garden can be placed on a wall, balcony, or even freestanding against a wall.
Tips: Ensure that there is an accessible power source for your LED lights if you choose to use them. You want this garden to be somewhere that you can easily reach for watering and maintenance.
Safety: When preparing your location, clear out any debris and ensure that the surface you are working on is sturdy enough to hold your vertical garden once it is built.
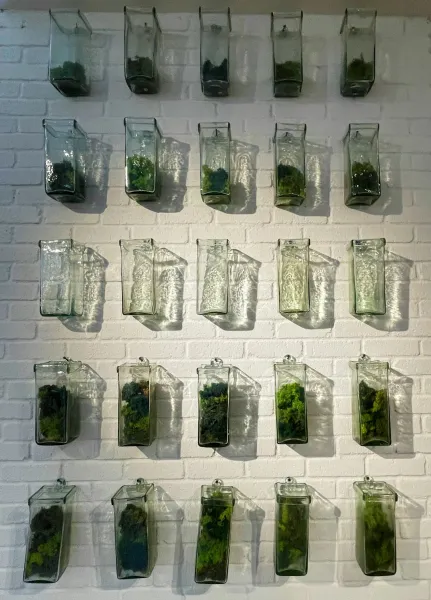
### 2. Prepare the Plastic Bottles
What: The next step is to prepare your plastic bottles to serve as planters.
How: Use your utility knife or scissors to cut the bottles in half or create a vertical slit about two-thirds of the way up. If you want to create multiple planting pockets in a single bottle, you can create smaller sections. Be mindful to cut evenly!
Tips: Sand down the edges of each cut bottle to avoid any sharp edges that could cause injury. It's also a good idea to wash the bottles thoroughly to remove any residual chemicals or sugars.
Safety: Always wear gloves to protect your hands from sharp bottle edges as you cut.
### 3. Drill Drainage Holes
What: To ensure the health of your plants, it’s critical to have proper drainage.
How: Using your drill, make several small drainage holes at the bottom of each bottle. This will allow excess water to escape and prevent root rot.
Tips: Drill holes in a circular pattern to create optimal water drainage. If working with multiple bottles, try stacking them to streamline the process.
Safety: Wear safety goggles and keep fingers clear of the drill’s path while operating.
### 4. Assemble Your Vertical Garden Frame
What: The next step is to assemble the structure that will hold your bottles.
How: If using a wooden pallet, you can skip this step. If you’re creating a custom frame, use wooden boards to build a stable structure that can hold the weight of the filled bottles. Securely attach using screws and brackets.
Tips: Make sure your structure is at least a foot wider than the bottles you will use to accommodate for spacing.
Safety: When using power tools, follow safety guidelines to avoid accidents.
### 5. Secure the Bottles to the Frame
What: Attach the prepared plastic bottles to your frame or pallet.
How: Depending on the design, you can either use wire to hang the bottles or secure them directly to the frame with screws or zip ties. Ensure they are evenly spaced for aesthetics and access.
Tips: Alternate the orientation of the bottles for visual interest, and consider staggering heights for a more dynamic look.
Safety: Double-check that the bottles are secure before adding soil or plants.
### 6. Fill With Potting Soil
What: Now you’ll fill each bottle planter with high-quality potting soil.
How: Using your small trowel, fill each bottle about two-thirds full with potting soil, leaving room for the plant roots.
Tips: Make sure not to overfill to allow for water absorption. Gently pat down the soil to eliminate air pockets, but do not compact it too tightly.
Safety: Handle soil gently to avoid creating dust. If you have allergies, consider wearing a mask.
### 7. Plant Your Seeds or Transplants
What: It’s time to add your selected plants or seeds.
How: For seeds, follow package instructions for planting depth. For transplants, gently remove them from their nursery pots and place them into the soil, covering the root ball carefully.
Tips: Label each plant to keep track and make sure they’re appropriately spaced for growth.
Safety: Be cautious not to damage the roots when planting, as this could hinder their growth.
### 8. Set Up LED Grow Lights
What: If you are using LED grow lights, set them up accordingly.
How: Install the lights above the vertical garden, angling them to ensure that all plants receive adequate light. Follow the manufacturer’s instructions for distance; generally, 12 to 24 inches above the plants is ideal.
Tips: Set a timer for the lights to mimic natural sunlight cycles, generally around 12-16 hours of light per day is sufficient for most plants.
Safety: Ensure that all electrical components are safely secured, and avoid overloading power outlets.
### 9. Water and Maintain Regularly
What: Water your indoor vertical garden, and establish a maintenance routine.
How: Start by gently watering the soil so that it remains consistently moist but not soggy. Depending on the plant types, you will want to check moisture regularly.
Tips: Use a spray bottle for an even and gentle watering method; this also helps to avoid overwatering.
Safety: Monitor the plants regularly for signs of pests or disease, and don’t hesitate to take swift action against any issues.
### 10. Monitor Growth and Adjust
What: Observing growth patterns will help to tailor your care.
How: Take notes on which plants thrive, which may need more or less light, and adjust watering as needed. Prune or harvest as necessary.
Tips: Enjoy the process! Garden design evolves, and adjustments may be required to keep things visually appealing and functional.
Safety: Stay vigilant about any insect infestations or plant diseases to keep your indoor garden healthy.
Troubleshooting
Creating a vertical garden can be rewarding but may come with its set of challenges. Here are some common issues you may encounter along with their solutions:
1. Wilting or Browning Leaves: This can occur from under-watering or over-watering. Solution: Check soil moisture and adjust watering frequency accordingly, ensuring your plants are not waterlogged.
2. Poor Growth: Insufficient light exposure can stifle plant growth. Solution: Ensure your LED grow lights are set up properly and adjust their height as plants grow, ensuring they don’t stretch too much.
3. Pests: Small insects may invade your plants. Solution: Regularly inspect your indoor garden and use an organic insecticide or neem oil to treat infestations quickly.
4. Algae Growth: If you see green sludge on the surface of the soil, it may be due to overwatering or insufficient light. Solution: Reduce watering and improve light exposure, allowing the top layer of soil to dry out between watering sessions.
5. Drainage Issues: If water is pooling at the bottom of the bottles, it could signal that the drainage holes are clogged. Solution: Use a skewer or similar pointed object to clear the holes, and check the drainage regularly to avoid root rot.
Conclusion
In conclusion, creating an indoor vertical garden using repurposed plastic bottles and LED grow lights is a fulfilling and sustainable project that anyone can embark on. You have learned about all the essential tools, materials, and detailed steps to bring your indoor garden to life.
Consider varying your plant choices, incorporating different types of herbs, flowers, or even ornamental plants for visual diversity. The maintenance of your vertical garden can be as simple as watching your plants grow and adjusting care as needed.
So gather your materials, get started on your vertical garden, and enjoy being able to bring a slice of nature into your home!