How to create an indoor vertical garden using repurposed materials and smart irrigation technology
Introduction
In recent years, the concept of indoor gardening has gained remarkable popularity, resonating with a diverse array of individuals, from urban dwellers to seasoned gardeners. One of the most attractive and functional approaches to indoor gardening is the vertical garden, which allows you to cultivate an array of plants in a limited space while simultaneously enhancing the aesthetics of your living environment.
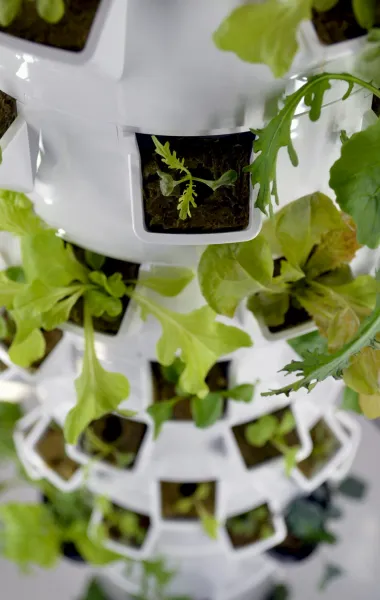
This DIY project not only promotes sustainability—by utilizing repurposed materials—but also integrates smart irrigation technology to ensure your plants are hydrated efficiently. Imagine having a lush green wall packed with herbs, succulents, or flowers, all thriving indoors, irrespective of external weather conditions. Vertical gardens can significantly improve air quality, provide edible plants for cooking, and offer a therapeutic outlet that connects you with nature.
Despite its numerous benefits, many beginners shy away from indoor gardening due to concerns about skill levels, time commitment, or lack of space. The beauty of a DIY vertical garden is that it’s an ideal project for novice gardening enthusiasts, requiring only basic tools and commonly available materials. Not only will this guide break down the project step-by-step, but it will also inspire creativity with the repurposing element, showcasing how you can turn everyday items into functional garden components.
Get ready to embark on a rewarding journey that brings nature into your home! Regardless of your previous experience with plants, this guide will provide comprehensive instructions and support, ensuring you create a flourishing indoor vertical garden filled with vitality and beauty.
Tools Needed
1. Drill: Essential for creating holes in various materials, allowing you to construct your vertical garden efficiently.
2. Screwdriver: Necessary for assembling certain components or securing brackets to support your garden structure.
3. Measuring Tape: Helps in accurately measuring your space and the dimensions of your vertical garden to ensure everything fits perfectly.
4. Level: Ensures that your vertical garden is properly aligned, allowing for an aesthetically pleasing appearance and proper drainage.
5. Scissors or Utility Knife: Useful for cutting repurposed materials, such as plastic bottles or fabric grow bags, to the desired size.
6. Wrench: Necessary for tightening nuts and bolts if using a metal framework or brackets for added support.
7. Watering Can or Hose: While smart irrigation is the focus, having a traditional watering option for initial set-up or manual control can be beneficial.
8. Protective Gear (Gloves, Goggles): Ensure safety when working with tools and materials, particularly when drilling or cutting.
Materials
1. Wood Pallet: 1 (can often be found for free; serves as the base for your vertical garden creating layers for plants).
2. Plastic Bottles or Containers: 8-10 (for holding soil and plants; a great way to repurpose items and save costs).
3. Geotextile Fabric: 1 square yard (to line the back of the pallet, ensuring good drainage while keeping soil in).
4. Soil Mix: 2-3 cubic feet (a lightweight potting mix that supports plant growth and retains moisture).
5. Plants/Seeds: Varieties like herbs (e.g., basil, thyme), succulents, or ornamental flowers (ensure they are suitable for indoor conditions).
6. Irrigation Drip System: 1 (includes tubing and emitters for a customized watering setup).
7. Plastic Sheeting (or tarp): 1 piece (to protect the floor during installation and prevent water damage).
8. Paint or Stain (optional): 1 quart (to give your pallet a personalized look and protection from moisture).
9. Wooden Brackets or Hooks: 4-6 (to securely mount the vertical garden against the wall).
10. Water Timer: 1 (for smart irrigation control, allowing you to automate the watering schedule).
Steps
Step 1: Gather Your Materials and Tools
Before starting your vertical garden, collect all the necessary materials and tools listed above. Begin by assessing your indoor space to determine where the vertical garden will be placed. Ensure this area receives sufficient light, either from natural windows or artificial grow lights. If using repurposed bottles, clean them thoroughly and remove labels, as this will prevent decomposition and promote a cleaner look. Tip: Use gloves when handling sharp objects during material preparation.
Step 2: Preparing the Wood Pallet
Take your wood pallet and decide on the orientation—it can be positioned horizontally or vertically based on your preference. If you desire an aesthetic touch, now’s the time to paint or stain your pallet. Ensure it's suitable for indoor use (i.e., non-toxic paint) and allow it to dry completely. Once dry, place the pallet on a flat surface, and use your measuring tape to ensure it meets your spatial requirements. Tip: Choose a pallet that is in good condition without any cracks or splinters to prevent injury when handling.
Step 3: Create Planting Containers
Using your plastic bottles, cut them in half horizontally or vertically, depending on your design preference. The top half can serve as a watering reservoir, while the bottom can hold soil. Make sure to create drainage holes at the bottom for excess water. If using more rigid containers, drill small holes in the base. You can customize the look by painting or covering these containers with decorative fabric or twine. Tip: Choose containers that fit well within the boundaries of your pallet, ensuring uniformity and aesthetics throughout the garden.
Step 4: Line the Pallet with Geotextile Fabric
Cut a piece of geotextile fabric to fit the back of the pallet. This fabric will act as a barrier that allows water to flow while keeping the soil intact. Secure the fabric to the pallet using a staple gun or strong adhesive. Be sure the fabric is taut to maintain a neat appearance. This step is crucial for preventing soil from falling out of the pallet while allowing excess water to drain. Tip: For added support, consider stapling the fabric in multiple rows for extra stability.
Step 5: Arrange Planting Containers
Based on your design, attach the containers to the front of the pallet. Use strong adhesive or screwdriver with brackets to secure the containers, ensuring they are spaced evenly. You can mix and match containers in various sizes and shapes to add dimension to your vertical garden. This is also the time to secure any hooks needed for mounting the pallet to the wall. Tip: Keep in mind the sun and light needs of your plants when positioning them; taller plants should be at the top and shorter ones at the bottom for easy access.
Step 6: Add Soil and Plant Your Seeds
With the containers attached and secure, it's time to fill them with potting soil, leaving about an inch from the top to prevent overflowing when watering. Gently press the soil down to eliminate air pockets. Now, plant your seeds or seedlings per the specific depth requirements for each variety. Water the soil lightly to settle it without overly soaking it. Tip: Be thoughtful of the plants' growth patterns. Group plants with similar light and water needs to ensure optimal growing conditions.
Step 7: Set Up the Smart Irrigation System
Following the manufacturer’s instructions, set up your irrigation drip system. This system should include a series of tubes running above the containers, with emitters strategically placed to deliver water directly to each planting section. Because this is an indoor setup, you can also consider utilizing a water timer to control watering intervals and duration intelligently. Tip: Test the system to ensure all emitters are functioning correctly and adjust accordingly to prevent underwatering or overwatering.
Step 8: Mount Your Vertical Garden
With everything prepared and set up, it's time to mount the pallet to the wall. Get assistance to hold the pallet while you secure it using brackets or directly into studs for stability. Ensure it's level for an appealing look and efficient water drainage. Always take care to ensure that it is securely fastened to prevent accidents. Tip: If you’re uncertain about drilling, consider using command hooks designed for heavy loads to avoid damaging the wall.
Step 9: Monitor and Adjust
Once the vertical garden is established, spend the initial weeks closely monitoring your plants for signs of dehydration or overwatering. Ensure your smart irrigation system delivers adequate hydration but make necessary adjustments based on your plants’ specific needs, especially as they grow. This step is important to observe how your plants respond and to troubleshoot any emerging issues quickly. Tip: Keep a journal to record watering times, growth rates, and any issues, which could help you make better-informed decisions moving forward.
Step 10: Enjoy and Maintain
Your vertical garden is now complete! Enjoy the beauty and benefits it brings to your space. Regularly check on your plants, trimming dead leaves and monitoring for pests. You may need to refresh the potting soil and nutrients periodically, depending on the plant's growth cycle. It’s essential to maintain a connection with your garden, as this can enhance your appreciation for the entire process. Tip: Rotate your plants occasionally to allow for even sunlight exposure to all sides, promoting healthy growth.
Troubleshooting
1. Over/Underwatering: If plants show signs of wilting or yellow leaves, it may indicate poor watering practices. Adjust your smart irrigation system’s timer or check the moisture levels with a finger test to diagnose the issue.
2. Insects and Pests: If you notice insects, consider using natural deterrents like neem oil. Regularly inspecting your plants can help you catch infestations early before they become serious.
3. Poor Growth: If plants seem stunted, this may indicate insufficient light or nutrients. Ensure your plants receive adequate light and consider adding liquid fertilizers to nourish them.
4. Soil Erosion: If soil begins to escape from containers, check the integrity of your geotextile fabric and ensure your containers have proper drainage. You can add more fabric or adjust soil levels to fix the issue.
5. Structural Instability: If the pallet appears to lean or shift, double-check the mounting hardware and reinforcing brackets. Ensure it’s anchored to solid studs in the wall, or consider re-locating the garden to a different area.
Conclusion
Creating an indoor vertical garden using repurposed materials and smart irrigation technology is not only a rewarding DIY project but also an excellent way to contribute to sustainability while reaping rewards in mental and physical health benefits. You can experiment with various plant combinations or even adapt the design to suit unique home decor styles.
Keeping an open mind and allowing for creativity in your gardening journey can lead to endless variations, including skinning your pallet garden with vibrant colors or using different containers as they become available.
Regular maintenance, observation, and occasional adjustments to your irrigation system will go a long way in ensuring your indoor vertical garden thrives long term, becoming a valuable and enjoyable part of your home.