How to create a vertical herb garden using repurposed pallets and plastic bottles
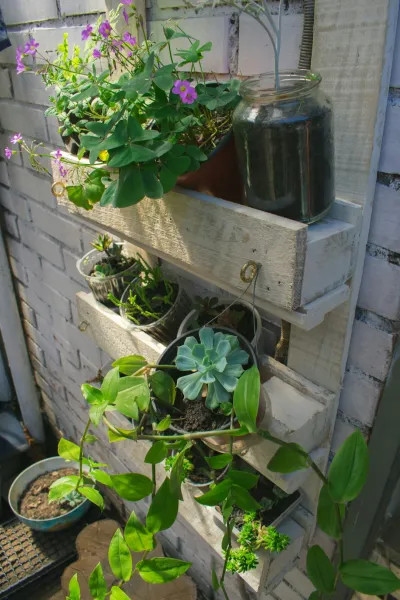
Creating your own vertical herb garden can be a rewarding experience, especially when you can repurpose materials you might otherwise discard. Utilizing old pallets and plastic bottles not only promotes sustainability but also allows you to craft a beautiful and functional garden that can fit into any space—be it a small patio, balcony, or even a sunny corner of your kitchen.
Why This Project?
In recent years, the trend of urban gardening has exploded. Many people are becoming more interested in cultivating their own herbs to enjoy fresh flavors in their cooking, save money at the grocery store, and create an inviting atmosphere in their homes. On top of that, gardening is an enriching activity that fosters mindfulness and relaxation, putting you in touch with nature.
However, not everyone has the luxury of outdoor space. This is where vertical gardening comes in, making it ideal for those with limited horizontal area. By repurposing pallets and plastic bottles, you can not only reclaim waste but also create a stunning garden display that adds character to your living space.
From novice gardeners to seasoned green thumbs, anyone can embark on this DIY project to transform a small area into a lush herb sanctuary. The skill level for this project is beginner-friendly, making it an excellent opportunity to flex your creative muscles and learn. While the project may require some physical effort, it is straightforward with the right guidance.
Tools Needed
1. Hammer: Essential for securing the pallet together and tapping nails into wood. Look for a sturdy hammer that is comfortable to hold.
2. Saw (handsaw or power saw): Required for cutting the pallet down to size and adjusting the heights of the plastic bottles if necessary.
3. Drill with drill bits: Useful for creating holes in the plastic bottles and pallet for drainage. Choose a drill that is easy to operate.
4. Sandpaper or sander: Necessary for smoothing rough edges on the pallet and plastic bottles to prevent injuries and enhance aesthetics.
5. Rope or twine: Ideal for securing the vertical structure to an anchor point to prevent tipping. Choose a durable material suited for outdoor use.
6. Measuring tape: Ensures that your measurements are precise, making for a more functional and visually appealing design.
7. Gardening gloves: Protect your hands when working with wood, soil, and plants. Opt for a pair that allows grip while ensuring comfort.
8. Paintbrush or roller and non-toxic wood sealer or paint (optional): If you wish to add a protective finish to the pallet or personalize its look, these items will come in handy.
Materials
1. Wooden pallet (1) – Look for one that is intact and free from chemical treatments.
2. Plastic bottles (10+) – Use a variety of sizes to accommodate different herb types.
3. Soil mix (1 bag, 2 cubic feet) – A lightweight, well-draining potting mix is ideal for herbs.
4. Herb plants or seeds (5-10) – Choose your favorites like basil, cilantro, parsley, or mint.
5. Drainage rocks (1 bag, 1-2 pounds) – Prevents water logging and helps with drainage in your bottles.
6. Nails or screws (small box) – For securing the pallet and attaching bottles.
7. Plastic tubing (3-5 feet) (optional) – For irrigation if you want to automate watering.
8. Hanging hooks or brackets (2-3) – To mount your vertical garden to the wall, if needed.
Step-by-Step Guide
# ### Step 1: Acquire Your Pallet & Plastic Bottles
What: The first step is to gather your materials. You need a solid, sturdy pallet that's free from cracks, splinters, and any toxic chemicals. Plastic bottles are your next priority; aim for a mix of sizes like 1-liter soda bottles or larger 2-liter bottles.
How: Visit hardware stores, supermarkets, or online marketplaces to find pallets. Check local grocery stores for discarded plastic bottles. Always opt for clean bottles, and if you’re repurposing items from home, be sure they are free of residues.
Tips: Make sure the pallet is in good condition—avoid any signs of mold or rot. For bottles, it might be best to wash and sanitize them before use.
Safety: When handling pallets, be cautious of sharp nails or splintered wood. Never use pallets marked with the HT symbol, as they are heat-treated and may have harmful chemicals.
# ### Step 2: Preparing the Pallet
What: Next, prepare the pallet for planting. You'll want to make it suitable for growing herbs and may need to adjust its height depending on where you’ll place it.
How: If your pallet is too tall, measure and cut it down to your desired height. Use sandpaper to smooth edges after cutting. If your pallet is stable and in good condition, you might leave it as is.
Tips: It's beneficial to paint the pallet with a non-toxic wood sealer to protect it from moisture if it will be indoors or has a chance of being exposed to the elements.
Safety: If using power tools, follow the instructions carefully and wear safety glasses. Regular gloves will protect against splinters.
# ### Step 3: Prepare the Plastic Bottles
What: Now focus on the plastic bottles, which will serve as your planting pots. You need to prepare them for planting herbs effectively.
How: Begin by cutting the bottles in half or cutting a hole in the side where the plants will emerge. Drill drainage holes at the bottom so water can escape. If using tape or glue, ensure it’s non-toxic.
Tips: If you plan to hang them, leave the top portions intact to hold more soil, but ensure drainage holes are plentiful. Using various sizes can accommodate different herbs or spacing.
Safety: Carefully handle sharp edges from the cut bottles to avoid cuts. Wearing gloves can help mitigate this risk.
# ### Step 4: Attach Bottles to the Pallet
What: Now comes the creative part—attaching the bottles to the pallet.
How: Using nails or screws, secure the prepared plastic bottles sideways onto the pallet so that the openings face outward. Space them evenly for aesthetic appeal and ensure stability.
Tips: Make sure the bottles aren't too heavy, or they may topple off. Consider placing heavier bottles at the bottom of the pallet.
Safety: Be cautious with the tools you use, ensuring that you hold bottles firmly while securing them to avoid injury.
# ### Step 5: Add Drainage Rocks
What: Before adding soil, place drainage rocks at the bottom of each bottle.
How: Pour about an inch of drainage rocks into the bottom of each bottle to prevent waterlogging, which can lead to root rot.
Tips: Using some moss or fabric over the rocks can help keep the soil from washing down while still allowing water to drain.
Safety: Use gloves to avoid sharp edges from broken rocks.
# ### Step 6: Fill Bottles with Soil Mix
What: Now it's time to fill the bottles with potting soil.
How: Use your soil mix to fill each bottle, leaving a small gap at the top. Ensure the soil is packed lightly but not too tightly—loosely packed soil allows for better drainage and air circulation.
Tips: Before planting your herbs, water the soil slightly to help pack it down and reduce any air pockets.
Safety: Wear a mask if you're sensitive to dust when handling dry potting soil.
# ### Step 7: Plant Your Herbs
What: The fun part—planting!
How: Gently place your herbs or seeds into the soil, making sure not to bury them too deep. If you're using seedlings, dig a small hole in the soil to accommodate the roots.
Tips: Water your herbs immediately after planting them to help them settle in. Choose herbs according to their sun and water needs; some may require more sun than others.
Safety: Handle plants carefully to avoid damaging delicate stems and leaves during planting.
# ### Step 8: Watering and Maintenance
What: After planting, focus on how you will maintain your herb garden.
How: Keep the garden in a location that receives ample sunlight—a west or south-facing wall is ideal. Avoid overwatering; check the soil moisture regularly.
Tips: Use a plastic tubing system if you want to automate watering. Alternatively, make sure to water your herbs consistently without letting them dry out completely.
Safety: If working with a watering can or hose, ensure the area remains dry to prevent slipping.
# ### Step 9: Secure the Pallet
What: Make sure your vertical garden is secure and stable.
How: Attach the pallet to a wall or use heavy-duty hanging hooks to prevent it from tipping over once filled with soil and plants.
Tips: If your garden is freestanding, consider weighing down the base or leaning it against a stable surface to enhance stability.
Safety: Ensure that any mounting hardware is correctly installed, using the appropriate tools to avoid injuries.
# ### Step 10: Monitor and Harvest
What: Your vertical herb garden is now ready to be nurtured and harvested!
How: Start monitoring your herbs. Regularly prune, and be sure to harvest them when they’re at their peak flavor. This encourages growth and prevents them from becoming leggy.
Tips: Play with companion planting; different herbs can enhance each other’s growth. Make sure to learn about each herb's specific needs for light and water.
Safety: Use sharp scissors or shears for harvesting, and store them safely away after each use.
Troubleshooting
Creating a vertical herb garden with repurposed materials can present several issues. Here are five common problems you may encounter and their solutions:
1. Waterlogging: If your herbs show signs of wilting or yellowing leaves, this may be an indication that your soil is too wet.
- Fix: Ensure that you have adequate drainage holes in your bottles. You may also want to remove excess soil or rocks to increase drainage.
- Fix: Rotate your vertical garden frequently to give all sides access to sunlight, or move it to a sunnier part of your home.
- Fix: Regularly inspect for aphids, spider mites, or whiteflies. Use organic insecticidal soap as a natural remedy if necessary.
- Fix: Assess watering habits; adjust accordingly. Make sure the roots have enough space and air circulation.
- Fix: Consider moving your vertical garden to a sunnier spot or supplementing with grow lights if indoors.
Conclusion
Creating a vertical herb garden using repurposed pallets and plastic bottles is an eco-friendly and rewarding project that adds character and freshness to your home. From the preparation of materials to the excitement of planting and maintenance, you have taken a significant step towards sustainability and self-sufficiency.
Feel free to play with the design by using different sizes and arranging the bottles artistically. You might even consider adding a watering system for convenience or expand to other plants as your experience grows.
Ultimately, maintaining your vertical herb garden will require periodic care, such as pruning, watering, and observing for pests, but the payoff of fresh herbs at your fingertips is well worth the effort. Happy gardening and let your green thumb flourish!