How to create a minimalist indoor vertical garden using repurposed plastic bottles
Introduction
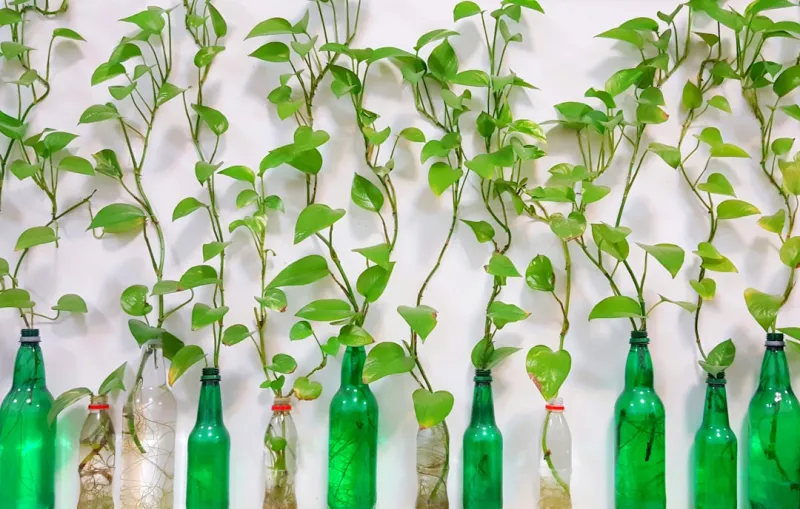
Creating a minimalist indoor vertical garden using repurposed plastic bottles is not just an eco-friendly hobby; it's also an opportunity to incorporate nature into your home. With rising urbanization, many of us find ourselves living in tighter spaces with limited access to green areas. A vertical garden can significantly brighten up your living space, improve air quality, and provide a calming aesthetic amid the bustling environment. Furthermore, using plastic bottles helps reduce waste, giving new life to materials that would otherwise end up in landfills.
This project is not only enjoyable but also accessible to beginners. You do not need a green thumb or extensive gardening experience to transform a few old bottles into a thriving vertical garden. The act of creating something beautiful from what you may consider garbage fosters creativity, sustainability, and a connection to nature that can be immensely rewarding.
In this guide, you'll learn about the tools and materials you'll need, step-by-step instructions to create your vertical garden, and troubleshooting tips to ensure your gardening experience is enjoyable and successful. This project is rated beginner-level, making it easy for anyone to dive in and emerge with a stunning piece that showcases your commitment to recycling and sustainability!
Tools Needed
1. Scissors: Essential for cutting the plastic bottles to the desired height and shape. Opt for sturdy scissors that can handle thick plastic without damaging the edges.
2. Drill (or a heated screwdriver): This tool allows you to create drainage holes at the bottom of each bottle, which is crucial for preventing overwatering and promoting healthy plant growth.
3. Ruler or Measuring Tape: A ruler helps you measure the precise dimensions for cutting the bottles and spacing the bottles in your vertical garden design. Consistency in measurement results in a structured look.
4. Permanent Marker: Use this to mark your cutting lines and hole placements on the bottles, ensuring accuracy during the cutting and drilling process.
5. Spooning Tool: If you plan to fill your bottles with soil, a small hand trowel or spoon makes transferring soil into the bottles easier and prevents unnecessary mess.
6. Screwdriver: You may need a screwdriver to attach the vertical garden frame to the wall or to place screws into your hanging setup.
7. Sandpaper (optional): If you find any sharp edges after cutting the bottles, sandpaper can smooth them out for safety, ensuring no cuts while handling the bottles.
8. String or Rope: If you plan on hanging the vertical garden instead of mounting it on a wall, string or rope can be very handy for securing the bottles.
Materials
1. Plastic Bottles (8-10): Any size will work, but a variety of sizes can add interest. Aim for bottles like 1-liter soda bottles or larger if you want to plant bigger plants.
2. Potting Soil (2 bags, 2 cubic feet): A standard-quality potting mix will provide your plants with the nutrients they need to thrive.
3. Small Plants or Seeds (10-12): Choose low-maintenance and indoor-friendly plants like herbs (basil, mint), succulents, or small flowering plants.
4. Metal or Plastic Mesh (1 sq. meter): This will prevent soil from falling out of the drainage holes while still allowing water to seep through.
5. Watering Can or Spray Bottle: Essential for gently watering your plants without causing a mess.
6. Wall Hooks or Brackets (2-4): If you're mounting your garden on a wall, these brackets provide a sturdy support system for your bottles.
7. Cardboard or Wooden Base (optional): If you want a freestanding vertical garden, a stable base will provide the necessary support.
8. Fertilizer (small container, optional): Suitable for your plants to ensure they get the right nutrients throughout their growing phases.
Step-by-Step Instructions
Step 1: Prepare Your Bottles
Before you begin assembling your vertical garden, thoroughly clean your plastic bottles to remove any residues from their previous contents.
- Rinse them with water and soap, then dry them completely. This prevents algae growth and unwanted odors from developing in your garden.
- Using the permanent marker, mark where you want to cut the bottles. Generally, cutting the bottles in half allows for plenty of soil and plant space, but feel free to customize based on your design.
Step 2: Cut the Bottles
Using your scissors, cut along the marked lines.
- Ensure you are making straight cuts for a clean look. If needed, use a cutting board or a protective surface while slicing to prevent accidental damage to furniture.
- If you notice any sharp edges once you’ve finished cutting, take sandpaper and smooth them out to ensure no injuries occur while handling the bottles.
Step 3: Create Drainage Holes
To promote healthy plant growth, it’s essential to create drainage holes at the bottom of each cut bottle.
- Use a drill or a heated screwdriver to penetrate the bottom of the bottles. Aim for several small holes rather than one large hole to avoid a quick drainage issue that can lead to water pooling.
Step 4: Prepare the Hanging Framework
If you’re mounting your vertical garden on a wall, create a framework to hold the bottles.
- You can use a simple wooden board or a metal framework, arranging it in a grid shape to attach your bottles securely later. However, this is optional if your plan is to just hang the bottles directly onto the wall.
- Attach hooks or brackets for a clean finish. If you’re hanging the bottles, ensure they are evenly spaced for a cohesive look.
Step 5: Setting Up the Mesh
To prevent soil from falling through the drainage holes, cut your metal or plastic mesh into small squares.
- Place the mesh at the bottom of each bottle after cutting and creating drainage holes. This will keep the soil contained while allowing water to escape easily. Secure it with a bit of soil if necessary.
Step 6: Fill the Bottles with Potting Soil
Now it's time to fill your bottles with potting soil.
- Using your spoon or trowel, carefully spoon the potting mix into each bottle, filling them about 2/3 of the way full.
- Be sure to pack the soil lightly to reduce settling later. Leave enough space at the top—at least a couple of inches—to allow for added plants or seeds.
Step 7: Planting
Select your choice of plants or seeds and begin the planting process.
- If you’re planting small plants, remove them gently from their nursery pots and place them in the soil of the bottles, ensuring the roots are well-covered.
- If using seeds, sprinkle them on top and cover them with a thin layer of soil. Remember to check the specific depth requirements for the seeds you use.
Step 8: Watering Your Garden
Once your plants are in place, it’s essential to give them their first drink.
- Use a watering can or a spray bottle for gentle watering. Water until you see it begin to drain from the holes at the bottom—this indicates that the soil is adequately moistened.
- Be careful not to overwater, as excessive moisture can lead to root rot.
Step 9: Mounting Your Vertical Garden
It’s time to secure your vertical garden in its intended place.
- Gently attach your cut bottles to the wall or your horizontal frame, ensuring each bottle is stable and will not fall. If you are using hooks, simply slide the bottles on.
- Check for structural integrity to ensure they can withstand the weight of the soil and plants over time.
Step 10: Maintenance and Care
Now that your vertical garden is complete, regular care is essential.
- Be sure to monitor your plants for water needs, checking the moisture of the soil weekly. Too much or too little water can cause issues, so finding that balance is key.
- Prune dead leaves and keep an eye out for pests. A clean garden is a happy garden!
Troubleshooting
Common Issues and Fixes
1. Root Rot:
- Symptoms: Dark, mushy roots or yellowing leaves.
- Solution: Ensure that there is adequate drainage. If you see root rot forming, it may be best to remove affected plants and let the soil dry out completely before replanting.
- Symptoms: Yellow leaves, moisture sitting at the bottom of bottles.
- Solution: Allow the soil to dry more between watering sessions. Consider using less soil or drilling more drainage holes.
- Symptoms: Leggy plants leaning towards light sources.
- Solution: Move your vertical garden closer to a window or invest in grow lights to ensure your plants receive adequate light.
- Symptoms: Stunted growth and discoloration.
- Solution: Fertilize the plants every few weeks during the growing season or refresh the potting soil to ensure plenty of nutrients are available.
- Symptoms: Holes in leaves or webs around plants.
- Solution: Identify the pest and treat accordingly, either with natural remedies like neem oil or insecticidal soap. Regularly inspect your plants to catch infestations early.
Conclusion
Creating a minimalist indoor vertical garden from repurposed plastic bottles is not only a satisfying DIY project but also a chance to beautify your living space while contributing to sustainability efforts. With the right preparation, tools, and materials, transforming those old containers into vibrant green accents can be a fulfilling endeavor for anyone, especially beginners.
Feel free to adapt your garden as you learn what works best for your specific plants and living environment. You might even find creative ways to incorporate other materials, such as old wooden pallets or crates, into your vertical garden design. Maintenance is straightforward, keeping an eye on water levels and plant health is simple, allowing you to enjoy your green space with minimal effort.
As you gain experience, think about expanding your garden with herbs for cooking or flowers to attract pollinators. Each step you take in gardening allows you to appreciate the process of growth—both in your plants and yourself!