Introduction
Garden Wall Using Repurposed Plastic Bottles And A Drip Irrigation System
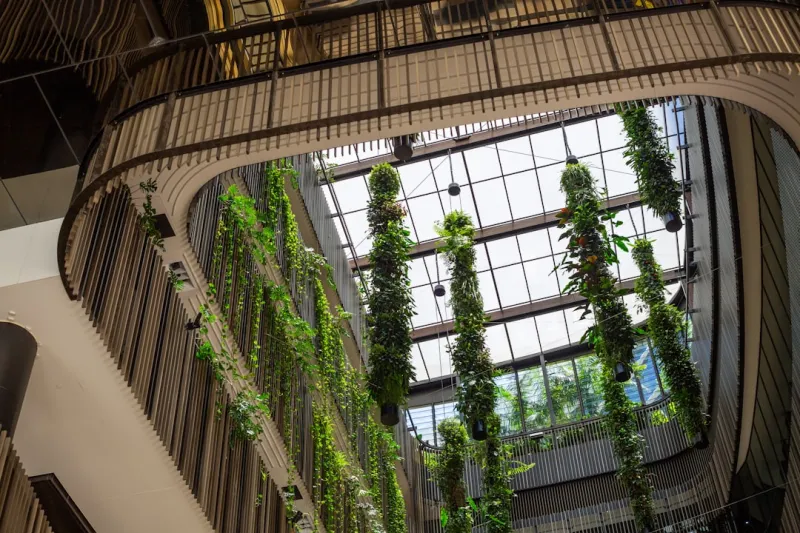
Garden Wall Using Repurposed Plastic Bottles And A Drip Irrigation Systembody.navh1.rating.hero-img.share.btn Garden Wall Using Repurposed Plastic Bottles And A Drip Irrigation SystemIn today’s urban landscapes, space can often be a constraint when it comes to gardening. However, the desire for greener living spaces is on the rise, pushing many to seek innovative solutions. One such solution is creating a vertical garden wall using repurposed plastic bottles. This not only maximizes space but also contributes to environmental sustainability by giving second life to
materials
that would otherwise end up in landfills.The benefits of creating a vertical garden are manifold. First, it can enhance air quality as plants absorb carbon dioxide and release oxygen. Second, it beautifies urban spaces by adding a burst of greenery, often referred to as a “green wall.” Furthermore, vertical gardens can help insulate buildings, reducing energy costs. They also create an ideal growing condition for herbs, vegetables, and ornamental plants, as the wall’s height can catch natural rainwater and sunlight.This is not just for experienced gardeners—it's Beginner-friendly, requiring minimal skills and can be accomplished as a solo endeavor or a fun family activity. Through this guide, you’ll not only learn how to construct a vertical garden wall with plastic bottles but also integrate a drip irrigation system that ensures your plants receive consistent water. Dive into this enriching experience and enjoy the lush greenery that comes with your own vertical garden!
Tools Needed
Scissors/Utility
- Knife: For cutting the plastic bottles to the desired size for planting.Drill with a drill bit: Needed to make holes for drainage and for attaching the bottles to a supporting structure.Screwdriver: To assemble the gardening frame and attach any brackets.Measuring
- Tape: Essential for accurate measurements of the space and alignment of bottles.Gardening
- Gloves: protect your hands while working with tools and soil.Bucket: For mixing soil and collecting any wastage.Wire or
- Twine: To help secure the bottles if you’re creating a hanging design.Watering
- Can: For initial watering and filling the irrigation system until it’s set up.
Materials
- Plastic Bottles: 10-20 bottles (depending on your design and space available).Wire
- Mesh or Wooden Pallet: 1 piece (for the structure to hold the bottles).Potting
- Soil: 3-4 bags (ensure used soil is appropriate for container gardening).Plants or
- Seeds: 12-15 plants/seed packets (choose herbs or succulents based on your preference).Drip
- Irrigation Kit: 1 complete kit (includes tubing and drip emitters).Water
- Reservoir Tank: 1 unit (for central water storage in the drip system).Nails or
- Screws: 20-30 pieces (for attaching the bottles to the wooden or mesh structure).Plant
- Fertilizer: 1-2 bags (for encouraging plant growth).
Step 1:
Prepare the Plastic BottlesBegin by collecting your plastic bottles. Rinse them thoroughly to remove any residues. Use your scissors or utility knife to cut the bottles in half. You can choose to cut the top off or create a “window” on the lower half, which allows you to see the soil levels more easily.
Tip: Make sure to keep the caps on, as they can help retain moisture inside the bottles.You can make drainage holes in the bottom by drilling with a small drill bit. This is crucial; without drainage, your plants could rot from water accumulation.
Step 2:
Create Your StructureSelect a wall or a sturdy piece of furniture (like a wooden pallet) to mount or lean your vertical garden against. Ensure it has adequate support, especially if you live in a windy area.Measure and mark where each bottle will be placed. If attached to a wall, consider vertical spacing, keeping in mind that taller plants may need more height.Safety
Tip: If using a drill, be cautious around any electrical or plumbing lines, and wear protective eyewear.
Step 3:
Assemble the FrameUse screws or nails to fasten a wire mesh or wooden palettes securely to your chosen structure. If you’re using a wooden pallet, you might find Preng spaces interwoven that can hold the bottles tightly.
Tip: If you plan to continue watering manually for a while, consider placing a tray underneath to collect any excess water.
Step 4:
Secure the BottlesNext, attach the bottom halves of your plastic bottles to the structure, ensuring they’re securely fastened. You can use wire or twine to help tie them in place if necessary. Be creative—perhaps arrange them in an artistic pattern, alternating heights to create visual interest.
Tip: Ensure that the drainage holes are positioned to allow water to flow down into the accumulation space or the lower bottles.
Step 5:
Prepare Soil and Fill BottlesMix potting soil and any fertilizers you intend to use in a bucket. Fill the bottles halfway (leaving some space for roots), but avoid compacting the soil too tightly. Then, insert the plants or seeds based on your gardening goals.If using seeds, follow the package instructions on planting depth. When placing plants, try to pair small plants with larger ones for visual depth.
Step 6:
Install the Drip Irrigation SystemFollow the instructions provided with your drip irrigation kit. Generally, the layout will include a main water supply line that connects to your reservoir tank.Ensure that the tubing runs to each bottle or cluster of bottles. Use drip emitters at each bottle location to deliver water directly to the roots.
Tip: Test your irrigation by filling the reservoir and running the system for a few minutes to check for even water distribution.
Step 7:
Connect Water ReservoirPosition your water reservoir tank higher than your vertical structure to ensure gravity can help in the water flow. This setup will provide optimal efficiency for your drip system. Attach the water supply line, and fill the tank with water.Safety
Tip: Ensure all connections are tight to avoid leaks, which could cause problems down the line.
Step 8:
Initial Watering and MaintenanceAfter assembling your vertical garden and installing the irrigation system, it’s essential to provide some initial water to settle the soil around the roots. Use a watering can to moisten the soil before fully relying on the drip system.
Tip: Monitor the plants periodically for first signs of moisture. Adjust the drip system’s timing and flow as needed.
2026 •