Introduction
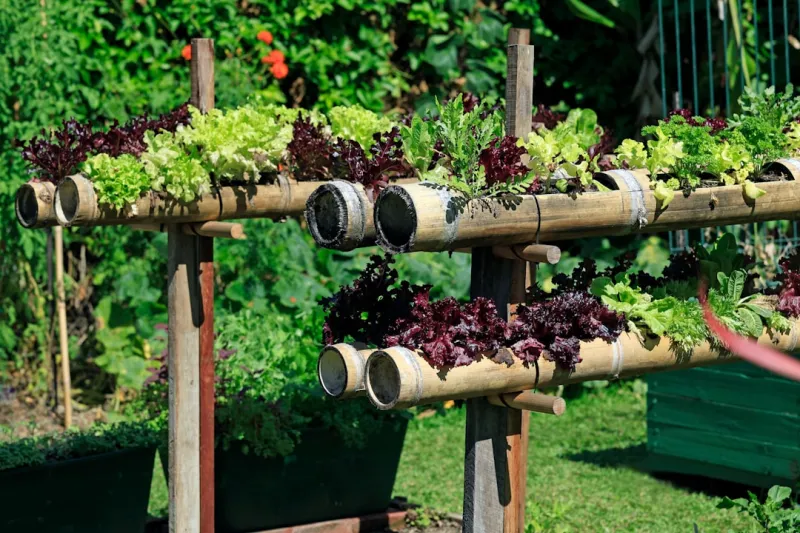
Garden Using Reclaimed Pallets And Hydroponic Systems
lies in its ability to enhance aesthetics and functionality. Reclaimed pallets offer a sturdy and rustic structure for a dynamic vertical garden, while hydroponic systems efficiently deliver nutrients to plants without the need for traditional soil. This combination allows for fast growth and easy maintenance.This is suitable for beginners, as it involves straightforward techniques and accessible
materials
You don’t need to be a gardening expert to succeed; all you need is patience, creativity, and a willingness to learn. Vertical gardens can thrive in sunny spots, and with hydroponics, many plants can flourish all year round. With so many benefits, including improved air quality, aesthetic appeal, and fresh duce at your fingertips, there has never been a better time to embark on your vertical gardening journey!
Tools Needed
Saw (Hand or Power)You'll need a saw to cut the pallet to the desired size, ensuring that it fits your space and needs.Sandpaper or SanderTo avoid splinters and to prep the wood, smooth down rough edges with sandpaper or a power sander.Drill and Drill BitsEssential for making holes for the hydroponic system and securing any additional structures like planting pockets.ScrewdriverUsed to secure parts of the pallet or hardware that may need tightening.Staple GunIdeal for fastening landscaping fabric to the pallet, helping retain water and soil while allowing drainage.Measuring TapeEnsures accurate measurements when cutting and assembling your vertical garden.LevelA level is vital for checking the evenness of your construct, ensuring your garden stays upright and looks professional.protective Gear (Gloves, Safety Goggles, Mask)Always wear protective gear when crafting and handling
materials
to ensure safety.
Materials
Reclaimed Pallet (1-2)Sourced from local stores or yards, usually free or inexpensive.Landscaping Fabric (1-2 yards)Keeps soil in while allowing drainage, assisting with any hydroponic medium you might use.Hydroponic System Kit (1)Includes nutrient solutions, water pumps, and tubing. Look for a kit suitable for vertical setups.Potting Soil or Hydroponic Medium (1-2 bags, depending on size)Choose between traditional potting mix or hydroponic media like clay pellets.PVC Pipe or Plastic Bottles (3-5, depending on your design)For creating the water delivery system in your vertical garden.Nutrient Solution (1 bottle)Specifically designed for hydroponics, providing essential nutrients to your plants.Bungee Cords or Twine (2-3 yards)Used for securing plants to the pallet during growth or for additional support.Plants or Seeds (various, depending on preference)Choose easy-to-grow Hydroponicly plants like herbs (basil, mint), leafy greens (lettuce, spinach), or strawberries.Wooden or Plastic Planters (as needed)Optional for additional planting space or to enhance aesthetics.Water Reservoir (1)For the hydroponic system’s water supply, can be a bucket or storage container.
Step 1:
Choose
- Your Location
What: Selecting the perfect spot for your vertical garden is crucial.
How: Ideally, look for an area that gets 6-8 hours of sunlight daily and is sheltered from harsh winds. Check for accessibility too; you’ll need to water and tend to your plants regularly.
Tips: Observe your space throughout the day to see how much light it gets. If you have limited sunlight, consider plants that thrive in shade or use grow lights.
Safety: Always check for overhead power lines or any hazards that could obstruct your garden.
Step 2:
Prepare
- Your Pallet
What: prepping your pallet involves cleaning and making any necessary adjustments.
How: Inspect the pallet for structural integrity. Remove any loose or broken boards, nails, or screws. Sand down all surfaces to eliminate splinters, focusing on the edges.
Tips: If your pallet has been treated with chemicals, look for HEatd pallets instead, which are safer for growing food.
Safety: Wear gloves while handling pallets, as splinters can lead to injuries.
Step 3:
Attach
- Landscaping Fabric
What: This fabric acts as a protective barrier between the soil and the wood, preventing rot and assisting with drainage.
How: Cut the landscaping fabric so that it covers the back and bottom of the pallet. Use a staple gun to secure the fabric evenly in place, making sure there are no gaps where soil can fall through.
Tips: Consider folding a few layers of fabric over particularly weak spots for extra durability.
Safety: Ensure your staple gun is used in a safe and controlled manner to avoid accidental injuries.
Step 4:
Construct
- Hydroponic System
What: Set up your hydroponic system to nourish your plants efficiently.
How: If using PVC pipes, create openings for the plants at regular intervals along the pipes. Connect the pipes to the water reservoir, ensuring the pump is positioned to circulate water and nutrients through the system effectively.
Tips: Use a timer for the pump to automate watering schedules for ease of use. Research how much water your plants will need to avoid over- or Underng.
Safety: Always follow the manufacturer's instructions when connecting electrical components, and ensure all cables and connections are secured and dry.
Step 5:
Fill with
- Soil or Hydroponic Medium
What: Depending on your method, filling the planter spaces with either soil or a hydroponic medium is key for plant growth.
How: If using soil, fill the planting pockets or containers, ensuring they're loosely packed to allow for drainage. If hydroponic, place the medium according to your system's specifications before planting.
Tips: Layering your medium can mote better drainage; use larger particles at the bottom and smaller ones on top.
Safety: If using potting soil, consider using a dust mask to avoid inhaling any fine particles.
Step 6:
Select and
- Plant Your Crops
What: Now it’s time to choose your plants based on your preferences and local climate.
How: For hydroponic systems, choose seeds or seedlings that are Well to hydroponic growth. Create small openings in your medium for seedlings or drop seeds directly into the soil.
Tips: Refer to each plant’s growth requirements, ensuring they are compatible with your chosen hydroponic system. Space them appropriately, allowing growth room.
Safety: Handle seedlings gently to avoid damaging fragile roots.
Step 7:
- Up the Water and Nutrient Delivery System
What: This step involves ensuring your plants receive adequate hydration and nutrients.
How: Adjust the water level in your reservoir to meet the needs of your plants. Dilute your nutrient solution according to packaging recommendations and pour it into the reservoir.
Tips: Use a pH testing kit to monitor the acidity of your water. Certain plants may have specific pH requirements for optimal growth.
Safety: Keep electrical components away from water; ensure all connections are waterof to prevent shorts.
Step 8:
Maintenance and
- Care
What: Routine maintenance is crucial for a thriving vertical garden.
How: Check the water level regularly and replace the nutrient solution as needed. Monitor plant health, looking for pests or diseases. Prune excess growth to encourage strong branches and keep plants healthy.
Tips: Use organic insecticides if issues arise, and consider rotating crops seasonally to maintain soil health.
Safety: Be careful while handling plants and any insecticides. Always read labels for safety information.
Step 9:
Regular
- Monitoring and Adjustment
What: Observing your garden will help you make tactical adjustments for optimal growth.
How: Spend a few minutes each day watching for signs of distress in your plants, such as wilting or discoloration. Adjust lighting and nutrient levels accordingly, and prune dead leaves to keep plants healthy.
Tips: Keep a gardening journal to track what works and doesn’t, allowing for adjustments in future plantings.
Safety: Avoid handling unfamiliar chemicals without proper knowledge of their potential side effects.
Step 10:
Harvesting
- Your duce
What: Reap the rewards of your hard work with a successful harvest!
How: Depending on the plants, harvest when they reach full maturity. Use clean scissors or pruners to cut the duce, handling them carefully to avoid damaging the plants.
Tips: For herbs, regular harvesting can encourage further growth, while for vegetables, aim to harvest in their prime for the best flavor.
Safety: Ensure tools are properly cleaned to avoid contamination of your plants.
2026 •