Introduction
Garden Using Repurposed Plastic Containers And Natural Rope
5 (107)
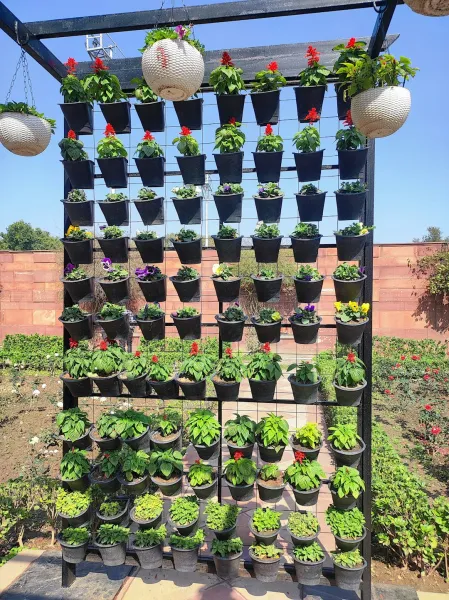
Garden Using Repurposed Plastic Containers And Natural Ropebody.navh1.rating.hero-img.share.btn Garden Using Repurposed Plastic Containers And Natural RopeCreating a vertical garden using repurposed plastic containers and natural rope is not just an eco-friendly DIY ; it is a creative approach to gardening that can elevate your living space, especially if you’re limited on horizontal room. With more people opting for urban living in smaller homes or apartments, utilizing vertical space has become essential for any gardening enthusiast. Not only does a vertical garden maximize your growing area, but it also adds aesthetic appeal and an element of nature to your surroundings.Why choose plastic containers? They are readily available, often free, and can be found in various shapes and sizes. The use of natural rope allows for a rustic charm while providing sturdy support for your plants. The benefits of such a go beyond mere decor; studies suggest that gardening can help reduce stress and improve mood, and having fresh herbs or flowers at your fingertips can enhance your cooking and living environment.This is perfect for beginners. With minimal experience, you can create a beautiful, functional garden that breathes life into your indoor or outdoor space. It’s a low-cost, High endeavor that provides both satisfaction and comfort. If you’re looking to dive into gardening without needing a green thumb, this vertical garden is the perfect fit.Step-by-Step Guide
Step 1:
Gather Your
Materials
and ToolsBefore you begin, ensure you have all your tools and
materials
ready. Take some time to sort through your repurposed plastic containers. Clean them thoroughly to remove any labels, residues, and chemicals, and check for any cracks or holes. Having all your
materials
organized will set you up for success.
Tip: Keep the containers of various sizes to create depth in your garden. Designate a clean space to work—this will make the process smoother and ensure you remain safe while using tools.
Step 2:
Prepare Your Plastic ContainersOnce the containers are clean, it’s time to prepare them for planting. If they don’t have drainage holes, use your drill to create several at the bottom of each container. This step is crucial to prevent Overng and ensure your plants thrive.
Tip: For larger containers, drill 4-5 holes spaced evenly. For smaller ones, 2-3 should suffice. Also, be cautious with your hands when drilling—ensure you have a stable grip and that the container is secured to avoid slips.
Step 3:
Cut the Natural RopeMeasure out the lengths of natural rope that you’ll need to suspend your containers vertically. This length should account for the height of your vertical garden and some extra to allow for tying knots. Using your utility knife or scissors, cut the rope to the desired lengths for each container.
Tip: An additional foot or two can make it easier to tie knots later. If you want to add multiple rows of containers, cut longer pieces accordingly.
Step 4:
Assemble the Rope StructureNow it's time to set up your vertical structure. Decide where you’ll hang your garden—this could be from a wall, fence, or even a sturdy frame. Use anchors or hooks that can support weight. Tie the cut lengths of rope to these anchors, leaving enough space between them for your containers.
Tip: Use a level tool during this step to ensure the ropes stay straight. This is crucial to avoid an uneven look and to maintain stability throughout the growth of your plants.
Step 5:
Attach the Containers to the RopeBegin attaching the containers to the rope. Slide the rope through the drainage holes in each container—if needed, you can also tie a simple knot at the bottom of the container to ensure it stays in place.
Tip: When tying the knots, go for a double or triple knot for extra security. Space the containers evenly to allow for good air circulation and sunlight exposure.
Step 6:
Fill Containers with SoilOnce all the containers are attached, fill them with potting soil. Leave about an inch of space from the top to make watering easier. Ensure the soil is packed well yet loose enough for proper drainage and root growth.
Tip: Use your garden trowel to help with this process. You can also mix in some Slowe fertilizer if desired, which will nourish your plants over time.
Step 7:
Plant Your Chosen FloraSelect your desired plants and carefully transfer them into the prepped soil. If you’re using seeds, plant them according to package instructions. Gently press the soil around the plants or seeds, ensuring they’re secure but not too deep.
Tip: Water your plants lightly after planting to help with settling. If you’re unsure about your plants' needs, research them beforehand to ensure optimal care.
Step 8:
Watering Your Vertical GardenUse your watering can or spray bottle to hydrate the plants in your vertical garden. Initially, you may need to water them more frequently as they adjust to their new environment.
Tip: Check the moisture level in the soil regularly. The basic rule of thumb is to water when the top inch feels dry. Be cautious with the amount of water poured to avoid overflowing and damaging the setup.
Step 9:
Decorate and Personalize (Optional)This is where you can unleash your creativity. Feel free to add small stones, decorative moss, or even personal notes tied with fabric to your vertical garden for flair. These embellishments can provide a vibrant, artistic touch to your plants.
Tip: When decorating, ensure that the added
materials
won’t obstruct the growth of your plants or hinder their access to sunlight.
Step 10:
Maintenance and Enjoy!After setting up your vertical garden, regular maintenance is vital for keeping it healthy and flourishing. Ensure to check for pests, remove any dead leaves, and trim plants as needed. Water and fertilize regularly according to the needs of your selected plants.
Tip: Consider rotating your plants occasionally for even growth. Update or replant as seasons change for continuous freshness!
2026 •