Introduction
Garden Using Repurposed Wine Bottles And A Wooden Pallet
5 (103)
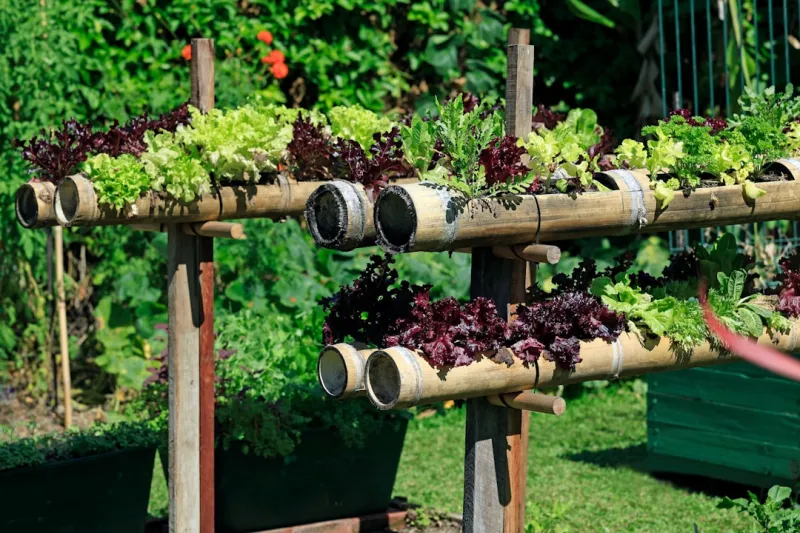
Garden Using Repurposed Wine Bottles And A Wooden Palletbody.navh1.rating.hero-img.share.btn Garden Using Repurposed Wine Bottles And A Wooden Pallet5 (60In today's fast-paced world, many of us seek to reconnect with nature while maximizing the limited space we have at home. A vertical garden is not just a beautiful way to enhance your living area; it’s also an eco-friendly that allows you to grow your own herbs, vegetables, or flowers even in the tightest of spaces. Using repurposed wine bottles and an old wooden pallet, you can create a unique vertical garden that not only looks stunning but also contributes to sustainability by giving a new life to
materials
that would otherwise be discarded.This is perfect for beginners, as it requires minimal tools and can be completed over a weekend. The sense of accomplishment you’ll feel at the end when you’ve created a living wall will be not only gratifying but also a great conversation starter for guests. Vertical gardens can improve air quality, provide food right at your fingertips, and add a lush visual appeal to any indoor or outdoor space.The skill level needed for this is manageable for anyone, regardless of their crafting experience. With guidance and a little bit of your own creativity and vision, you’ll be able to transform simple
materials
into a functional and aesthetic array of greenery. In this guide, we’ll walk you through everything you need to know to create your very own vertical garden using repurposed wine bottles and a wooden pallet.
Tools Needed
- Drill with drill bits: A drill is essential for making holes in the wooden pallet and wine bottles. You'll need bits suitable for both wood and glass.Screwdriver: To assemble components, including securing the pallet to a wall or horizontal surface if needed.Measuring tape: Accurate measurements are crucial for ensuring that wine bottles are evenly spaced and positioned on the pallet.Level: To ensure that your pallet hangs straight and the garden looks organized.Utility knife: For cutting your wine bottles if you choose to use them in a more structured way.Sandpaper or a glass file: This helps to smooth out any sharp edges after cutting glass bottles, preventing cuts or injuries.Garden shovel or trowel: To add soil to your wine bottle planters.Safety goggles and gloves: Always prioritize your safety, especially when working with glass and power tools.
Materials
- Wooden pallet: 1 (ensure it is in good condition with no rot or damage)Repurposed wine bottles: 10-15 (cleaned and labels removed)
- Potting soil: 2-3 bags (depending on the size of the bottles and what plants you wish to grow)
- Plants or herbs: A variety of 10-15 (consider options such as succulents, herbs, or small flowering plants)
- Landscape fabric or burlap: 1 yard (to line the bottles for better soil retention)
- Nails or screws: As needed (for securing the pallet if it needs reinforcement)
- Twine or strong wire: 1 role (to create vertical holders for bottles)
- Sealant or waterof paint: 1 can (to protect the wood from moisture)
- Garden rocks or gravel: 1 bag (to aid drainage in the bottles) Optional - Decorative items: Items like small decorations or stencils to personalize your garden.
Step 1:
Select and Prepare Your PalletBegin by selecting a sturdy wooden pallet. Depending on where you plan to place your vertical garden, choose a pallet that suits your aesthetic and functional needs. Check for any signs of rot or decay and ensure that there are no truding nails or splinters.After selecting the pallet, clean it with a stiff brush to remove any dirt or debris. If desired, you can lightly sand the surface to remove rough patches. Consider applying a coat of sealant or waterof paint on the pallet to protect it from moisture, especially if you plan to hang it outdoors. Let it dry thoroughly before ceeding to the next step.
Step 2:
Measure and Mark Bottle PositionsDecide how many wine bottles you will use in your vertical garden based on the available space on your pallet. Using a measuring tape, measure the distance between each bottle so it looks visually appealing once completed. Generally, a spacing of about 6-12 inches apart works well to avoid overcrowding while allowing each plant ample sunlight.Once measured, use a pencil to mark locations where each bottle will be placed. Ensure the markings are level to maintain a tidy appearance in the finished .
Step 3:
Drill Holes for BottlesSelect a drill bit suitable for glass, and carefully drill holes in the marked spots. If your pallet has standard slats, you may want to consider drilling through the wood so the bottle fits snugly. Always wear safety goggles when drilling and take your time to minimize mistakes.If you find it difficult to manage the glass while drilling, consider placing a piece of plywood underneath the bottle as a stable platform. Start with a small pilot hole before applying full pressure for larger holes.
Step 4:
Prepare Wine BottlesAfter the holes are drilled, you can begin preparing the wine bottles. Clean them thoroughly, ensuring that all labels are removed and the inside is rinsed. Use a utility knife or cutting tool to create additional small holes in the bottom of each bottle, ensuring proper drainage.If cutting the bottles, be cautious and use sandpaper or a glass file to smooth any sharp edges. Wear gloves during this process to ensure safety. Once prepared, you can decorate the bottles with paint, twine, or other artistic embellishments if you wish.
Step 5:
Create Planting ContainersBefore you fit the bottles into the pallet, add a layer of small rocks or gravel at the bottom of each bottle for drainage. Follow this with a layer of landscape fabric or burlap, cut into circles slightly larger than the opening of the bottles. This will help hold the soil in place while allowing excess water to escape.Now, fill the bottles with potting soil, leaving just about an inch of space at the top for the plants. Be generous and compact the soil lightly to make room for your plants.
Step 6:
Add Plants to BottlesChoose plants that are suitable for your environment (indoor or outdoor) and the amount of sunlight available. Herbs, succulents, and small flowering plants tend to thrive in these types of gardens. Begin planting by creating a small hole in the soil for each plant.Gently remove the plants from their original pots and place them into the soil in the bottles, then cover the roots with soil, ensuring they are secure. Water lightly to help establish the plants while avoiding Overtion.
Step 7:
Secure Wine Bottles to the PalletWith the plants now settled into your bottles, it’s time to hang them on the pallet. Depending on your design, you can slide each bottle into the drilled holes or secure them using twine or wire as needed. For additional support, you can also screw or nail the bottles at the base to prevent them from tipping.Ensure that each bottle is securely in place and visually appealing. Take a step back every now and then to ensure that the spacing and orientation align with your expectations.
Step 8:
Hang the Pallet Vertical GardenChoose a location to hang your vertical garden. If you haven’t already, now is the time to attach hooks or brackets to the back of the pallet. Ensure that they are secured firmly and can handle the weight of the pallet when fully planted.With the help of a friend, lift the pallet into place. Use the level to ensure it is straight, making adjustments as necessary. If you are attaching the pallet to a wall, ensure you use appropriate hardware to secure it safely.
Step 9:
Water and Maintain Your Vertical GardenAfter your vertical garden is installed, give the plants a thorough watering, ensuring that excess water drains properly. Check the bottles daily for the first week, watering as needed depending on their environment.As your plants grow, you’ll want to prune them as necessary, especially if they start to overcrowd the space or require more airflow.
Step 10:
Enjoy Your Garden and ExperimentNow's the fun part! Spend time enjoying the fruits of your labor. Consider documenting your garden's gress through photographs or journals. Additionally, engage with plant care tutorials to learn more about individual plant needs. As your confidence grows, feel free to experiment with additional plants or expand the vertical garden.
2026 •