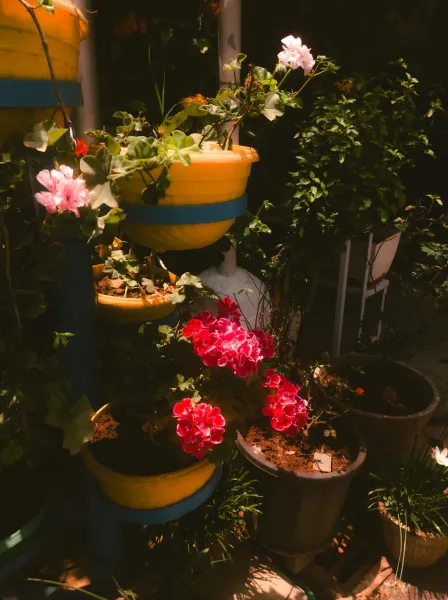
How to create a vertical garden using repurposed plastic bottles and sustainable materials
Creating a vertical garden is not only an exciting DIY project but also an excellent way to bring greenery into your living space regardless of your outdoor space constraints. With the world increasingly focusing on sustainability, using repurposed materials such as plastic bottles not only reduces waste but also gives you an opportunity to create something beautiful. Vertical gardens are both aesthetically pleasing and functional, as they can improve air quality and allow you to grow herbs, vegetables, or ornamental plants right at home.
Why Choose This Project? This project stands out because it is a perfect blend of creativity, sustainability, and the joy of gardening—all rolled into one. Many people are deterred from gardening due to lack of space, especially in urban settings. Repurposed plastic bottle gardens can be constructed on balconies, patios, or even walls indoors, making them a versatile choice for anyone. Furthermore, vertical gardens save space while also providing a growing area for plants without taking up precious ground space.
Benefits of Vertical Gardens:
- Space Saving: Vertical gardens maximize limited space by allowing plants to grow upward.
- Aesthetics: Adds a vibrant touch of nature to any environment, making it visually appealing.
- Air Quality: Plants absorb carbon dioxide and release oxygen, improving air quality in your space.
- Sustainability: This project utilizes materials that would otherwise end up in landfills, contributing to an eco-friendlier approach to gardening.
Tools Needed
1. Scissors or Utility Knife: For cutting plastic bottles to the desired shape and size. A utility knife can provide precision, but if you're not comfortable using one, scissors work well for thinner bottles.
2. Drill with Drill Bits: Necessary for creating drainage holes and securing your vertical garden to the wall or structure. A drill ensures that you can make clean holes without cracking the bottles.
3. Screwdriver: If you're using screws or anchors to attach your plants, a screwdriver will be essential for assembly.
4. Ruler or Measuring Tape: To accurately measure your bottles and soil depths, ensuring you get the best results from your DIY garden.
5. Marker: Helpful for marking measurements on the plastic bottles before cutting.
6. Gloves: To protect your hands during the cutting and planting processes, especially if you're working with sharp edges from bottles or using soil that may contain irritants.
7. Watering Can or Spray Bottle: Essential for watering your plants after planting. A spray bottle can help distribute water evenly without overwhelming the plants.
8. Level (Optional): If you're hanging your garden on a wall, a level helps ensure that your project is straight, adding to its professional look.
Materials
1. Plastic Bottles: At least 6-10 two-liter bottles (depending on how large you want your vertical garden). 2. Potting Soil: Approximately 10-20 liters, enough to fill all the bottles with adequate soil for plant growth. 3. Seeds or Seedlings: Choose plants that thrive in vertical gardens, like herbs, salad greens, or flowering plants. Consider starting with 5-10 young plants. 4. Twine or Wire: About 10 meters for securing the bottles together or hanging them, depending on your vertical garden’s design. 5. Wooden Pallet or Frame (optional): This can be your vertical support structure, ideally reclaimed wood for sustainability. 6. Draining rocks or gravel: About 5 liters, which will serve to improve drainage in the bottom of the bottles. 7. Organic Fertilizer: A small bag, as you'll want to provide your plants with nutrients for steady growth. 8. Plastic or Fabric Mesh (optional): To prevent soil from washing out through drainage holes. 9. Paint (optional): To decoratively paint your bottles and give your garden a personal flair. 10. Watering tray: To catch excess water below your vertical garden, especially if it's indoors.
Step-by-Step Guide
# ### Step 1: Gather Your Materials
Start by collecting all the materials you’ll need for your project, including the plastic bottles and soil. Make sure to wash the bottles thoroughly, as they may have residues that are harmful to plants. This is a key step that some beginners overlook, but it sets the base for healthy plant growth.
# ### Step 2: Prepare Your Bottles
Using your scissors or utility knife, carefully cut each two-liter bottle lengthwise down the center, leaving one side attached as a "hinge." Make sure to keep one end of each bottle intact for the soil compartment. You should also create small drainage holes at the bottle base to ensure water does not accumulate and drown your plants.
## Tips:
- Always cut the bottles in a well-ventilated area and wear gloves to protect your hands.
- Aim for small, evenly spaced holes for proper drainage.
# ### Step 3: Add Drainage Material
Place a layer of small rocks or gravel at the bottom of each bottle, about an inch deep. This will help with drainage, preventing root rot or overly damp soil. Adding mesh over the drain holes is optional but can help keep soil from spilling out.## Tips:
- Use recycled gravel or rocks from your garden if available, keeping the eco-friendly theme intact.
# ### Step 4: Fill with Soil
Now you can fill each bottle roughly two-thirds full with potting soil. Avoid overpacking the soil, as plants need space to grow and expand roots. Lightly patt the soil down without compacting it too much.## Tips:
- If you have garden compost, adding a bit to the potting soil can provide nutrients to your plants.
# ### Step 5: Plant Your Seeds or Seedlings
Gently place your seeds or seedlings into the soil, following specific depth recommendations for each type. If you're planting seeds, sprinkle them evenly and cover lightly with soil.## Tips:
- Choose plants based on your climate and growing space. Herbs like basil, mint, or small flowers work well in vertical gardens.
# ### Step 6: Assemble Your Vertical Garden Structure
If you're using a wooden pallet as a base, lay it flat. Start by securing bottles in layers, using twine or wire to attach them together. Create a configuration that’s stable and allows sufficient sunlight to reach all plants. Make sure to leave space for watering and maintenance.## Tips:
- A staggered configuration provides a beautiful cascading effect, while also maximizing sunlight exposure.
# ### Step 7: Secure Your Garden to a Wall or Stand
Carefully attach your vertical garden structure to a wall or free-standing frame, ensuring it is stable. Use a level to confirm it's straight. If attaching to a wall, drill screws into anchors placed in the wall studs to ensure it can support the weight of the soil and plants.## Safety:
- Always wear protective eyewear when drilling, and make sure to avoid any electrical wires or plumbing behind the wall.
# ### Step 8: Watering and Fertilization
Once everything is set up, thoroughly water your plants until water drains from the base. Opt for a gentle spray initially until the plants become established. You can start fertilizing according to the plant's needs roughly 2-3 weeks after planting.## Tips:
- Monitor moisture levels closely in vertical gardens, as they may dry out faster than traditional gardens.
# ### Step 9: Maintenance and Care
Monitor your vertical garden regularly, ensuring it receives enough sunlight and water. Prune plants to encourage growth and experimentation. Pay attention to pests; natural insecticidal soap can be helpful if you notice any unwanted guests.## Tips:
- Keep a gardening journal. Document what grows well and any issues you encounter, helping guide your future projects.
# ### Step 10: Harvest and Rotate
As your plants mature, you will need to harvest accordingly. Regular cropping encourages more growth in many cases, especially with herbs. Rotate the plants as necessary, especially if some start to outgrow their area.## Tips:
- Plan your garden layout seasonally to optimize plant growth based on sunlight and water needs.
Troubleshooting
1. Drainage Issues: If your plants are sitting in water, check the drainage holes. They might be blocked by soil. Increase the size of the holes or adjust the plantings to improve drainage.
2. Pests: If you notice bugs, consider using natural insect repellents or carefully removing them. Regular checks will help you catch and address infestations early.
3. Stunted Growth: Ensure your plants are receiving adequate light and nutrients. If necessary, consider rotating them for a better light exposure or adding a balanced organic fertilizer.
4. Wilting Plants: Check soil moisture—plants may need more or less water. A general guideline is to stick your finger into the soil; if it feels dry, give it a drink.
5. Unstable Structure: If your garden isn't stable, you may need to adjust how it’s hung or attached. Cross-bracing with additional supports can alleviate this issue.
Conclusion
Creating a vertical garden using repurposed plastic bottles and sustainable materials is not just a fun, eco-friendly project but also a rewarding way to enjoy gardening in small spaces. You can customize the design, choose various plants, and even experiment with colors and arrangements that suit your taste.
Recap: We went through the entire process, from gathering tools and materials, to planting, and maintenance. Now you have a sustainable garden that enhances your home environment.
Consider variations by using different types of containers, adding a watering system, or even incorporating LED lights for indoor conditions. With dedicated care, your vertical garden can thrive and provide joy for years to come, while simultaneously reducing your ecological footprint.
Happy gardening!