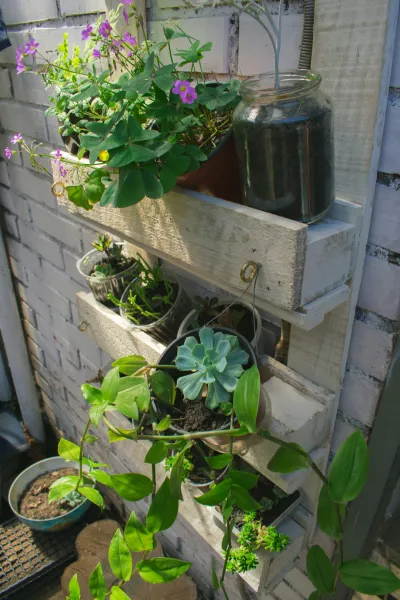
How to create a vertical garden using repurposed pallets and upcycled plastic bottles
Creating a vertical garden is not only an exciting DIY project, but it also offers a plethora of benefits, especially for those of us with limited space. Whether you live in an apartment, have a small backyard, or simply wish to brighten up a dull wall, vertical gardens can transform vertical surfaces into lush, green spaces. Using repurposed pallets and upcycled plastic bottles, this guide aims to inspire creativity and resourcefulness while promoting sustainability.
Why This Project? Vertical gardening allows you to maximize your gardening potential by using vertical space. As urbanization increases, many people are seeking ways to incorporate greenery into their lives without the luxury of vast expanses of land. Moreover, repurposing pallets and plastic bottles minimizes waste and is a great way to contribute to environmental sustainability by turning discarded materials into something beautiful and functional.
Benefits of Vertical Gardenuing:
- Space Efficiency: Utilize walls, fences, and other vertical surfaces.
- Aesthetic Appeal: Enhance the beauty and style of your residence while creating a vibrant atmosphere.
- Fresh Produce: Grow your herbs, veggies, and flowers right at home.
- Easy Maintenance: Vertical gardens tend to require less weeding.
- Air Quality Improvement: Plants filter toxins and improve the air in and around your space.
Tools Needed
1. Screwdriver
- A screw gun or screwdriver is essential for assembling the pallet structure and securing the bottles in place.
2. Saw
- A handsaw or jigsaw will be needed for cutting the pallet to the desired size and for creating openings in the plastic bottles.
3. Drill
- A drill with various bits will help create drainage holes in the bottles and for securing the bottles to the pallet.
4. Sandpaper/Power Sander
- Smoothing out rough edges on the pallet and bottles will prevent injuries and create a more polished look.
5. Measuring Tape
- For accurate measurements of both the pallet and the positioning of the bottles, a measuring tape is indispensable.
6. Gardening Gloves
- Protect your hands while working with wood and soil to ensure that you keep your skin safe from splinters, bacteria, and dirt.
7. Paintbrush & Sealant (Optional)
- For those who wish to add a weatherproof coating to the pallet, a paintbrush and sealant will enhance durability.
8. Utility Knife
- A utility knife can be handy for making precision cuts on plastic bottles as well as for trimming any leftover debris.
Materials
1. Wood Pallet
- 1 Standard-sized pallet (usually 48” x 40”)
2. Plastic Bottles
- 10-15 1-2 liter plastic bottles (the type used for soda or water)
3. Potting Soil
- 3-4 bags (approximately 1.5 cubic feet each)
4. Plants/Seeds
- Choose a mix of herbs (e.g., basil, parsley), small veggies (e.g., lettuce, radishes), and flowers (e.g., petunias).
5. Nails or Screws
- 1 box (2-inch nails or screws for assembly of the pallet structure)
6. Coated Wire
- 1 spool (for securing the bottles to the pallet)
7. Liquid Fertilizer
- 1 bottle or packets (for boosting growth)
8. Plastic Sheeting or Landscape Fabric
- Enough to line the back and prevent soil loss (1-2 yards)
9. Watering Can or Hose
- For watering your plants conveniently.
10. Painting Supplies (Optional)
- If you decide to paint your pallet for aesthetic appeal, have some weatherproof paint and a paintbrush.
Steps to Create Your Vertical Garden
### 1. Choose Your Location
- What: The foundation of your vertical garden begins with finding a suitable wall or area where the pallet can be securely mounted.
- How: Look for a space that gets at least 4-6 hours of sunlight daily. It should also be easily accessible for watering and maintenance.
- Tips: If you are mounting on a wall, ensure it is sturdy enough to hold the weight of the pallet and plants. Aim to pick a location near a water source for convenience.
- Safety: Watch for any overhead power lines or obstacles while placing your pallet.
### 2. Prepare the Pallet
- What: Prepare the pallet by cleaning and ensuring its surface is smooth for planting.
- How: Use sandpaper or a power sander to smooth down any rough edges. If desired, paint the pallet with weatherproof paint for protection against the elements.
- Tips: Choose a non-toxic paint or skip painting altogether if you prefer a rustic, natural look.
- Safety: Always wear gloves when handling wood and sanding to avoid splinters.
### 3. Create Drainage in Bottles
- What: Preparing plastic bottles for planting involves creating drainage holes.
- How: Using a drill, make several holes in the bottom of the bottles. You can also cut the bottoms off for additional drainage and visibility.
- Tips: Rinse out any leftover residue from beverages before using the bottles.
- Safety: Exercise caution with the drill; make sure your hands are clear of drill bits.
### 4. Line the Pallet for Soil Retention
- What: To prevent soil from spilling out, line the back of the pallet.
- How: Use plastic sheeting or landscape fabric to cover the backs of the slats. Secure with a staple gun.
- Tips: Use staples generously to ensure the fabric remains in place, especially once loaded with soil.
- Safety: Take care not to staple through the wood; maintain a safe distance from the edges.
### 5. Cut and Install Plastic Bottles
- What: Bottle placement is critical to fit the plants perfectly.
- How: Attach the bottles to the front of the pallet by placing them horizontally through the slats, ensuring that the drainage holes are facing down.
- Tips: Secure each bottle with coated wire or screws so they don’t shift or fall over time.
- Safety: Avoid sharp edges; make sure the bottles are properly secured to prevent accidents.
### 6. Fill with Potting Soil
- What: Fill each bottle with potting soil, preparing to plant your herbs or flowers.
- How: Using a funnel or your hands, densely fill each bottle about two-thirds full with potting soil.
- Tips: Lightly tamp down the soil to eliminate air pockets and create a stable base for plants.
- Safety: Wear gloves while handling soil to prevent any contamination or irritations.
### 7. Plant Your Seeds or Small Plants
- What: The exciting phase of planting comes next.
- How: Plant your chosen seeds or small plants per bottle, ensuring not to overcrowd them. Different species may require different depths of planting.
- Tips: Refer to seed packets for specific planting depths and care instructions. Consider proximity to ensure taller plants don't overshadow shorter ones.
- Safety: Use a small shovel or your fingers, being careful not to disturb the existing soil structure.
### 8. Water Your Vertical Garden
- What: Once the plants are in place, it’s important to establish proper watering practices.
- How: Water gently using a watering can or hose, ensuring the soil is moistened without overwhelming the plants.
- Tips: Consider using a self-watering system for plants to maintain consistent moisture levels. Monitor plants regularly.
- Safety: Remember to check for drainage and avoid standing water; excess moisture can promote mold or rot.
### 9. Maintain Your Vertical Garden
- What: Regular maintenance is crucial for the health of your plants.
- How: Schedule time for watering, inspecting for pests, and trimming dead leaves or spent flowers. Fertilize once a month with a balanced liquid fertilizer to encourage growth.
- Tips: Keep a gardening journal for tracking growth and changes in your garden.
- Safety: Always wear gloves when working with soil and plants; be cautious of outdoor living conditions, especially when using tools.
### 10. Enjoy Your Vertical Garden!
- What: Revel in the fruits of your labor.
- How: Take time to enjoy your greenery, consider inviting friends over to demonstrate your hard work!
- Tips: Regularly photograph your garden to celebrate progress and document challenges you face for future improvements.
- Safety: Ensure that all tools and materials are cleaned and stored away properly after use.
Troubleshooting Common Issues
Issue 1: Plants are Wilting or Browning
- Fix: Check watering levels. Crowded conditions can lead to dehydration; cut back on watering or treat for pests if found.
Issue 2: Drainage Problems
- Fix: Ensure that all bottles have adequate drainage holes. If water is pooling, re-drill holes or adjust the placement of bottles.
Issue 3: Pest Infestation
- Fix: Inspect the plants for signs of pests. Use a homemade insecticidal soap or neem oil to treat infestations without harming plants.
Issue 4: Faded Plants or Poor Growth
- Fix: Evaluate sunlight exposure. If plants aren't thriving, consider relocating to a sunnier spot or supplementing with a grow light.
Issue 5: Structural Instability
- Fix*: Check for loose screws or attachments. Reinforce using additional support if necessary, and ensure it’s mounted securely to the wall.
Conclusion
Creating a vertical garden using repurposed pallets and upcycled plastic bottles is a rewarding and fruitful project that adds life to your space while embodying eco-friendliness. With creativity, you can personalize your garden with various plant choices and designs. Plus, the satisfaction of nurturing your plants fosters a deeper appreciation for gardening.
Don’t hesitate to explore various plant combinations or styles, perhaps incorporating other repurposed materials! Regular maintenance and observation will ensure your garden flourishes. Dive into this green venture and witness your nurturing efforts culminate into vibrant growth.
By Alex, Home Hack Lab*