Introduction
Garden Using Reclaimed Pallets And Succulents For Small Patios
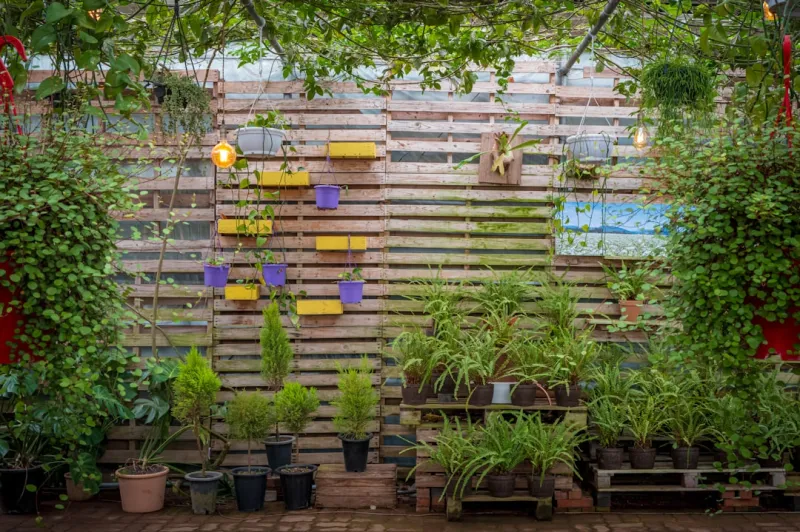
Garden Using Reclaimed Pallets And Succulents For Small Patiosbody.navh1.rating.hero-img.share.btn Garden Using Reclaimed Pallets And Succulents For Small Patios Garden Using Reclaimed Pallets And Succulents For Small Patiosh2.content p Garden Using Reclaimed Pallets And Succulents For Small Patios Garden Using Reclaimed Pallets And Succulents For Small Patios Garden Using Reclaimed Pallets And Succulents For Small Patios Garden Using Reclaimed Pallets And Succulents For Small Patiosh2a Garden Using Reclaimed Pallets And Succulents For Small Patios Garden Using Reclaimed Pallets And Succulents For Small Patiosh2a Garden Using Reclaimed Pallets And Succulents For Small Patios Garden Using Reclaimed Pallets And Succulents For Small Patiosh2a Garden Using Reclaimed Pallets And Succulents For Small Patios Garden Using Reclaimed Pallets And Succulents For Small Patiosh2a Garden Using Reclaimed Pallets And Succulents For Small Patios Garden Using Reclaimed Pallets And Succulents For Small Patiosh2a Garden Using Reclaimed Pallets And Succulents For Small Patios Garden Using Reclaimed Pallets And Succulents For Small Patiosh2a Garden Using Reclaimed Pallets And Succulents For Small Patios Garden Using Reclaimed Pallets And Succulents For Small Patiosbody.Nav.Nav ah1.rating-chip.hero-imgh2pulli.social-share.share-grid.btn#fb-root} Garden Using Reclaimed Pallets And Succulents For Small Patios5 (34 Garden Using Reclaimed Pallets And Succulents For Small Patiosimgh2.btn-box.btn Garden Using Reclaimed Pallets And Succulents For Small Patios Garden Using Reclaimed Pallets And Succulents For Small PatiosCreating a vertical garden using reclaimed pallets and succulents is a fantastic way to make the most of limited space while adding charm and beauty to your small patio. This not only showcases your creativity but also motes sustainability by recycling
materials
that might otherwise end up in a landfill. Vertical gardens are ideal for small outdoor areas, as they allow you to increase your green space without occupying precious floor real estate. Plus, succulents are a great choice for beginners because they require minimal care and are Well for container gardening. Imagine stepping out onto your patio and being greeted by a lush tapestry of vibrant succulents showcasing various colors, textures, and shapes. A vertical garden not only elevates the aesthetic appeal of your outdoor space but also provides benefits beyond beauty. Plants naturally purify the air, boost mood, and contribute positively to your overall well-being. Moreover, gardening can be therapeutic, offering you a rewarding hobby that encourages mindfulness and relaxation. For those new to gardening or DIY , this guide provides a clear and Easy To approach to creating your own vertical garden. No prior experience is necessary, but a willingness to learn and engage is all that is required. With just a few tools and
materials
, you can transform reclaimed pallets into a stunning vertical garden that breathes life into your patio. Let’s dive into the essential tools,
materials
, and step-by-step instructions to get you started on this exciting !
Tools
- Needed
- Saw: A hand saw or a circular saw will make it easier to cut your wood pallets to the desired sizes. Make sure to securely support the pallets when cutting.Final
- ResultHammer: You’ll need a hammer for driving nails into the pallet and securing it together.
- Nails: Choose galvanized or WEatherant nails to ensure your vertical garden withstands outdoor conditions.
- Drill: A drill will help create drainage holes and attach hooks for mounting your vertical garden on the wall or fence.
- Stapler (or staple gun): This tool is useful for attaching landscape fabric to the back of the pallet to hold the soil and plants.
- Gloves: protect your hands from splinters when handling reclaimed pallets, as they can be rough and may have sharp edges.
- Level: To ensure your vertical garden hangs straight, a level will help you check your work as you install it
- Paintbrush (optional): If you decide to paint or stain your pallet for aesthetics, a paintbrush is essential for an even application.
Materials
- Reclaimed wood pallets: 1-2 pallets, depending on the height and width desired for your garden.Landscape fabric: 1-2 yards, to prevent soil from falling through the slats.
- Potting soil: 2 bags (around 2 cubic feet each), formulated for succulent growth.
- Succulents: 10-15 plants, depending on the size of your pallets and how densely you want to plant them.
- Nails: 1 box (usually 50-100), for securing the pallets and fabric.
- Hanging brackets or hooks: 2-4, according to your setup, for mounting the vertical garden.
- Wood stain or paint: (optional) 1 quart, to finish or protect the pallets.
- Watering can or spray bottle: For watering your succulents.
- Sandpaper: 1 piece, to smooth rough edges on the pallets.
- Plastic sheeting or trash bag: 1, as a barrier to protect your patio or floor during the assembly process. Step-by-Step Instructions
Step 1:
Selecting and
- Preparing the Pallet
What: Choose suitable reclaimed wood pallets for your vertical garden.
How: Look for pallets that are in good condition without significant cracks, rot, or loose boards. Avoid pallets that have been treated with toxic chemicals (marked with “MB”). Once selected, clean each pallet thoroughly to remove dirt, dust, and debris. If needed, use sandpaper to smooth any rough edges or truding nails that could cause injury.
Tips: Check if the pallets stack easily, and if they’re free of mold or pests. Staining or painting the pallet not only enhances its look but also provides extra protection against moisture.
Safety: Wear gloves during handling and sanding to prevent splinters or cuts.
Step 2:
Cutting the
- Pallet
What: Cut the pallet to the desired height.
How: Using a saw, measure and mark the cuts based on how tall you want your vertical garden. A typical height is between 3 to 5 feet. Make the cuts with attention and patience, ensuring they’re straight to maintain a professional look.
Tips: If you want a multi-level planter, consider leaving some sections of the pallet intact for a strong base while using the visible top sections for planting.
Safety: Use appropriate safety gear when cutting wood, particularly goggles to protect your eyes from splinters.
Step 3:
Creating
- Drainage Holes
What: Drill drainage holes to prevent water accumulation.
How: Use a drill to create drainage holes in the base of the pallet’s slats where you will be placing soil. This step is crucial as succulents do not thrive in soggy conditions. Ideally, each section should have 3-4 holes spaced evenly apart.
Tips: Keep the amount of soil in each segment moderate to reduce weight and improve drainage.
Safety: Ensure you have a stable work surface during drilling, and always wear safety glasses.
Step 4:
Attaching
- Landscape Fabric
What: Line the back and sides with landscape fabric.
How: Cut a piece of landscape fabric that will cover the entire back and sides of the pallet. Securely attach it with a staple gun or nails, ensuring that fabric extends slightly over the top to aid in soil retention.
Tips: Folding the edges of the fabric over the top helps keep soil contained and reduces the risk of it spilling out.
Safety: Be cautious when handling the staple gun, as the staples can be sharp.
Step 5:
Securing the
- Pallet
What: Prepare the pallet for mounting.
How: If desired, attach hanging brackets or hooks to the back of the pallet. Make sure they are securely fastened to carry the weight of the entire structure filled with soil and plants. If you plan to lean it against a wall, it may not be necessary to attach hooks.
Tips: If using a Walld approach, ensure the mounting hardware is rated for the weight of the garden.
Safety: When drilling into a wall, be mindful of electrical wiring and plumbing.
Step 6:
Filling with
- Soil
What: Fill the sections with potting soil.
How: Wearing gloves, fill each section of the pallet with potting soil. Leave enough space at the top to allow for planting the succulents. The soil should be compacted but not overly dense to ensure aeration.
Tips: Choose a soil mix specially formulated for succulents, which typically contains sand and grit for better drainage.
Safety: Avoid inhaling dust from the soil; consider wearing a mask if needed.
Step 7:
Planting the
- Succulents
What: Select and plant your succulents.
How: Carefully remove the succulents from their containers, loosening the roots minimally. Place a succulent in each section of the pallet and cover the roots with soil. Make sure to consider the amount of light your chosen succulents will need and place the more Lighting species towards the top.
Tips: Mix different types of succulents for a visually engaging display. Consider varying colors, textures, and sizes for an attractive arrangement.
Safety: Be careful as some succulents have sharp edges that may prick your skin.
Step 8:
Watering and
- Maintenance
What: Water your vertical garden and establish a care routine.
How: Water the plants lightly after planting to settle the soil. Allow the soil to dry out between watering, as succulents do not require frequent hydration. Position your vertical garden in a location with adequate sunlight (6-8 hours a day is ideal).
Tips: Monitor the moisture level regularly, as too much water can lead to rot. You can also mist the plants but avoid soaking them.
Safety: Use caution when using gardening tools around the pallet to avoid injury.
2026 •