Introduction
Garden With Repurposed Soda Bottles And Natural Moss
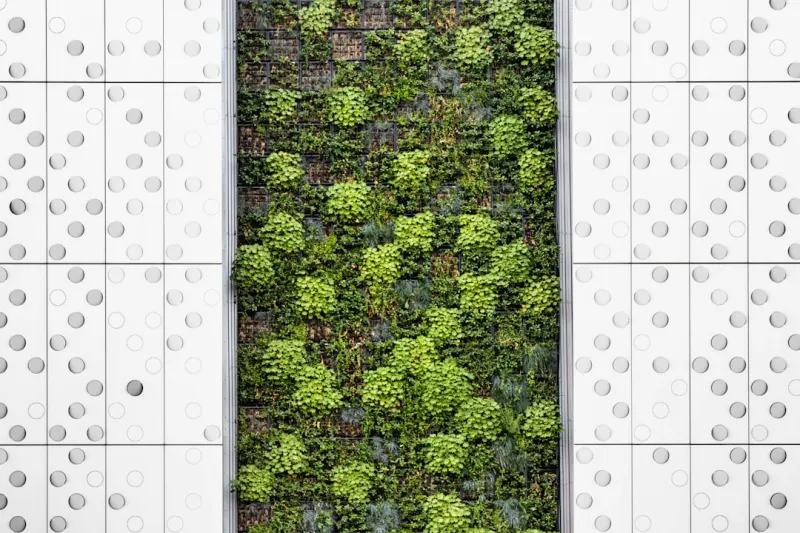
Garden With Repurposed Soda Bottles And Natural Mossbody.navh1.rating.hero-img.share.btn Garden With Repurposed Soda Bottles And Natural Moss Garden With Repurposed Soda Bottles And Natural Mossh2.content p Garden With Repurposed Soda Bottles And Natural Moss Garden With Repurposed Soda Bottles And Natural Moss Garden With Repurposed Soda Bottles And Natural Moss Garden With Repurposed Soda Bottles And Natural Mossh2a Garden With Repurposed Soda Bottles And Natural Moss Garden With Repurposed Soda Bottles And Natural Mossh2a Garden With Repurposed Soda Bottles And Natural Moss Garden With Repurposed Soda Bottles And Natural Mossh2a Garden With Repurposed Soda Bottles And Natural Moss Garden With Repurposed Soda Bottles And Natural Mossh2a Garden With Repurposed Soda Bottles And Natural Moss Garden With Repurposed Soda Bottles And Natural Mossh2a Garden With Repurposed Soda Bottles And Natural Moss Garden With Repurposed Soda Bottles And Natural Mossh2a Garden With Repurposed Soda Bottles And Natural Moss Garden With Repurposed Soda Bottles And Natural Mossbody.Nav.Nav ah1.rating-chip.hero-imgh2pulli.social-share.share-grid.btn#fb-root} Garden With Repurposed Soda Bottles And Natural Moss Garden With Repurposed Soda Bottles And Natural Mossimgh2.btn-box.btn Garden With Repurposed Soda Bottles And Natural Moss Garden With Repurposed Soda Bottles And Natural MossCreating a vertical garden is an eco-friendly and aesthetically pleasing way to bring nature into your home or garden. Not only does this enable you to repurpose
materials
you might otherwise throw away, but it also motes sustainability, creativity, and a connection to nature. Using repurposed soda bottles in combination with natural moss provides a unique gardening experience that is accessible to beginners. Vertical gardens can be placed on walls, balconies, or patios, making them ideal for small spaces. Why This ?By creating a vertical garden, you're not just beautifying your surroundings; you're also contributing to environmental sustainability by reusing plastic
materials
that would otherwise contribute to global waste problems. Reusing soda bottles not only helps reduce plastic waste but can also give you the satisfaction of crafting something useful from what would typically be discarded. Additionally, introducing moss into your vertical garden can help in maintaining humidity and provide a lush, green appearance. Moss is hardy and requires minimal maintenance, making it an excellent choice for beginners. This is perfect for those who may have limited gardening experience or space to work with yet seek a rewarding and ductive endeavor.
- Benefits of a Vertical GardenSpace Efficiency: Vertical gardens utilize vertical space, allowing you to garden even in small areas. This makes it ideal for apartment balconies or small yards.Air
- Quality improvement: Plants naturally filter air pollutants and can help improve indoor and outdoor air quality.Aesthetic
- Appeal: A vertical garden adds color and life to any space and can serve as a stunning focal point.Cost-Effective: Utilizing repurposed
materials
like soda bottles reduces costs while helping the environment. Skill LevelThis is categorized as Beginner-friendly, requiring no advanced gardening skills or special tools. With a little patience and creativity, anyone can create a stunning vertical garden using soda bottles and moss.
Tools Needed
- Utility Knife or Scissors: Used for cutting soda bottles to create planting pockets. A utility knife can achieve cleaner cuts, but scissors are more manageable for beginners.Final
- ResultDrill or Screwdriver: Necessary for creating drainage holes if you want to ensure proper water flow. A drill makes this task easier but can be substituted with a screwdriver for smaller holes.
- Ruler or Measuring Tape: Essential for measuring out sections on your soda bottles to maintain consistency when cutting and spacing.
- Marker or Pencil: Used for marking cutting lines on the bottles. This ensures precision and helps in making aesthetically pleasing cuts.
- Gardening Gloves: protect your hands during the , especially while handling soil, moss, and other
materials
Keeping yourself clean and safe is essential.
- Watering Can or Spray Bottle: Required for watering your moss and ensuring adequate moisture. A fine mist from a spray bottle can prevent overwatering.
- String or Wire (optional): If you wish to hang your vertical garden, using string or wire can provide additional stability.
- Hanging Hooks (if mounting): Required if you plan to mount your vertical garden to a wall. These will support the weight of the garden once it's filled with soil and plants.
Materials
- Soda Bottles: approximately 10–15, depending on the desired size of your vertical garden. A mix of 2-liter and 12-ounce bottles can provide variety.Natural
- Moss: About 1 bag (covering approximately 4 square feet). Live moss is recommended for a vibrant garden.
- Potting Soil: 1 bag (about 1 cubic foot). A quality blend will give your plants enough nutrients to thrive.
- Activated Charcoal (optional): About 1 cup. This helps with drainage and absorbs toxins, enhancing growth conditions.
- SLowe Fertilizer: 1 small pack. It will provide essential nutrients for your plants over time.
- Decorative Stones or Gravel: 1 bag (for drainage). This will be added to the bottom of your bottles to improve drainage and prevent root rot.
- Plants of Choice: 10-15 small plants (such as herbs, succulents, or Shadent plants). Choose plants based on your growing environment.
- Landscape Fabric (optional): 1 square yard. This can help retain soil while allowing drainage. It's not required but can be beneficial.
- Plastic or Rubber Bands: 1 pack. Useful for securing some plants or moss in place as they start to grow.
- Spray Bottle: For misting the moss and plants. Steps to Create Your Vertical Garden
Step 1:
Gather Your
Materials
and ToolsBefore you start crafting your vertical garden, make sure to gather all your supplies and tools in one workspace. Having everything on hand reduces stress and ensures a smooth workflow. Once assembled, you can ceed to prepare your soda bottles, which will serve as the foundation for your garden.
Step 2:
Prepare the
- Soda Bottles
What: You will repurpose your soda bottles into planters. Starting with clean bottles prevents any contaminants from affecting plant growth.
How: Using your utility knife or scissors, cut each soda bottle vertically, leaving about an inch uncut at the base to create a flap that can hinge open, forming a planting pocket. Make about three to four holes near the bottom (for drainage) and consider cutting slits into the covering flap for easy access.
Tips: Clean the bottles thoroughly before use and label them if you plan to grow different types of plants in each. Be careful when handling sharp tools; it’s wise to wear protective gloves during this process.
Step 3:
Create
- Drainage Layers
What: This step is crucial; without proper drainage, your plants can suffer from overwatering, leading to root rot.
How: Start by adding a layer of decorative stones or gravel at the bottom of each bottle. Then, if you've chosen to use activated charcoal, add it on top of the gravel layer. This will help with filtration and keeping the soil healthy.
Tips: Make sure there’s enough space for the soil; roughly one-third of the bottle should be filled with stones and charcoal to facilitate drainage.
Step 4:
- Potting Soil
What: Now, it’s time to prepare the growing medium for your plants.
How: Fill each bottle with potting soil up to the brim while leaving a layer of soil at the top for planting moss. Mix in the Slowe fertilizer according to the instructions on the package.
Tips: Use your hands or a small scoop to carefully pack the soil, ensuring that it is not overly compacted, which can cause water retention and root issues.
Step 5:
Select and
- Add Plants
What: Choose small plants that suit the light conditions of your chosen location.
How: Insert your selected plants into the soil, making sure they are spaced well enough to grow. If using moss, you can add it alongside your plants for an added layer of texture. Consider using herbs, succulents, or any other small plants you're interested in.
Tips: When removing plants from their nursery pots, take care not to damage the roots. If they are tightly packed, gently loosen them before planting.
Step 6:
Incorporate
- Natural Moss
What: This step adds a lush, green aesthetic and helps retain moisture.
How: Tear pieces of your natural moss and place them on top of the soil, effectively covering it. Press the moss down gently to ensure it makes contact with the soil.
Tips: Ensure moss remains moist, especially during the initial phases; mist it with your spray bottle regularly.
Step 7:
Prepare for
- Mounting
What: If you want to hang or mount your vertical garden, this is the right time.
How: Using the drill or screwdriver, create mounting holes at the base of the bottles. If you’re using string or wire, thread it through the holes to create a hanging system. Ensure everything feels secure and able to support the weight of your garden.
Tips: Check the stability of your setup by lifting it as a whole; if it feels wobbly, reinforce the fixing points.
Step 8:
Watering and
- Mist Treatment
What: proper hydration is critical for the survival and growth of your plants.
How: Use a watering can or spray bottle to lightly mist the moss and plants. Water until the soil feels damp but not saturated. OVerng can cause moss to decay and roots to rot.
Tips: To gauge the moisture level, stick your finger into the soil an inch deep. If it feels dry, it’s time to water; if it’s moist, wait a little longer.
Step 9:
Find an
- Optimal Location
What: Position your vertical garden to maximize light while ensuring it’s safe from harsh elements.
How: Ideal locations can include Suned walls or slightly shaded patios. Ensure it is not exposed to extreme weather or direct scorching sunlight unless plants are specifically Heatnt.
Tips: If this is your first time, observe how much sunlight your plants receive throughout the day, making adjustments as necessary.
Step 10:
Maintenance and
- Monitoring
What: Regular care is essential to ensure your vertical garden thrives over time.
How: You’ll want to periodically check the moisture level, regularly mist your moss, prune any dead leaves, and replace plants as necessary. Monitor for pests and diseases – using organic solutions can help maintain plant health.
Tips: Consider rotating the plants in your vertical garden based on seasonal seasons or to refresh your design. Also, note that different plants may have different moisture and sunlight requirements, so group them accordingly.
2026 •