How to create a vertical garden using reclaimed pallet wood and a drip irrigation system
Introduction
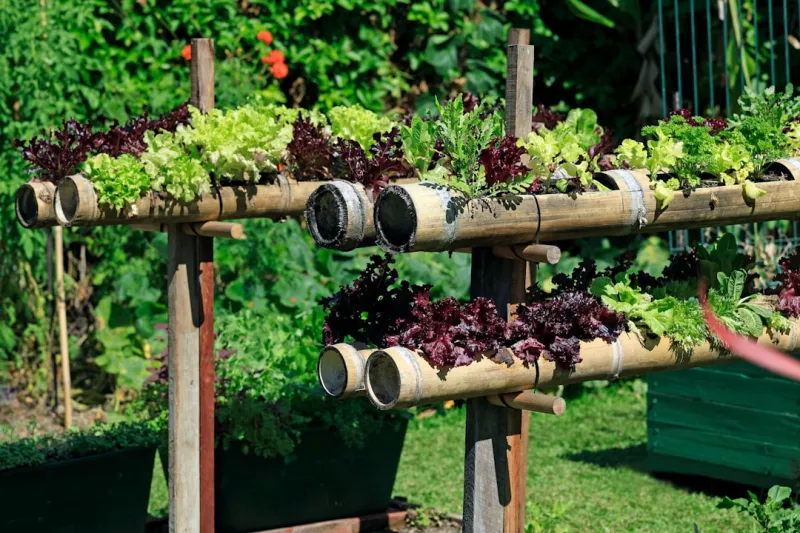
Creating a vertical garden using reclaimed pallet wood can be one of the most rewarding DIY projects you can undertake. Not only do vertical gardens save space, making them ideal for small yards or urban living, but they also bring lush greenery into your environment, promoting better air quality and enhancing aesthetics. With the rising interest in sustainability and environmental consciousness, utilizing reclaimed materials like pallets is an excellent way to contribute to a greener planet while also saving costs.
Why This Project? Building a vertical garden with recycled pallet wood allows you to enjoy the beauty and functionality of gardening while minimizing your ecological footprint. It’s a great way to turn unused areas of your home, like a bare wall or an awkward corner, into a vibrant green space. Moreover, vertical gardening makes it easier to maintain plants, as you can tend to them at a comfortable height without constant bending or kneeling. Additionally, incorporating a drip irrigation system ensures your plants receive optimal hydration without the hassle of manual watering.
Benefits: Beyond aesthetics, vertical gardens can improve biodiversity, create habitats for beneficial insects, and grow your food supply—herbs, salad greens, and even flowers can flourish in such a setup. If you’re a beginner, fear not. This DIY project is accessible with just a little bit of creativity and effort. By following the steps outlined below, you'll create a functional garden that enhances your living space and nurtures your botanical ambitions.
In terms of skill level, this project is suitable for anyone from novice to experienced DIYers. While basic hand and power tools are required, step-by-step guidance ensures a seamless experience. So, let's dive into the details of creating your vertical garden with reclaimed pallet wood and a drip irrigation system!
Tools Needed
1. Screwdriver/Drill - Essential for assembling the pallet pieces and installing the irrigation system. A power drill can save time.
2. Saw - Needed for cutting the pallet wood to size. A jigsaw or hand saw is suitable, depending on which you find easier to use.
3. Measuring Tape - Provides accurate dimensions to ensure every piece fits snugly and your garden looks professional.
4. Sandpaper - Helps smooth any rough edges on the pallets, preventing splinters and making the structure safer to handle.
5. Level - Ensures that your vertical garden is perfectly upright, which is vital for aesthetics and proper water distribution.
6. Safety Goggles and Work Gloves - Protect your eyes from debris and your hands from splinters while working with wood and power tools.
7. Hammer - Useful for driving nails into the wood, especially if the pallet slats are tight-fitting.
8. Pliers - Handy for manipulating small components of the drip irrigation system and for general gripping tasks.
Materials
1. Reclaimed Pallet Wood - 2-3 pallets depending on the desired size of your garden.
2. Stain or Sealer - 1 can (3-4 cups) to weatherproof the wood; choose a non-toxic option if you plan to eat what you grow.
3. Landscaping Fabric - 1-2 yards to line the pallet and retain soil while allowing for drainage.
4. Potting Soil - About 1-2 cubic feet, depending on the number of plants you intend to grow.
5. Plants/Seeds - Choose 5-10 plants (consider herbs and flowers) that suit your environment and preferences.
6. Drip Irrigation Kit - 1 kit designed for small gardens (including the main hose, emitters, and connectors).
7. Wood Screws - 1 box (1-2 inches long) to secure the pallets together and create a stable structure.
8. Brackets or Corner Supports - 4-6 pieces to reinforce the corners of the vertical structure.
9. Plastic or Metal Planters (optional) - 5-10 units if you prefer to create individual plant pockets.
Steps to Create Your Vertical Garden
Step 1: Selecting and Preparing Your Pallet Wood
- What: Choose sturdy, undamaged pallets that are free from chemical treatments (look for HT markings). Inspect for bugs and rot.
- How: Begin by disassembling the pallets. Use a screwdriver or pry bar to carefully take apart the wood slats without damaging them. Trim any warped wood lengths.
- Tips: Consider wearing work gloves when handling pallets as they may have rough edges or splinters. If you prefer, use a hammer to drive nails and pry the slats apart.
- Safety: Always ensure you’re working in a well-ventilated space and wearing protective eyewear.
Step 2: Assembling the Pallet Frame
- What: Create a vertical structure with multiple layers for your gardening.
- How: Start by laying one pallet flat on the ground. Attach two brackets to each corner for support. If you’re using another pallet on top, repeat this process, ensuring the portrait orientation. Secure with wood screws.
- Tips: Use a level frequently to maintain a straight structure. A more complex design may involve placing pallets at different angles for visual interest.
- Safety: Double-check that all screws are driven deep enough so that no sharp ends protrude.
Step 3: Sanding Your Pallet Wood
- What: Smooth the surfaces of your pallets to ensure safety.
- How: Using medium-grit sandpaper, buff the surfaces and edges to eliminate splinters. Progress to fine-grit sandpaper for a smoother finish.
- Tips: Take your time with this step; a well-sanded pallet is more appealing and safer.
- Safety: Always wear a dust mask when sanding to prevent inhalation of particles.
Step 4: Weatherproofing the Wood
- What: Protect the wood from moisture and insects.
- How: Apply a coat of non-toxic stain or sealer to all surfaces of the pallet frame using a paintbrush or spray can. Allow it to dry completely according to the manufacturer's instructions.
- Tips: A second coat may provide better durability if you live in a wet climate. Test a small area first.
- Safety: Work in a ventilated area and use gloves to prevent skin contact with the sealant.
Step 5: Lining the Pallet with Fabric
- What: Prepare the interior of the pallet for planting.
- How: Cut landscaping fabric into sections that can line each pocket of the pallet. Use a staple gun to attach it to the inside of each section, allowing for adequate drainage and preventing soil loss.
- Tips: Ensure the fabric covers the gaps between slats effectively; this will help keep your plants healthy.
- Safety: Be cautious with the staple gun, and make sure your fingers are clear when firing staples.
Step 6: Filling with Soil
- What: Start the preparation for planting.
- How: Fill each section with potting soil, making sure to lightly pack it in. Avoid overfilling to prevent spillage.
- Tips: Use a small trowel or garden hand tool to pack soil into tight areas. Ensure the soil isn’t overly compacted to allow for root growth.
- Safety: Wear gloves while handling soil to protect your hands from potential irritants.
Step 7: Planting Your Chosen Greens
- What: Introduce your plants to their new vertical home.
- How: Make small holes in the soil and place your seedlings or seeds into the respective sections of the pallet, topping off with additional soil as needed.
- Tips: Opt for plants that thrive in vertical gardens — herbs like basil, parsley, and flowers for color are excellent choices. Follow spacing guidelines on seed packets.
- Safety: Be gentle when handling plants to avoid root damage during transplantation.
Step 8: Setting Up Your Drip Irrigation System
- What: Efficiently water your vertical garden.
- How: Follow instructions provided with your drip irrigation kit. Connect the water source to the main tubing and cut lines to run across all sections of the pallet, attaching emitters where needed.
- Tips: Ensure emitters correspond with plant locations. Test the system to ensure even water distribution before fixing lines permanently.
- Safety: Turn off water pressure while making adjustments to avoid sudden water sprays or leaks.
Step 9: Securing the Vertical Garden
- What: Finalize the mounting of your vertical garden.
- How: Use brackets or secure the base of each pallet to a wall or fence for stability. Consider multiple securing points for larger pallets.
- Tips: Use a stud finder for wall mounts if working with drywall. Always ensure secure anchoring to prevent accidents.
- Safety: Taking precautions, especially working at heights, is crucial. Make sure any steps or ladders are stable.
Step 10: Maintenance and Enjoyment
- What: Keep your vertical garden thriving.
- How: Regularly check the irrigation system, water your plants if necessary (especially during hot spells), and prune as needed. Watch for pests and diseases.
- Tips: Keep a garden journal to track growth and any necessary interventions. Harvest herbs frequently to encourage growth.
- Safety: Always observe from a safe height when harvesting or checking plants in elevated positions.
Troubleshooting
Even with careful planning and execution, you might face some challenges while setting up or maintaining your vertical garden. Here are five common issues and their fixes:
1. Plants Wilting
- Cause: Insufficient water supply through the drippers.
- Fix: Monitor the layout of the drip system. Adjust the flow rate on emitters or check for clogs in the lines.
- Cause: Not enough landscaping fabric or poor sealing at the pocket.
- Fix: Reinforce fabric coverage and check for any gaps. Adding a layer of mulch on top can help retain soil.
- Cause: Close proximity of plants can attract pests.
- Fix: Regularly inspect plants for signs of infestations and use organic pesticides or introduce beneficial insects.
- Cause: Inadequate light exposure or differing soil conditions in pockets.
- Fix: Rotate plants periodically for even exposure or consider readjusting your vertical structure’s positioning for light.
- Cause: Clogs or leaks in the irrigation setup.
- Fix: Regularly clean emitters and inspect all fittings for leaks. Adjust lines as necessary to ensure the flow is consistent.
Conclusion
Creating a vertical garden using reclaimed pallet wood and a drip irrigation system not only beautifies your space but also fosters a connection with nature and sustainable living. This DIY guide has walked you through the journey, from gathering materials to reaping the rewards of your hard work. You now have the tools and knowledge to create an impressive green sanctuary in your home, providing fresh herbs, flowers, or decorative foliage.
Variations: Consider customizing your vertical garden by painting the pallets, adding decorative elements, or even constructing integrated shelves for pots or ornaments. Seasonal updates can also be happening with new species or seasonal displays for seasonal gardening.
Maintenance: Consistent care ensures the longevity of your garden, leading to continual growth and blooming beauty year-round. So roll up your sleeves and start your vertical gardening adventure today!