How to create a vertical garden using old pallets and rainwater collection systems
Tools Needed
1. Hammer
- Essential for driving nails and making adjustments to the pallet structure during assembly.
- Used for cutting the pallets to size if you need to modify them to fit your available space or design preferences.
- Required for creating drainage holes in the pallets and for securing the pallets together or to a wall if needed.
- Useful for fastening screws in your pallet assembly and when attaching hooks or other components for the rainwater system.
- Important to ensure that your pallets will fit well in your designated space and to measure plant spacing accurately.
- Protect your hands while working with wood, soil, and plants to avoid splinters or skin irritation.
- Useful for applying protective treatments or stains to your pallets to protect them from weather elements.
- Ensures your vertical garden is straight, which is essential for both aesthetics and proper drainage.
Materials
1. Old Pallets (2-3)- You may need more depending on the size of your vertical garden and the number of plants.
- Prevents soil from falling out while allowing water to drain through.
- A good quality potting mix is suitable for the plants you want to grow.
- Choose a variety of herbs, flowers, or vegetables depending on what you want to grow vertically.
- For assembling the pallets securely, use galvanized screws for durability outside.
- A receptacle for storing rainwater; can be made from repurposed materials or purchased.
- Redirects rainwater from your gutters into the collection barrel efficiently.
- For connecting the rainwater system to your vertical garden if needed for watering.
- Helps to identify different plants in your vertical garden.
- Optional, used to weatherproof your pallets if they will be exposed to the elements.
Introduction
Creating a vertical garden using old pallets and a rainwater collection system is a fantastic and sustainable way to maximize your gardening potential, especially if you have limited space or want to add greenery to an urban environment. This DIY project offers various benefits: it utilizes recycled materials, conserves water, and allows you to grow a variety of plants in a compact area. Vertical gardens are not only visually stunning but also provide functional benefits like improving air quality and enhancing your mental well-being by creating an uplifting environment.Additionally, rainwater collection is an eco-friendly practice that reduces reliance on municipal water supplies. By integrating a rainwater collection system, you're ensuring that your plants receive clean, chemical-free water while conserving water resources.
This project is suitable for beginners, requiring basic tools and minimal carpentry skills. No prior gardening experience is necessary, making it an accessible option for anyone interested in gardening while contributing to sustainability efforts.
Let’s dive into the steps for creating your vertical garden with old pallets and a rainwater collection system!
Step 1: Gather Your Materials and Tools
Before you get started, gather all materials and tools in one location to streamline the process. Ensuring you have everything within reach will save you time and effort during assembly. This initial preparation is essential to fully enjoy the creative process. Consider wearing gloves and protective eyewear, particularly when handling the pallets and power tools. Safety first!
Step 2: Select and Prepare Your Pallets
Begin by examining the old pallets you've gathered. Look for pallets that are in good condition without broken boards or loose nails; these will be sturdier and safer. If necessary, give them a light scrubbing to remove any debris or dirt. Once cleaned, consider wood treatment - if you're planning to keep your vertical garden outside, applying a protective sealant will extend the pallet's life against the elements. Additionally, decide if you want to modify your pallets—cutting them to adjust height or width could enhance design flexibility.
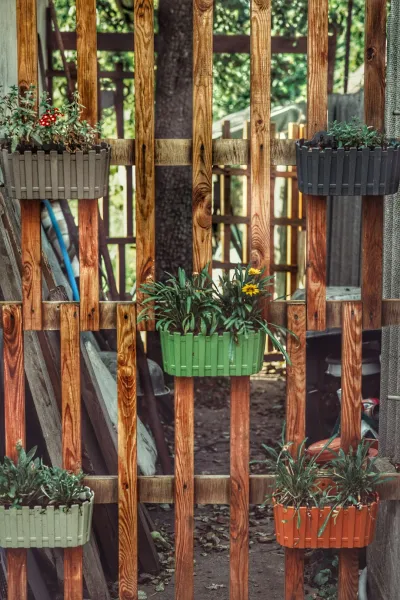
Step 3: Create the Vertical Structure
Using your nails or screws, assemble the pallets vertically. Stack them on top of each other or lean a few against a wall using a 45-degree angle. Ensure each pallet is secured to the other to maintain stability. If you lean them, you might want to use brackets for extra support. An important tip is to use a level while assembling to make sure the structure doesn’t tilt, which could affect growth and watering.
Step 4: Add Drainage Holes
With your drill, create drainage holes at the bottom of each pallet compartment to prevent water from pooling and damaging the plants. Aim for holes that are 1-2 inches wide, spaced about 1 foot apart. If your pallets have gaps between the slats, you might skip this step, but remember to assess if those slats will accommodate your soil mix well.
Step 5: Line the Pallets with Landscape Fabric
Cut the landscape fabric into sections that will fit the back and bottom of each pallet compartment, stapling or tacking it firmly in place. This fabric will hold the soil in while allowing excess water to drain through. Ensure that you have enough fabric to cover all parts that come into contact with soil and plants.
Step 6: Fill the Compartments with Soil
Once your pallets are lined, fill each compartment with potting soil, leaving about an inch of space at the top. This space will prevent soil from spilling over when watering. Depending on your plant choice, ensure you're using suitable soil. For herbs and flowers, a general-purpose potting mix usually works well.
Step 7: Plant Your Vegetables or Herbs
Now, choose your plants or seeds and begin planting! If you have seedlings, gently remove them from their containers. For seeds, follow the recommended spacing from the seed packet. Consider grouping plants with similar sunlight and water needs together. It would be helpful to plant the larger plants at the bottom and the smaller on top to maximize exposure to sunlight.
Step 8: Set Up Your Rainwater Collection System
Position your rainwater barrel beneath a downspout. Use a downspout diverter to channel rainwater into the barrel while preventing debris from entering. Ensure that the barrel is secure and that you have a cover to keep mosquitoes out. You can also use a PVC pipe or hoses to direct rainwater from the barrel closer to your vertical garden, making it handy when watering.
Step 9: Watering System Setup
Using your hose or PVC piping, create a simple drip system that allows for a slow and steady flow of water directly onto your plants. If using hose fittings, ensure they are tight and leak-proof to avoid water waste. Regularly check for blockages or leaks in your system.
Step 10: Consider Plant Care and Maintenance
Establish a care schedule for your vertical garden. Monitor the moisture levels in the soil, as vertical gardens can dry out quicker than traditional gardens. Make sure to also monitor pest infestations. Regularly checking your plants, pruning them as necessary, and applying fertilizers will promote healthy growth. Be attentive, as taller plants may require more frequent watering.
Troubleshooting
1. Inadequate Drainage
- Issue: If plants are root-bound or show signs of wilting or overwatering, there might not be enough drainage.
- Fix: Check drainage holes and ensure they are clear. If necessary, drill additional drainage holes.
- Issue: Plants may become infested or succumb to disease due to overcrowded spacing.
- Fix: Regularly inspect plants for signs of pests and diseases. Utilize organic pest control methods like neem oil and encourage beneficial insects. Ensure plants have enough airflow and light.
- Issue: Soil may be washing out of compartments during watering.
- Fix: Add additional landscape fabric or netting to the back of the pallet. Consider using a heavier soil mix or additional plant weight to hold it down.
- Issue: Some plants may not be thriving, indicating they may not be receiving enough sunlight.
- Fix: Relocate your vertical garden to a sunnier spot if possible. Alternatively, consider switching to shade-tolerant plants.
- Issue: Plants may show stunted growth or yellowing leaves.
- Fix: Check soil moisture and ensure that the nutrients are balanced. If necessary, consider adding a diluted liquid fertilizer to enhance growth.
Conclusion
Creating a vertical garden using old pallets and a rainwater collection system is a fulfilling and environmentally friendly way to grow your own vegetables, herbs, or flowers. This project not only revives old materials but also conserves water—a win for both you and the environment. Along the way, you can explore variations, such as painting your pallets or incorporating more sophisticated irrigation systems for convenience. Routine maintenance will ensure that your garden thrives for years to come.As a beginner, embrace the learning journey, and feel free to experiment as you refine your gardening practices. Your vertical garden can become a stunning feature in your home while providing fresh produce right at your fingertips.