How to create a sustainable vertical garden using repurposed plastic bottles and a drip irrigation system
Introduction
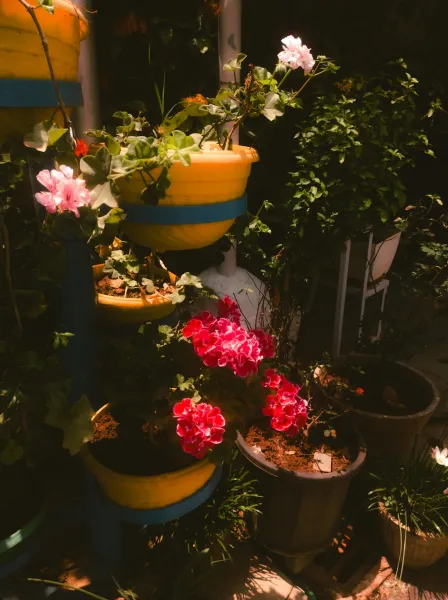
Creating a sustainable vertical garden using repurposed plastic bottles is not just an environmentally friendly project; it's also a rewarding endeavor that offers numerous benefits. Our planet is drowning in plastic waste, and finding innovative ways to use these materials can significantly reduce our ecological footprint. Vertical gardening allows you to make the most of limited space, making it ideal for urban dwellers or for those looking to add greenery to small patios or balconies. Not only does it enhance the aesthetic appeal of your living space, but it also provides fresh herbs, vegetables, and flowers, contributing to your health and well-being.
This project is perfect for beginners; it requires minimal skills but allows for creativity and personal expression. By constructing a vertical garden, you can cultivate your own food, reduce stress, and improve air quality in your surroundings. Additionally, integrating a drip irrigation system simplifies the watering process, ensuring your plants receive the right amount of moisture without wasting water. This guide will break down the project into manageable steps so that even DIY novices can succeed in creating their very own sustainable vertical garden.
Tools Needed
1. Utility Knife: Essential for cutting the plastic bottles to the required sizes. A sharp knife ensures clean cuts, making your bottles easier to work with.
2. Drill with Bits: To create holes for drainage and for anchoring the vertical garden. A drill allows for precision when making these holes, ensuring better plant health.
3. Scissors: Handy for trimming plastic, especially those areas that the utility knife can't easily reach. They provide more control for detailed work.
4. Ruler or Measuring Tape: To measure the dimensions of your bottles and ensure consistent spacing in the vertical garden setup. Accurate measurements lead to a more uniform and aesthetically pleasing design.
5. Marking Pen: Useful for marking cut lines and drill points on the bottles and support structures, reducing the chance of mistakes.
6. Tape or Adhesive: To secure connections between the bottles and other components. Strong adhesives will help maintain structural integrity as your vertical garden grows.
7. Level: Ensures that your vertical garden structure is straight and stable. Using a level prevents water from pooling and ensures uniform exposure to sunlight.
8. Gloves: Protects your hands from sharp edges and potential irritants in the plastic. Safety should be a priority during any DIY project.
Materials
1. Plastic Bottles (10-20): Depending on how extensive you want your garden to be, you can use half-liter or one-liter bottles, which are perfect for small plants and herbs.
2. Wooden Pallet or Frame (1): A used wooden pallet makes an excellent support structure. Alternatively, you can construct a frame using lumber.
3. Drip Irrigation Kit (1): This kit usually includes everything needed for a basic system, such as tubing, emitters, and connectors.
4. Potting Soil (1-2 bags, 8-10 quarts each): Use a quality potting soil to provide your plants with the nutrition they need for healthy growth.
5. Plants or Seeds (varied): Choose a mix of herbs, veggies, or flowers that thrive in your climate and will fit well in vertical spaces.
6. Fishing Line or Strong Wire (1 roll): Useful for creating additional support for the bottles, adding stability to your vertical garden.
7. Cover Cloth or Plastic sheeting (1-2 pieces): Acts as a protective barrier for the plants, especially if you’re setting up outdoors where weather could impact growth.
8. Liquid Fertilizer (1 bottle): Provides essential nutrients for your plants, especially during their growth phases when they require more nourishment.
9. Screen or Mesh (1-2 feet square): To cover the drainage holes in the bottom of the bottles to prevent soil from falling out while allowing excess water to escape.
10. Trellis or Supporting Stakes (optional): Additional support for climbing plants like tomatoes or cucumbers, which can benefit your vertical garden as they grow.
Steps to Create Your Vertical Garden
Step 1: Gather Your Materials and Tools
Before you begin your project, it's crucial to gather all your materials and tools in one place. This organization streamlines the process and makes it more enjoyable. Review the list of tools and materials needed and ensure you have everything on hand. Take the time to inspect your plastic bottles for any punctures, cracks, or damage. Rinsing and drying them thoroughly not only prepares them for planting but also helps eliminate any residual odors that could affect plant growth.
Tip: Separate your bottles by size. This can influence how you stagger them later in the vertical layout for aesthetics and practicality.
Step 2: Prepare the Plastic Bottles
Start by cutting the plastic bottles in half. Measure about 10 cm from the bottom of the bottle and mark it with your pen, then use your utility knife to cut along the line. Make sure you wear gloves during this process to avoid any cuts. Once cut, remove the labels and clean the bottles thoroughly to ensure no contaminants can affect your plants.
Tip: Consider drilling a few small holes in the bottom half of each bottle for drainage, promoting better water flow to avoid root rot.
Step 3: Assemble the Support Structure
If using a wooden pallet, lay it flat on the ground. If constructing a frame, measure and cut the wood accordingly, forming a sturdy rectangular shape. Secure the corners with tape or screws to ensure stability. The goal is to create a structure that can support the weight of the soil-filled bottles. If needed, using stakes or additional metal brackets can add extra support.
Safety Tip: When working with power tools, always wear eye protection and follow safety protocols to avoid injury.
Step 4: Attach the Bottles to the Structure
Lay your bottles on the support structure, ensuring to secure each half in place either using fishing line, wire, or any tough adhesive. You may opt for a staggered arrangement to enhance the visual aspect of the vertical garden. If attaching the bottles back-to-back, ensure they remain secure enough to handle environmental stress when filled.
Tip: Use a level after each addition to keep the setup uniform and visually appealing.
Step 5: Prepare and Fill Bottles with Soil
Once the bottles are secured, it’s time to fill them with potting soil. Leave about an inch of space from the top to prevent spillage during watering. For a great mix, consider adding some compost to enrich the soil and boost plant health.
Tip: Gently pack the soil to eliminate air pockets but don’t compact it too much, as roots need space to grow and expand.
Step 6: Plant Your Chosen Herbs, Vegetables, or Flowers
Now it’s time to plant! If you are using seeds, scatter them evenly and lightly cover with soil. For seedlings, carefully place them into the soil, ensuring they're not too deep. Consider the light requirements of each plant; place sun-loving plants at the top and shadier types at the bottom.
Tip: Group plants with similar watering needs together for the benefit of your drip irrigation system.
Step 7: Set Up the Drip Irrigation System
Following your kit's instructions, start setting up the drip irrigation system. Ensure that you run tubing from a reliable water source, and attach emitters for each bottle. Make sure the system allows water to flow efficiently into each bottle without leading to overflow.
Tip: Install a timer to automate watering. This ensures plants get adequate moisture during hot weather and reduces water waste.
Step 8: Water and Fertilize Your Garden
Once everything is set up, gently water your garden to ensure soil settles and there are no air pockets left. With the drip irrigation in place, ensure each outlet provides moisture. Apply liquid fertilizer according to the instructions on the package to support healthy growth.
Tip: Observe your plants for the first couple of weeks to monitor if they’re getting enough water. Adjust the emitter flow rates if needed.
Step 9: Maintenance and Observation
After planting your vertical garden, spend some time each week observing it. Check if the plants are growing well, but also inspect for any signs of diseases or pests. Regularly check that your drip irrigation system is functioning correctly and that all bottles have adequate drainage.
Tip: Rotate the position of your plants if possible to prevent uneven growth or sun exposure, ensuring all plants receive equal sunlight.
Step 10: Harvest and Enjoy
After a few weeks to months, depending upon growth rates, your plants will be ready to harvest! Depending on what you’ve chosen, you can enjoy fresh herbs and vegetables right from your balcony or patio garden. Regular harvesting encourages growth and delicious new flavors.
Tip: Document your gardening journey; take notes of what works and what doesn’t, and consider experimenting with new plants in the future.
Troubleshooting
Even the best-project setups can face common challenges. Here are five issues and their fixes:
1. Watering Problems: If some bottles are dry, adjust the drip emitter flow to ensure equal distribution. Higher elevation bottles may need more flow.
2. Pests or Diseases: Regularly inspect plants. Use organic pesticides or introduce beneficial insects like ladybugs to combat infestations naturally.
3. Soggy Soil: If the soil is consistently wet, check drainage holes and adjust the drip system. Consider reducing watering frequency or adding coarse material like perlite to the soil mix.
4. Plant Growth Issues: If some plants aren’t growing well, check for light exposure or overcrowding. Adjust plant spacing or retrain plants to utilize vertical growth techniques.
5. Bottle Stability: If bottles are unstable, reinforce with additional wires or brackets. Ensure they are secured directly to the support structure to minimize movement.
Conclusion
In this guide, we explored the exciting and sustainable project of creating a vertical garden using repurposed plastic bottles and a drip irrigation system. Not only does this project help reduce waste, but it also enhances your living space and can significantly improve your lifestyle by providing fresh produce and a tranquil green environment.
Remember, each vertical garden is unique, and you can customize it based on your preferences, space, and climate. Maintenance is key; observe your plants regularly, adjust as necessary, and continue experimenting with new varieties to keep your garden thriving. This DIY endeavor is a rewarding way to engage with nature and invest in a healthier, more sustainable lifestyle.