How to create a self-watering indoor herb garden using upcycled plastic bottles
Creating an indoor herb garden is a fulfilling and educational project that can bring life to your home and enhance your cooking. With the increasing awareness of sustainability, this DIY guide will help you turn plastic waste into a functional self-watering herb garden that can thrive indoors. Upcycling, in this case, not only reduces the need for new materials but also minimizes waste, making it an eco-friendly initiative.
Why This Project? Indoor gardening allows individuals to grow fresh herbs right in their kitchens or living rooms, providing convenience and encouraging healthy eating habits. Fresh herbs enhance the flavor of your dishes, reduce the need for processed flavor enhancers, and have potential health benefits. They can also improve air quality and bring a sense of nature indoors, which has been linked to reduced stress levels and improved creativity.
Benefits:
- Environmental Impact: This project repurposes plastic bottles, reducing landfill waste.
- Cost-Effectiveness: Growing your herbs indoors can reduce grocery bills.
- Quality Control: You will know exactly how your herbs have been grown, free from pesticides or chemicals.
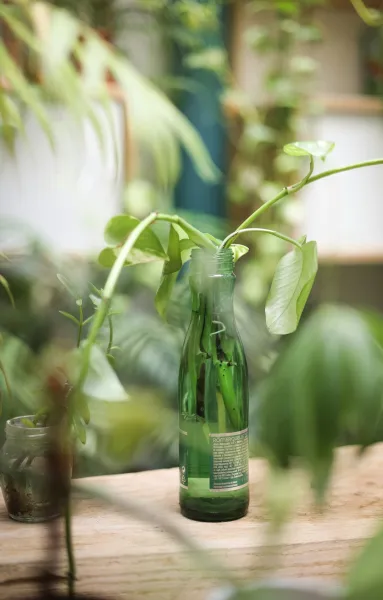
- Aesthetic Value: An herb garden adds beauty and greenery to your space.
---
Tools Needed
- Utility Knife or Scissors: For cutting the plastic bottles accurately and safely. A utility knife usually makes cleaner cuts, but scissors can be a safer option for beginners.
- Drill or Screwdriver: Essential for creating drainage holes in the bottle caps. If you don’t have a drill, a screwdriver can work with enough pressure, though you may need to make a pilot hole first.
- Measuring Tape or Ruler: To accurately measure the cut heights and dimensions. This ensures that your herb plants can fit and grow comfortably within the containers.
- Marker or Pen: Useful for marking measurement lines on the bottles for precise cutting. This minimizes mistakes and enhances the aesthetic look of your containers.
- Soil Scoop or Small Trowel: Handy for filling your bottles with potting soil and moving it around, especially tricky in narrow openings.
- Watering Can or Jug: For filling the bottom reservoir with water initially. It should have a long spout for easy access to the lower section of your self-watering system.
- Safety Goggles: A critical safety item that protects your eyes while cutting and drilling. Precaution is better than risk, especially with sharp tools.
Materials
- Plastic Bottles (6-8 bottles): 1.5-liter or 2-liter soda or water bottles work best. Ensure they have been cleaned and dried thoroughly.
- Potting Soil (4-6 cups): A lightweight potting mix designed for container gardening is ideal. This ensures good drainage and aeration, which is crucial for plant health.
- Rope or Cotton String (2-3 feet): This will act as a wick, pulling water from the reservoir up to the soil above. Natural fibers work best because they absorb water effectively.
- Herb Seeds or Seedlings (5-10 packs): Choose your favorites such as basil, mint, parsley, or cilantro based on your cooking needs.
- Scissors or Garden Snips: Ensure you have a pair for trimming any seedlings and managing growth.
- Small Stones or Gravel (1 cup): Helps with drainage at the bottom of the bottles and prevents the soil from becoming overly saturated.
- Masking Tape or Duct Tape: Useful for securing parts of the system together once assembled.
- Organic Fertilizer (optional): Consider this for enhanced plant health; it can be added into your soil mix.
Step-by-Step Guide
### Step 1: Gather Your Materials and Tools
Start by gathering all the required materials and tools in one accessible area. This ensures a smooth workflow and eliminates interruptions. Take a moment to check on the cleanliness of your plastic bottles. If they are soiled, wash them with soap and water, rinse thoroughly, and set them aside to dry. Having everything on hand will also make it easier to visualize your steps and maintain organization.
### Step 2: Prepare Your Plastic Bottles
Choose how many herb plants you would like to grow and take the corresponding number of plastic bottles. Using the measuring tape, determine where you will cut the bottles in half (usually about 5-7 inches from the bottom). Mark this height with your marker. Carefully use your utility knife or scissors to cut along the marked line. Tip: Go slowly to ensure clean cuts, and be cautious of the sharp edges that might form. Wear safety goggles if necessary.
### Step 3: Drill Holes in the Bottle Caps
Next, you will need to create drainage holes in the bottle caps. This is essential for allowing the wicking mechanism to work effectively. Using a drill, create 2-3 small holes (about 1/4 inch in diameter) in each cap. If you don't have a drill, use a screwdriver to puncture small holes directly into the caps. These holes will allow for air exchange and help the wick draw moisture up to the soil. Safety Tip: Be cautious as the drill can slip if too much pressure is applied.
### Step 4: Create the Wick
Take your cotton string or rope and cut two pieces about 12 inches long. Each piece will serve as a wick to draw water into your plants. Thread one end of each string through one of the drainage holes in the bottle caps and pull it through until you have several inches hanging below. This length ensures sufficient contact with the water in the bottle’s bottom and the soil in the top section.
### Step 5: Assemble the Bottles
Now it's time to assemble your self-watering units. Place the top half of the plastic bottles upside down into the bottom halves. The cap should initially sit slightly above the bottom half. Secure them in place with masking tape or duct tape around the rim if necessary. This ensures stability and prevents any misalignment. Tip: Make adjustments so the holes align well with the wick for optimal moisture transfer.
### Step 6: Add Gravel for Drainage
To prevent your soil from becoming waterlogged, add a layer of small stones or gravel at the bottom half of the bottle (first bottle section) about 1-2 inches deep. This provides good drainage and helps maintain a healthy root system, crucial for optimum plant health. Soil compacted too tightly can inhibit growth and water absorption.
### Step 7: Fill with Potting Soil
After adding gravel, carefully fill the top bottle sections with potting soil, leaving some space at the top to account for your future seedlings or seeds. Use your soil scoop or small trowel to move soil efficiently into the narrow neck of the bottle. Gently compact the soil without crushing it to create a robust structure for your herbs. Tip: If you overfill, you might risk soil runoff every time you water.
### Step 8: Plant Your Herbs
Time to get your hands dirty! Depending on whether you’re using seeds or seedlings, the planting process will vary slightly.
- For Seeds: Sow them according to the seed packet instructions—usually 2-3 seeds per bottle, and cover them lightly with a thin layer of soil.
- For Seedlings: Make a small indentation in the potting soil and transplant one seedling per bottle after removing from its previous container.
### Step 9: Water and Maintain
Place your assembled self-watering herb garden in a location with ample sunlight (at least 6 hours of sunlight per day). Fill the bottom reservoir with water through the cap using your watering can, watching as it fills the lower section. If properly assembled, the wicks will draw moisture into the soil above. Keep an eye on the water level initially and refill as needed. Tip: Because this is a self-watering system, you might only need to water occasionally once established.
### Step 10: Monitor Growth and Care
As your herbs start to grow, regularly check for pests or diseases. Prune or harvest your herbs to promote bushier growth, and don’t forget to rotate your plants if they're leaning toward the sunlight to ensure even growth. Consider supplementary feeding with organic fertilizer every four to six weeks to boost vitality and yield. Tip: Grow different herbs according to their light needs, allowing you to experiment in your indoor garden!
---
Troubleshooting
Despite the ease of this project, problems can arise. Here are five common issues and their fixes:
1. Insufficient Water Uptake:
- Fix: Check the wicking system. Ensure the wicks are properly threaded and in contact with the water. You might need to adjust the length or position.
- Fix: Roots may be drowning. Ensure the gravel layer is adequate, and consider reducing water intake for a few days to allow the soil to dry.
- Fix: Check the lighting conditions and ensure seeds are kept moist but not soggy. Some seeds may require more warmth or light to germinate effectively.
- Fix: Rotate the bottles regularly to promote even growth. If possible, move them to ensure they get equal sunlight if some areas receive more light than others.
- Fix: This can occur due to stagnant water. Once every few weeks, clean the reservoir and replace any standing water. Rinse thoroughly before refilling.
Conclusion
Creating a self-watering indoor herb garden from upcycled plastic bottles is not just a creative way to tackle waste but also a practical solution to enjoying fresh flavors at home. This project is easily attainable for beginners and encourages continuous engagement with the gardening process. Try experimenting with different herbs or even adding an aesthetic touch by painting your bottles.
Maintenance requires minimal effort, allowing you to enjoy fresh herbs with little upkeep while fostering a greater appreciation for sustainable living. Revamp your garden over time by integrating different techniques or expanding into vegetable gardening using similar methods.
Have fun with your DIY project, and remember—the experiences, knowledge, and fresh herbs you cultivate are all part of the journey towards becoming a more sustainable and resourceful individual!