Introduction
Create An Indoor Vertical Garden Using Repurposed Shipping Pallets
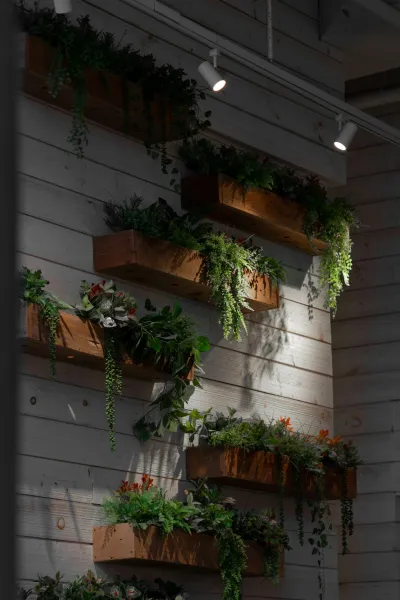
indoor vertical garden with shipping pallets is a Beginner-friendly . With just a bit of creativity, some basic tools, and a commitment to following our step-by-step guide, you’ll have your own vertical garden thriving in no time. Let’s delve into the world of indoor gardening and bring some green into your living space!
Tools
- Needed
- Screwdriver (or Drill): A screwdriver or drill makes it easier to assemble and secure the pallet and any additional components like hooks or shelves.Saw: If you need to cut the pallet to size or remove any unwanted boards, a saw is essential. A hand saw or a power saw will work, but a power saw will save time.
- Sandpaper: To ensure safety and aesthetics, sandpaper will help smooth out any sharp edges on the pallet.
- Staple Gun: This tool is useful for securing landscaping fabric to the pallet, preventing soil from falling through while allowing for water drainage
- Paintbrush (or Roller): If you wish to paint or stain the pallet to match your décor, a paintbrush or roller is needed for even application.
- Garden Trowel: This small spade is perfect for planting and moving soil within the tighter spaces of your vertical garden.
- Watering Can or Hose: A reliable way to keep your plants hydrated, especially in a vertical setup where other watering methods may be cumbersome.
- Gloves: Gardening gloves will protect your hands while working with soil and sharp items, ensuring your comfort and safety throughout the .
Materials
- Repurposed Shipping Pallet: 1 (make sure it's in good condition without wooden planks that are too damaged)Potting
- Soil: approximately 5-10 quarts (enough to fill the pallet planters)
- Landscaping Fabric: 1 yard (for lining the pallet)
- Nails or Screws: 20-30 (for securing the pallet’s structure) Wood Screws (for securing brackets to the wall, if needed): 10-15 Brackets or L-brackets: 2-4 (to stabilize and secure the pallet to the wall)
- Selection of Plants: 5-10 (herbs, succulents, or small vegetables that thrive in vertical gardens)
- Wood Stain or Paint: 1 pint (optional, for sealing and beautifying your pallet)
- Hammer: 1 (for driving nails into the wood)
- Plastic Plant Pots: 5-10 (small pots to aid in transferring your chosen plants into the pallet)Steps to Create Your Indoor Vertical Garden#
Step 1:
Choose Your PalletThe first step in your indoor vertical garden is to acquire a shipping pallet. Look for pallets that are Wellucted, with no missing boards or visible damage. It's best to choose pallets that are marked with "HT" (Heatd) to ensure they are free from harmful chemicals. Check local warehouses, gardening centers, or online marketplaces for available pallets. When choosing, keep in mind the size of your indoor space and how much wall area you can realistically dedicate to this .
Tip: Clean your pallet thoroughly with soap and water to remove any dirt, potential chemical residues, or pests. Allow it to dry completely before ceeding.#
Step 2:
Prepare Your PalletPreparation is key to ensuring the stability and longevity of your vertical garden. Start by sanding down any rough surfaces and edges, which can be a safety hazard. You can use sandpaper or a power sander for this task. If you wish to paint or stain your pallet, now is the time to do so. Use a paintbrush or roller for an even coat, and ensure to let it dry thoroughly afterward.Safety
Tip: Wear a dust mask while sanding to prevent inhaling wood dust, and use gloves to protect your hands during painting or staining.#
Step 3:
Line the PalletOnce your pallet is cleaned, sanded, and painted (if desired), it’s time to line it with landscaping fabric. Cut a piece of fabric that covers the back, bottom, and sides of the pallet. Secure the fabric using a staple gun to ensure that it stays in place. This will help prevent soil from spilling out and keep your plants healthy.
Tip: Make sure to leave some fabric flaps at the front to allow for plant growth and to easily access the soil when planting and watering.#
Step 4:
Position the PalletFind a suitable location in your home for your vertical garden. Ideal spots include sunny walls or areas close to windows for adequate sunlight. If your desired location is Walld, ensure it has the structural support to hold the weight of the pallet and the soil when fully planted. You might need to use wall brackets or screws to secure it properly to the wall.
Tip: Consider using a level to ensure your pallet hangs straight on the wall, as an uneven garden can be both unsightly and detrimental to plant growth.#
Step 5:
Fill with Potting SoilNow it's time to add potting soil to your lined pallet. Carefully fill the sections of the pallet with the soil, ensuring that you leave enough room for your plants. If your pallet has multiple layers or sections, fill each section appropriately, compacting the soil gently to prevent it from shifting.
Tip: Use a garden trowel to pack the soil but avoid overpacking, as this can impede drainage and restrict roots from growing properly.#
Step 6:
Planting Your PlantsSelect a variety of plants that thrive in indoor, vertical environments. Herbs such as basil, parsley, and mint are excellent choices, as are small vegetables like cherry tomatoes and peppers. You can also consider succulents or other small indoor plants if you prefer a Non garden. Carefully remove the plants from their pots and break up any tightly bound roots before placing them into the soil.
Tip: When planting, position taller plants towards the top of the pallet and shorter ones towards the bottom to create a beautiful tiered effect, taking advantage of available light.#
Step 7:
Water ThoroughlyAfter planting, water your vertical garden thoroughly. Since it’s a vertical setup, water may run through quickly, so take care to adequately soak the soil without Overting. Use a watering can with a spout that can reach the back areas of the pallet, or a hose if you have ample access.
Tip: Look for signs of insufficient water, such as drooping leaves, and adjust your watering schedule accordingly. Remember to check soil moisture regularly.#
Step 8:
Maintenance and CareYour vertical garden will require regular maintenance to thrive. This includes watering, checking for pests, and trimming plants as needed. Pay attention to plant growth and adjust light exposure as necessary; some plants may thrive in more light while others prefer partial shade. Ensure good air circulation by not overcrowding your plants.
Tip: Document the care you give your plants using a gardening journal or app, noting watering schedules, growth patterns, and any problems that arise for better future planning.#
Step 9:
2026 •