Introduction
Create An Indoor Vertical Garden Using Repurposed Pallets And Led Grow Lights
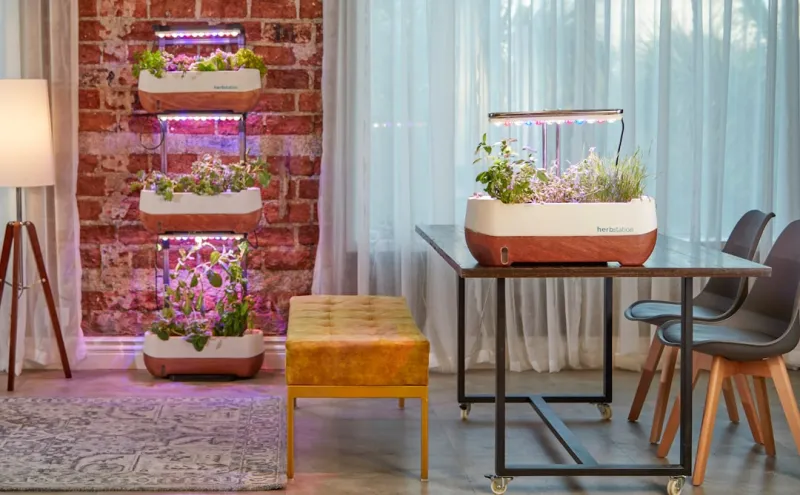
indoor vertical garden is not just a trend; it’s a practical solution for anyone looking to bring a bit of greenery into their space. In urban environments where outdoor space is limited, or for those who simply love the aesthetic and benefits of houseplants, vertical gardens serve as a perfect commise. Repurposing pallets adds an eco-friendly element to your , letting you upcycle
materials
while crafting a serene living environment. Adding LED grow lights enhances this immensely by ensuring your plants receive the light they need to thrive, all while conserving energy.Why This ?Establishing an indoor vertical garden can be both a fulfilling and restorative hobby. The myriad of plants you can grow—from herbs and succulents to leafy greens and flowers—means you can customize this garden to fit your lifestyle and aesthetic preferences.
- Benefits include:Space-Saving: Vertical gardens maximize growth areas, especially in small spaces. They utilize vertical space efficiently.Air
- Quality improvement: Plants have an innate ability to purify the air, reducing toxins and adding oxygen.
- Enhanced Aesthetics: A vertical garden acts as a living piece of art that can make any dull wall vibrant and alive. Mental Well-Being: Gardening has ven mental health benefits, offering stress relief and satisfaction. Fresh Herbs/Vegetables: Growing your own herbs and vegetables saves money and motes healthy eating habits.Skill
- Level: This DIY is friendly for all skill levels, from beginners to seasoned gardeners. With the right tools,
materials
, and a bit of enthusiasm, you'll find this both intuitive and rewarding.
Tools Needed
- Screwdriver: Essential for assembling the pallets and securing components. A power screwdriver can speed up the process.Saw: A hand saw or power saw will help you cut the pallets to the desired size if needed. The right cut will ensure your vertical garden fits well in your indoor space.Drill: For drilling holes for drainage and securing shelves in the pallets. A drill helps create an appropriate environment for your plants.Measuring
- Tape: To measure dimensions accurately before cutting wood and placing it in your indoor area. This helps avoid unnecessary errors and waste.Sandpaper or
- Sander: To smooth out rough edges of the wood, preventing splinters and ensuring it’s safe to handle.Level: Ensures that your vertical garden is hanging straight on your wall. This will also ensure that water doesn’t pool in one area.Safety
- Goggles: A necessity when cutting or drilling to protect your eyes from debris.Work
- Gloves: protect your hands while handling wood and soil, and keep your grip secure while working.
Materials
Wooden pallets (1-2): Ensure they are clean and untreated if possible; about 4x4 feet is a good starting size.Potting soil (5-10 gallons): A good quality potting mix will support your plants' growth and health.Plants or seeds (various): Depending on your preference; examples include herbs like basil and mint, succulents, or spinach.Wooden brackets (6-8): For securing the pallets to the wall safely. Make sure they are sturdy.LED grow lights (1-2 sets): These will provide adequate lighting for your plants; choose those with adjustable settings.Planters or felt pockets (5-10): These will hold the soil and plants. Felt pockets allow for good drainage.Nails or screws (1-2 pounds): Depending on how you choose to secure the pallets together or to the wall.Watering can or spray bottle: To keep your plants hydrated without Overng.Plastic liners (optional): To prevent soil from falling through the pallet during watering.Zip ties (optional): For securing plant pockets or other
materials
as needed.
Step 1:
Choose Your LocationBefore jumping into the assembly of your vertical garden, take time to choose the perfect location. Look for a spot in your home that gets adequate natural light or is suitable for LED grow light placement. Consider areas near a wall that can support the weight of the pallet garden.
Tip: Caution is crucial—avoid areas that may experience heavy foot traffic to reduce the risk of knocking over your garden.
Step 2:
Prepare the PalletIf you are using old pallets, ensure they are clean. Use sandpaper to smooth rough edges to avoid splinters. You may wish to disassemble them, but if they’re in good condition, you can leave them as they are.
Safety: When handling pallets, always wear gloves to prevent injuries from nails or wood splinters.
Step 3:
Seal the Wood (Optional)If your pallet isn’t treated, consider sealing it with a non-toxic wood stain or sealer to protect against moisture and soil degradation.
Tip: Allow the sealer to dry completely as proper manufacturer instructions before you ceed. This step longs the longevity of your garden.
Step 4:
Assemble the Garden FrameUsing your screwdriver or drill, attach brackets to the pallet to reinforce it. Attach additional pallets if you’d like to create multiple layers.
Tip: Ensure everything is level before anchoring to the wall; use a level to guarantee that what you’re creating is straight.
Step 5:
Add Drainage and LinerAt this stage, nap or cut the plastic liner according to the openings of the pallet. A Wellated planter helps maintain necessary moisture levels without pooling.
Tip: Use a staple gun to secure the plastic liner if needed, ensuring there are still airflow channels.
Step 6:
Fill with Potting MixFill each section of the pallet with potting soil, making sure to leave some room at the top. Ensure everything is packed firmly but not overly compressed.
Tip: Mix some Slowe fertilizer into the soil for better nutrient availability as your plants grow.
Step 7:
Plant Your SelectionNow it's time to plant! Whether you’re starting with seeds or potted plants, lay them out according to your design preference.
Tip: Consider placing taller plants at the bottom and shorter ones at the top to maintain an appealing visual aspect and ensure adequate sunlight exposure.
Step 8:
Fix the Garden to the WallSecure your vertical garden to the wall using screws or bolts through the brackets. Make sure it’s anchored well and doesn’t wobble.
Safety: Use wall anchors if you’re securing into drywall; this will provide stability for your garden’s weight.
Step 9:
Install LED Grow LightsOnce your garden is secured, hang LED grow lights at the appropriate angle. Make sure they can be adjusted depending on the height of your plants as they grow.
Tip: Set a timer for your grow lights to keep a consistent lighting schedule for your plants.
Step 10:
Water and Monitor GrowthWater your plants lightly while checking the drainage. Regularly monitor soil moisture and the growth patterns of your plants.
Tip: Overwatering is one of the most common mistakes in gardening; only water when the soil feels dry about an inch below the surface.
2026 •