Introduction
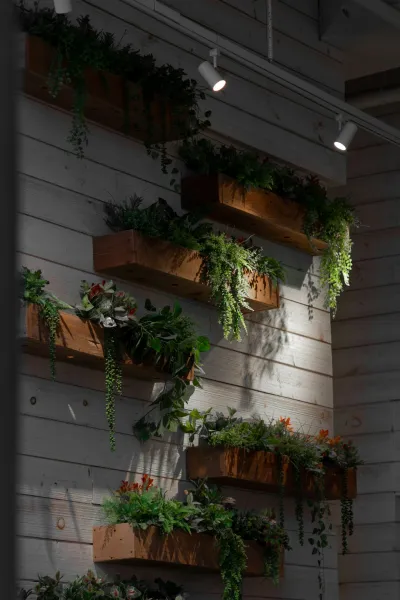
Create An Indoor Vertical Garden Using Reclaimed Pallets And Led Grow Lights
Create An Indoor Vertical Garden Using Reclaimed Pallets And Led Grow Lightsbody.navh1.rating.hero-img.share.btnCreate An Indoor Vertical Garden Using Reclaimed Pallets And Led Grow Lightsto both woodworking and gardening for novices.
Tools Needed
Before diving into the , gather the necessary tools. Here’s what you’ll need:Drill/Driver: Essential for making holes and driving screws into the pallets and other
materials
- Saw (Hand saw or Power saw): Helps cut the pallets and wood to the required dimensions.
- Measuring Tape: Necessary for measuring dimensions to ensure your garden fits perfectly in your selected space.
- Screwdriver: For tightening screws, especially in places where your drill might not fit.
- Level: Ensures your vertical garden hangs straight, preventing water from pooling in uneven spots.
- Sandpaper: Preps the surface of your pallets, removing splinters and rough edges for safety and aesthetics
- Paintbrush and Wood Stain: Optional, but a great way to add a personal touch; stains can also provide a protective finish to your wood.
- Safety goggles: Important for eye protection during cutting and drilling.
Materials
Gather the following
materials
to get started:2 Reclaimed
- Pallets: Ensure they are clean and free of contaminants.1 Sheet of Plastic Garden Fabric (3 ft x 4 ft): For lining the back of your vertical garden to prevent soil spillage. Potting Soil (3-4 bags): Choose a quality potting mix suitable for the plants you wish to grow. Plants (4-6 varieties): Consider easy-to-grow options such as herbs (basil, mint), succulents, or lettuce. Wood Screws (1.25” or 2” screws, 30 pieces): To attach the pallets securely in place. LED Grow Lights (2 strips or bulbs): Depending on the size of your setup; they will provide adequate lighting for photosynthesis.
- Power Strip: For convenient electrical access for your LED lights. Plant Containers (4-6 small pots): Ensure they have drainage holes.
- Cloth or Gardening Gloves: To protect your hands during assembly and handling soil and plants.
- Watering Can or Spray Bottle: For watering your plants.Steps to Create Your Indoor Vertical Garden
Step 1:
Prepare the
- Pallets
What: First, you'll need to reclaim and ready the pallets for use in your garden.
How: Inspect your pallets for any damage or rot before use. If clean and sturdy, use sandpaper to smooth out rough surfaces.
Tips: Wear safety goggles to shield your eyes from dust and splinters. If you need to break apart a pallet for easier use, consider using a crowbar to pry it apart gently.
Safety: Check the pallets for any markings indicating they have been treated with chemicals; look for the HT (Heat Treated) marking to ensure they are safe for growing plants.
Step 2:
Cut the
- Pallets
What: Depending on your space, you may need to modify the pallets.
How: Using your saw, cut the pallets down to size if necessary. Standard pallet size is about 48 inches by 40 inches, but adjust this to fit your wall space or desired dimensions for the vertical garden.
Tips: Ensure you measure twice before you cut to avoid mistakes. Also, consider cutting one pallet in half to create a tiered effect for your garden.
Safety: Always cut away from yourself and ensure your workspace is stable. Wearing gloves during the cutting process is recommended to protect your hands.
Step 3:
Assemble the
- Structure
What: Join your pallets to create the vertical structure.
How: Use your drill to attach two pallets vertically. Fasten secure screws through the lower pallet into the upper pallet. For added support, attach corner braces or L-brackets.
Tips: Use a level to ensure your pallets are straight while assembling. Depending on the design, you might want to keep some space in between pallets for better air circulation for the plants.
Safety: Ensure the drill is switched off when not in use and insert the battery only when ready.
Step 4:
Line the
- Back with Plastic Garden Fabric
What: Prevent soil from spilling out of your garden.
How: Cut the plastic garden fabric to size. Secure it to the back of the pallets using a staple gun, making sure it fits snugly.
Tips: Make sure the fabric overlaps the edges slightly; this will help contain soil and hold moisture.
Safety: Be cautious with the staple gun; keep fingers clear of the staple entry point.
Step 5:
Prepare
- Plant Containers
What: Get the pots ready to hold your plants.
How: Fill each of your pots with a potting mix, leaving about an inch of space at the top. Ensure that the soil is packed lightly but not too tight.
Tips: Water the soil lightly before placing plants to remove air pockets; this will help with drainage.
Safety: Always use gloves while handling soil and plants to avoid any irritation from soil or fertilizer.
Step 6:
Position the
- Plants
What: Plant your selected greenery into the pots.
How: Gently remove plants from their nursery containers, loosen any tightly bound roots, and place them into the potting soil. Fill in any gaps with more soil and ensure that plants are planted at the same depth they were in their nursery containers.
Tips: Choose not only plants with similar light/water requirements but also consider coloration and texture for a cohesive look.
Safety: Monitor any sharp tools during this phase; keep them away from the work area to avoid accidents.
Step 7:
Mount the
- Garden to the Wall
What: Secure the vertical garden to your wall or other surfaces.
How: Use heavy-duty screws to fix your vertical garden securely into the wall. Take care to attach it to wall studs for stability, or use wall anchors if attaching to drywall.
Tips: Consider placing a shadow box or shelf beneath your garden to catch excess water.
Safety: Be cautious when using ladders to reach higher placements. Ensure the area is clear of any obstructions.
Step 8:
Install
- LED Grow Lights
What: provide the necessary light for your indoor garden.
How: Position your LED grow lights above your vertical garden, ensuring they are at an adequate distance based on the manufacturer's instruction to avoid burning the leaves.
Tips: Invest in a timer for your lights so they imitate natural daylight—most plants require 12-16 hours of light daily.
Safety: Ensure that electrical wires for the lights are secured away from any water placement to prevent hazards.
Step 9:
Water and
- Maintain Regularly
What: Establish a watering and maintenance schedule for your plants.
How: Regularly check the moisture levels in the soil; if it feels dry, give it a light watering. Watch for signs of pests or decay, and remove any unhealthy foliage mptly.
Tips: Consider using a spray bottle for easy watering in tight spaces, and keep a journal to note watering and growth patterns.
Safety: Always unplug lights before watering to prevent electrical hazards.
Step 10:
Enjoy
- Your Vertical Garden
What: Take the time to appreciate your creation!
How: Spend time in front of your new indoor garden, watering, pruning, or even harvesting some fresh herbs for cooking.
Tips: Engage your family or friends and share your gardening experiences, or even host a small gathering to show off your handiwork.
Safety: Enjoy the without rush; working too quickly increases the risk of mistakes or injuries.
2026 •