How to create an indoor hydroponic herb garden using repurposed glass jars
Introduction
Creating an indoor hydroponic herb garden using repurposed glass jars is an excellent project for both novice and experienced gardening enthusiasts alike. Hydroponics is a method of growing plants without soil, relying instead on nutrient-rich water solutions. This technique offers a variety of benefits that can enhance your gardening experience, and what better way to start than by using materials you already have at home? Transitioning to hydroponics not only conserves space but also minimizes mess, making it ideal for urban living or those who may not have access to outdoor gardening space.
This project allows you to grow fresh herbs right in your kitchen, providing an aromatic experience and instant access to ingredients that can elevate your meals. With herbs such as basil, mint, or cilantro at your fingertips, you'll find that your culinary creations will be tastier and healthier. Additionally, you’ll be helping the environment by repurposing glass jars that might otherwise be discarded. This DIY hydroponic garden is low-cost, requires minimal skill, and can stimulate a deeper appreciation for the food you consume. Plus, nurturing your plants indoors can be incredibly fulfilling, as you witness the process of growth.
In this guide, we will take you through each step of the process, detailed enough for beginners to follow. You'll learn the necessary tools, materials, and techniques you need to embark on this rewarding garden project.
---
Tools Needed
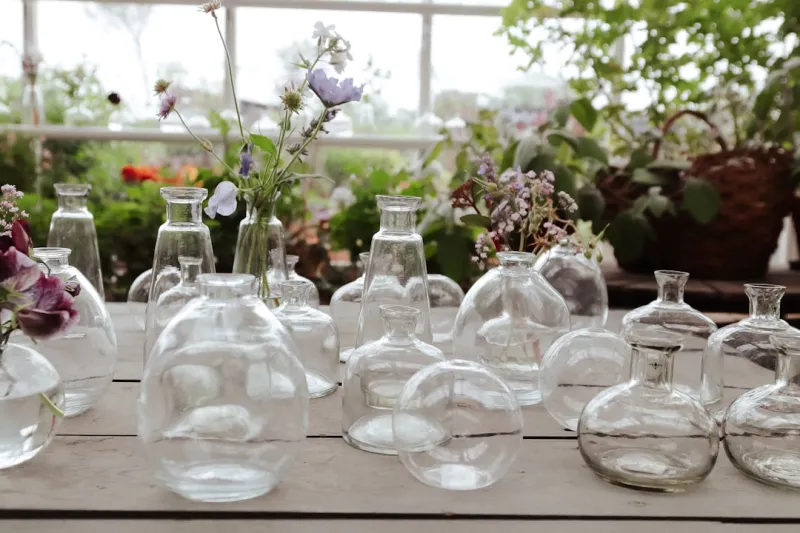
- Glass Jar(s): The main component of this project, they will house your plants and nutrient solution. A variety of shapes and sizes can be used, like mason jars, coffee jars, or even old jam jars.
- Drill with Small Bit: Essential for creating holes in the lid of your jars to hold the net pots, which will contain your plants. A drill will provide the accuracy needed for this task.
- Net Pots: These are used to hold the plants while allowing the roots to absorb nutrients from the water. Their mesh design ensures good airflow and drainage.
- Growing Medium (e.g., clay pellets, rock wool): Provides support for your plants while allowing water to flow through freely. A good medium also fosters a healthy root environment.
- Hydroponic Nutrient Solution: This liquid is vital for the growth of your herbs as it contains essential macro and micronutrients. It generally comes in a concentrated form, which you will dilute in water.
- Water: Clean, distilled, or dechlorinated water is necessary for your hydroponic system, as it serves as the base for your nutrient solution.
- Measuring Cup: To correctly mix your nutrient solution. Precision is crucial in hydroponics; too much or too little nutrients can negatively impact your plants.
- pH Testing Kit: This kit allows you to monitor the pH levels of your water solution. Plants typically thrive in a pH range between 5.5 and 6.5, and maintaining this range is crucial for nutrient absorption.
Materials
- Glass Jars: 3-5 jars of varying sizes, depending on the number of herbs you want to plant.
- Drill Bits: 2-3 bits might be required if you need to adjust sizes based on the net pots.
- Net Pots: 3-5 pots, corresponding to the number of jars you are creating.
- Growing Medium: 1-2 bags (at least 2 liters) of your chosen medium like clay pellets or rock wool.
- Hydroponic Nutrient Solution: 1 bottle (follow the manufacturer's instructions for dilution).
- Water: About 5-7 liters for the initial setup and regular top-ups.
- Measuring Cup: 1 cup for mixing the nutrient solution.
- pH Testing Kit: 1 kit (multiple strips or a digital meter can be used).
- Labeling Stickers or Tape: To mark different jars with the name of herbs being grown.
- Scissors: For cutting any existing root systems from the net pots or trimming your herbs.
Step 1: Gather All Your Materials and Tools
What: Before you start creating your hydroponic garden, gather all required materials and tools at a designated workspace.
How: Clear a flat surface, such as a kitchen table or workbench, to give you ample room to work. Ensure that your workspace is well-lit and has easy access to water and electricity (for your drill).
Tips: Organization saves time. Lay out your tools logically, starting with those you will need for the initial phase of the project, like your jars and drilling tools.
Safety: When working with a drill, wear protective eyewear to shield your eyes from small shards of glass that might fly. Make sure to position the jar securely before drilling.
---
Step 2: Prepare the Glass Jars
What: Clean the glass jars thoroughly to remove any residues or contaminants.
How: Use soapy water to rinse out the jars, followed by a rinse with clean water. Ensure that there are no stickers or glue residues on the glass that can interfere with light penetration.
Tips: If you want to get eco-friendly, soak the jars in warm, soapy water to loosen any labels—this makes it easier to remove them without damaging the glass surface.
Safety: Handle glass jars with care to avoid cuts. If a jar shatters while cleaning, carefully clean the area and dispose of the shards properly.
---
Step 3: Drill Holes in the Jar Lids
What: The next step is to create holes in the lids of your jars to fit the net pots securely.
How: Using a drill and a drill bit suitable for glass (typically, a tile or glass bit), carefully drill holes in the center of each jar lid. The diameter should be just slightly smaller than the net pots to ensure they fit snugly.
Tips: Start the drill at a slow speed, applying gentle pressure. As you drill into the metal cap, make sure to use a steady hand to avoid cracking the lid. Consider wearing gloves for additional grip.
Safety: Always ensure the drill is unplugged when changing bits or handling it. Use clamps or a towel to secure the jar lid to prevent it from spinning while drilling.
---
Step 4: Insert Net Pots and Growing Medium
What: Place the net pots in the drilled holes and fill them with your chosen growing medium.
How: After confirming that the net pots fit snugly, take your chosen growing medium and fill each pot approximately 2/3 full. This medium will support the plant roots while allowing for proper drainage.
Tips: If using rock wool, ensure it's pre-soaked as per the instructions on the package. For clay pellets, rinsing before use can help remove excess dust that may affect water quality.
Safety: Work with care when handling the medium to avoid spilling, which can create a slippery work surface.
---
Step 5: Select and Plant Your Herbs
What: Choose the herbs you want to grow and prepare them for planting in the net pots.
How: You can propagate herbs from seeds, starter plants, or cuttings. If using seeds, follow the instructions on the seed packet for planting depth. If you're using seedlings or cuttings, ensure they have enough root structure to settle into the medium.
Tips: Favorites for beginners include basil, mint, and parsley due to their hardiness and rapid growth. Consider labeling each jar with the herb name for easy identification.
Safety: When handling any plants, ensure you wash your hands afterward, especially if you were handling roots or soil media.
---
Step 6: Mix Your Hydroponic Nutrient Solution
What: Prepare a nutrient-rich solution for your herbs.
How: In a clean measuring cup, measure out the appropriate amount of water and nutrient concentrate according to the instructions on the nutrient bottle. Mix them thoroughly, ensuring even distribution.
Tips: It’s often best to start with a lower concentration of nutrients and gradually increase as your plants grow. Keeping a log can help you monitor what has worked best for your plants.
Safety: Always read safety labels on nutrient solutions; while they are beneficial for plants, they can be harmful if ingested.
---
Step 7: Fill the Glass Jars with Nutrient Solution
What: Now it’s time to fill your jars with the nutrient solution.
How: Pour the prepared nutrient solution into each jar until it reaches just below the net pot. Ensure the bottom of the net pot is submerged to allow the roots access to the nutrients.
Tips: Be careful not to overfill, as too much water can lead to algae growth or root rot. Regularly check the water level, topping up as necessary.
Safety: If the nutrients spill, clean it immediately to prevent any unintentional slipping hazards.
---
Step 8: Place Your Hydroponic Herb Garden in a Suitable Location
What: Find the ideal spot for your indoor hydroponic garden.
How: Herbs typically love bright, indirect sunlight. A location like a kitchen windowsill can provide the necessary light. Rotate jars occasionally to ensure all plants receive equal sunlight.
Tips: If natural light is limited, consider using LED grow lights to provide adequate lighting. Keep the lights on for about 12-16 hours daily.
Safety: Be cautious when placing your jars too close to heaters or air conditioning vents, as drastic temperature changes can stress plants.
---
Step 9: Monitor and Maintain Your Hydroponic Garden
What: Regular maintenance is key to a thriving hydroponic herb garden.
How: Check the water level and nutrient concentration every week. Remove any dead leaves and ensure the jars are clean and algae-free. If necessary, replace the nutrient solution every two to three weeks.
Tips: Keep a journal of your garden’s performance. Note any changes in growth, the condition of the leaves, and any pest sightings. This will help ensure a sustainable growing practice.
Safety: If you notice mold or other contaminants, act immediately to clean the jar and replace the water solution to prevent it from affecting healthy plants.
---
Troubleshooting
1. Yellowing Leaves: This can be a sign of overwatering or nutrient deficiencies.
- Fix: Check your nutrient solution and adjust its concentration. Allow for better drainage by ensuring that your growing medium isn’t overly saturated.
- Fix: Ensure your plants are receiving adequate light; they may need 12-16 hours per day. Additionally, checking the nutrient balance in your solution can help to spur growth.
- Fix: Reduce the water level in your jars and ensure that the net pot isn’t sitting too deep in the nutrient solution. You may also need to trim off any rotten roots.
- Fix: If you see pests, treat them using natural insecticidal soap. For algae, moving jars to a less bright location or using opaque jars can help.
- Fix: Adjust the amount of nutrient solution weekly, and consider using pH testers to ensure your solution is within the ideal range (5.5 to 6.5).
Conclusion
Creating an indoor hydroponic herb garden using repurposed glass jars is an incredible way to grow fresh herbs right in your home. This project not only allows you to utilize materials that would typically go to waste but also gives you the satisfaction of cultivating your herbs. The benefits of hydroponics include reduced water use, quicker growth rates, and independence from the outdoors. With patience and care, you can enjoy a thriving indoor garden ripe with fresh herbs.
As you become more comfortable with the hydroponic system, you may want to explore variations, such as expanding to more jars or experimenting with different herbs. Regular maintenance, diligent observation, and the willingness to adapt are crucial to your indoor garden's success. For advanced growers, consider integrating automation with smart sensors for watering and nutrient monitoring.
Remember, patience is key; watching your plants grow is not only rewarding but a continuous learning experience. Enjoy the journey, and happy gardening!