Introduction
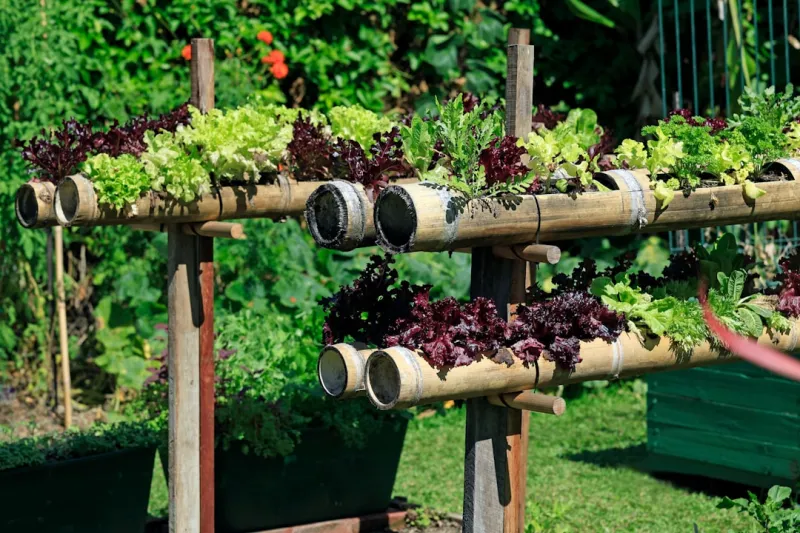
Garden Using Repurposed Wine Barrels And Drip Irrigation
maximizes space, making it an ideal choice for urban dwellers or anyone with limited ground area. Not only does it provide a stunning visual element, but vertical gardens also improve air quality, reduce noise pollution, and contribute to biodiversity. Plus, it's a fantastic way to engage in sustainable living. Repurposing
materials
, such as wine barrels, adds an Ecoous touch to your gardening efforts, allowing you to contribute positively to the planet.This DIY is Beginner-friendly and adaptable, making it accessible to those with limited gardening experience. Even if you’ve never planted anything before, you can create a thriving vertical garden with just a bit of time and effort. By incorporating drip irrigation, you’ll also ensure that your plants receive a consistent and efficient water supply, reducing waste and saving you the hassle of frequent watering.
Tools Needed
Drill - Necessary for making drainage holes and attaching components within the structure.Saw (hand saw or jigsaw) - To cut the wine barrels to height or shape as needed.Measuring tape - Ensures that all sections fit together well and are sized appropriately.Trowel - Perfect for planting and digging small holes.Level - Ensures your vertical garden has the right posture and stability.Pliers - Helps in bending and securing the wires for the drip irrigation system.Gloves - protects your hands from dirt, chemicals, and potential injuries.Safety goggles - Keeps your eyes safe while drilling or cutting
materials
These tools are essential for creating your vertical garden and ensuring that it is both stable and aesthetically pleasing.
Materials
Repurposed wine barrels (2-4, depending on your preference)Potting soil (2 bags, 1-2 cubic feet each) - For planting your chosen plants.Plants/Seeds (various, depending on preference) - Herbs, vegetables, or flowering plants.Drip irrigation kit (1) - Includes tubing, emitters, stakes, and connectors.Landscape fabric (1 roll, 3x50 feet) - Prevents soil from escaping while allowing drainage.Wooden or metal brackets (for stabilizing) – Quantity will depend on how many barrels you're using.Plastic containers or pots (optional, 2-4) – For growing Shallow plants in specific sections.Mason jars or decorative pots (optional, as desired) – For aesthetic additions to the garden.Rope or wire - For securing barrels together or for hanging additional plant containers.Water source – A hose or sprinkler system to connect with your drip irrigation kit.Having these
materials
on hand will set you up for success as you embark on creating your vertical garden.Step-by-Step process#
Step 1:
Selecting and
- Preparing Your Wine Barrels
What: Start by sourcing your wine barrels. You can find them at local wineries, garden centers, or online marketplaces.
How: Look for barrels that aren’t showing signs of excessive damage or decay. Once you have your barrels, clean them thoroughly to remove any residues or pests. If they're stained, that’s okay – the rustic patina can add to their charm.
Tips: If you want to keep the wood looking fresh, consider applying a food-safe wood conditioner after cleaning to preserve the wood's integrity.
Safety: Ensure you wear gloves when cleaning to protect your hands from any contaminants.#
Step 2:
Cutting the
- Barrels
What: Depending on your design, you may wish to cut the wine barrels to varying heights.
How: Use a hand saw or jigsaw to make clean cuts. Plan your cuts carefully, considering which section will be the bottom to hold soil and plants.
Tips: Measure the height of each barrel before cutting to ensure uniformity. Label each one if you’re cutting multiple barrels to avoid confusion later.
Safety: Always wear safety goggles to protect your eyes from wood splinters.#
Step 3:
Creating
- Drainage Holes
What: It’s crucial to have proper drainage for your plants in order not to drown their roots.
How: Drill holes in the bottom of each barrel, making sure they’re evenly spaced. You need about 5-6 holes, each at least 1-2 inches in diameter.
Tips: Place the barrels on a sloped base so gravity can help drain excess water.
Safety: When operating power tools, follow basic safety precautions and read the instructions.#
Step 4:
Positioning the
- Barrels
What: Once prepared, it’s time to position your barrels vertically.
How: Arrange them in a way that suits your available space and aesthetic preferences. You might stack them directly on top of each other or line them side by side. Use brackets or braces to secure the barrels if needed.
Tips: Opt for a location that receives ample sunlight for the types of plants you plan to grow.
Safety: Ensure that the structure is sturdy and can support the weight of the soil and plants.#
Step 5:
Laying
- Down Landscape Fabric
What: The landscape fabric will help retain soil while allowing excess water to drain.
How: Cut the fabric to fit the size of the barrels, lining the interior to prevent soil from falling out of the drainage holes.
Tips: Staple or glue the fabric to the inside of the barrels for added security.
Safety: Make sure no staples are exposed, as they can cause injury.#
Step 6:
Adding
- Potting Soil
What: Now it’s time to fill the barrels with potting soil.
How: Carefully pour the bags of potting soil into each barrel, filling them to about Threers full.
Tips: Tapping the sides of the barrels gently after filling will help settle the soil and remove air pockets.
Safety: Use a mask if you’re sensitive to dust, as potting soil can be a bit dusty when disturbed.#
Step 7:
Planting
- Your Chosen Plants
What: Now that the barrels are filled, it’s time to plant!
How: Make small holes in the potting soil and drop in your plants or seeds. For seedlings, follow the instructions on spacing and depth provided on the seed packet.
Tips: Choose plants that are compatible in terms of sunlight and water needs. Mixing herbs like thyme, basil, and rosemary can be both useful and beautiful.
Safety: Wear gloves while planting. The soil can harbor bacteria.#
Step 8:
Setting
- Up the Drip Irrigation System
What: Install the drip irrigation system to ensure even watering.
How: Follow the instructions in the drip irrigation kit. Generally, you will connect the main line to a water source and run smaller tubing to each plant section, inserting emitters close to each plant's base.
Tips: Setting a timer for your system can save you time and ensure your plants are watered consistently.
Safety: Always check for leaks after installation before leaving it unattended.#
Step 9:
Aesthetic
- Enhancements
What: Add a touch of personality and charm to your vertical garden.
How: Use additional decorative pots, mason jars, or objects that reflect your personal style. You can also hang small pots between the barrels for cascading plants.
Tips: Try to incorporate plants with varying heights and colors to create visual interest.
Safety: Ensure that anything hung is secure and won’t fall, potentially causing injury or damage.#
Step 10:
Regular
- Maintenance
What: To keep your vertical garden thriving, regular maintenance is essential.
How: Check the plants weekly for any signs of pests or disease. Trim back any excess growth and ensure the soil is moist but not soggy.
Tips: Rotate plants occasionally to make the best use of available sunlight and minimize wear on specific plants.
Safety: Use gloves and ans while gardening to protect yourself from potential irritants.
2026 •