Introduction
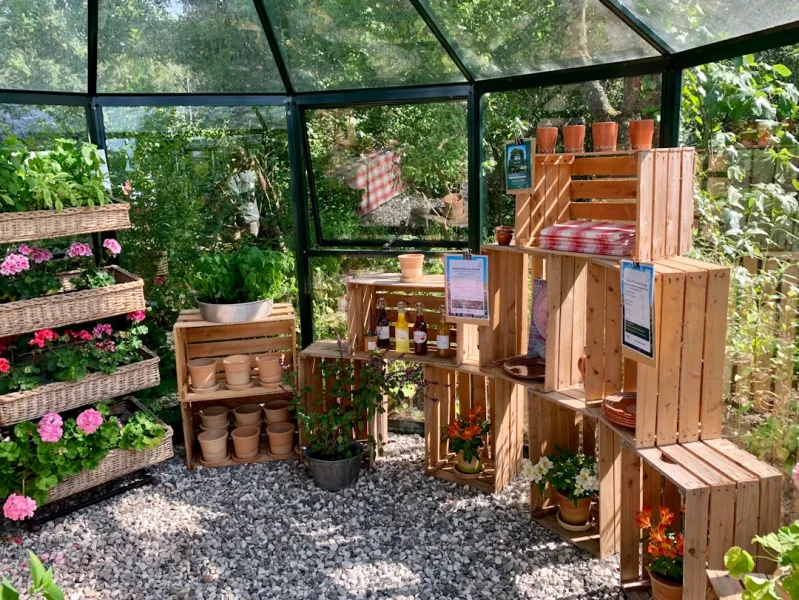
Garden Using Repurposed Pallets For Small Spaces
offers several advantages, such as imving air quality, enhancing aesthetics, and promoting a healthier lifestyle by encouraging you to grow your own food. Moreover, a vertical pallet garden can serve as a beautiful focal point in your home or yard, attracting pollinators and giving you a sense of accomplishment as you nurture your plants.Skill Level This is suitable for beginners, as it requires basic woodworking knowledge and minimal tools. Whether you're a novice gardener or someone with a flair for DIY , this step-by-step guide will walk you through the entire process.
Tools Needed
Drill/Driver: Essential for making holes and driving screws into the wood. provides strong assembly for your vertical garden structure.Screwdriver: In case you can’t access certain areas with a drill, a screwdriver will help with any Handning needed.Saw (Hand saw or
- Jigsaw): Useful for cutting down pallets to the desired size. Necessary for getting perfect dimensions according to your space.Sandpaper: To smooth out rough edges on the wood and prevent splinters, ensuring safe handling.Measuring
- Tape: Crucial for accurate dimensions when cutting pallets and arranging them in your designated space.Staple
- Gun: Ideal for attaching landscaping fabric to the back of the pallets to hold soil in place.Level: Ensures that your vertical garden is perfectly straight, which is important for aesthetics and plant health.Gloves: protects your hands from chemicals, rough surfaces, or splinters while handling pallets.
Materials
- Repurposed Pallets: 3–4 medium-sized pallets, which you can find through local businesses or online marketplaces.Landscaping
- Fabric: 1–2 yards, to line the back of the pallet and contain the soil.Wood
- Screws: 1 box, for assembling the pallets and attaching any additional layers.Potting
- Soil: 2–4 bags, depending on the size of your pallets and the plants you plan to grow.Plants/Seeds: Choose according to your preference, around 6–12 plants that suit vertical growth like herbs or small greens.Plastic
- Plant Pots: 5–8 pots, to make it easier to replace plants as they grow or die out.Drill
- Bit for Wood: 1, to create drainage holes in the pallets and pots.Wood
- Stain or Sealant: 1 can, optional, for preserving the wood against the elements if your garden is outdoors.Start
- Plant Fertilizer: 1 packet, to give your plants a good initial nutrient boost.Watering
- Can: To conveniently water your plants, ensuring they stay Welled during their growth.
Step 1:
Choosing Your PalletsStart by sourcing your pallets. Look for pallets that are in good condition – free of rot, cracks, or loose boards. Make sure they are not treated with harmful chemicals (look for those marked with "HT", which means HEatd). You can often find these at grocery stores, warehouses, or online marketplaces like Craigslist or Facebook Marketplace.
Step 2:
Preparing Your Work AreaOnce you've gathered your
materials
, it's time to prepare a safe, well-lit workspace. For a like this, a garage or outdoor area works best. Lay down a tarp or some plastic to catch any debris, and organize your tools for easy access.
Tip: Keep a trash can nearby for any wood scraps.
Step 3:
Cutting the PalletsUsing your saw, cut the pallets down to the desired size based on the area where you intend to display your vertical garden. Traditional pallets are usually around four feet long, so you may want to cut them in half or into smaller sections based on your available space.Safety
Tip: Wear eye protection and gloves during this process to guard against any splinters or flying debris.
Step 4:
Sanding the EdgesTake your sandpaper and start sanding down any rough edges or surfaces on the cut pallets. Not only does this protect you, but it also gives your garden a more finished and polished look. Be diligent in this task as rough edges can harm plants as well.
Tip: You may also consider applying a wood stain or sealant to protect your from the weather if you plan on placing it outside.
Step 5:
Lining with Landscaping FabricOnce the pallets are sanded and you're satisfied with their appearance, cut landscaping fabric to the size of the pallet and use your staple gun to attach it to the back of the pallet. This fabric will help retain soil while allowing for necessary drainage.
Tip: Ensure that the fabric is secured tightly and cover all areas of the back, as loose parts could lead to soil leakage.
Step 6:
Assembling the PalletsNow that your pallets are lined, you can start assembling them. Stack them vertically or at an angle based on your design preferences and secure them together with wood screws. If they're freestanding, consider adding an L-bracket at the bottom of each pallet for additional stability.-
tip: Use a level to check each layer as you go to avoid any tilting or instability.
Step 7:
Filling with SoilFill the lined pallets with potting soil, leaving enough space for your plants. Make sure to pack the soil firmly but not too tightly, as your plants will need adequate air circulation for their roots.
Tip: After filling, gently water the soil to help it settle properly.
Step 8:
Planting Your GardenNow it’s time to plant! Choose plants that do well in vertical gardens, such as herbs (basil, mint, or thyme) and small colorful flowers. You can also use small pots inside the pallet for easy replacement of dead plants.Care
Tip: If planting directly into the soil, leave enough space between each plant to allow for growth and airflow.
Step 9:
Watering Your Vertical GardenAfter planting, give your garden a thorough watering. Ensure moisture seeps through the landscape fabric but avoid water logging. It's best to adopt a consistent watering schedule, usually once a week, but adjust based on weather conditions.
Tip: During the first few weeks, check the soil moisture frequently as the new plants establish their roots.
Step 10:
Maintaining the GardenFinally, regularly check your vertical garden for any signs of pests or dead leaves. Trim or prune plants that become overgrown to maximize sunlight and air circulation, which keeps your garden healthier overall.Maintenance
Tip: Fertilize your plants based on their needs; a Generale fertilizer would work well for most herbs and flowers.
2026 •