Introduction
Garden Using Repurposed Pallets And Mason Jars For Small Spaces
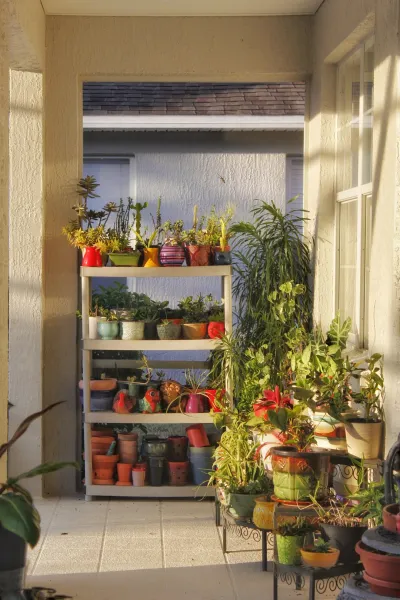
Garden Using Repurposed Pallets And Mason Jars For Small Spacesbody.navh1.rating.hero-img.share.btn Garden Using Repurposed Pallets And Mason Jars For Small SpacesIf you’re looking to inject life into small spaces, a vertical garden is an excellent way to do it without sacrificing precious floor area. In urban settings where outdoor space is limited, creating a vertical garden not only maximizes your available square footage but also enhances air quality, provides fresh herbs and vegetables, and adds an Eyeng aesthetic to your environment. This DIY is especially suited for those on a budget since it incorporates repurposing
materials
you might already have at home, such as pallets and mason jars.Using repurposed pallets in conjunction with mason jars allows you to craft a unique, functional piece of art that can serve as an herb garden, succulent holder, or simply a decorative element.
- The primary benefits of a vertical garden include:Space
- Efficiency: Vertical gardens allow you to grow more plants in a smaller area.Aesthetic
- Appeal: They create visual interest and enhance the overall ambiance of your space. Cost-Effectiveness: Repurposing
materials
helps you save money.
- Easy Maintenance: Planting herbs and small flowers can often be Lownance, requiring less effort.
- Air Quality improvement: Plants can help improve indoor air quality by filtering toxins.Skill
- Level: This is aimed at beginners and requires basic DIY skills such as cutting, drilling, and assembling. Don’t worry if you’ve never tackled something like this before; each step will be detailed to help you along the way.
Tools Needed
- Saw (Hand saw or Circular saw): Essential for cutting the pallet to your desired dimensions. A saw will allow you to customize the size of your vertical garden for your available space.Drill with
- Drill Bits: You’ll need a drill to create holes for the mason jars and for any necessary assembly. This tool can also allow easy attachment of the pallet to a wall or structure.Sandpaper or a
- Sander: To smooth any rough edges on the pallet wood. This not only makes for a more polished look but also reduces splinters for safer handling.Measuring
- Tape: Accurate measurements are critical for ensuring that everything fits well and looks good. A measuring tape helps you cut the
materials
to the correct size.Level: Used to ensure that the pallet is straight when you mount it on the wall. An uneven garden can look unappealing and may also detract from the growth of your plants.Paint or
- Wood Stain (optional): If you want to personalize your vertical garden, using paint or stain can help it better match your decor. Additionally, staining can help protect the wood from moisture.Gloves: Safety equipment to protect your hands, especially when handling wood and tools.Safety
- Glasses: Another piece of essential safety equipment to shield your eyes while saw cutting or drilling.
Materials
- Wooden Pallet: 1 full pallet (ensure it is untreated to avoid chemicals leaching into the soil).Mason
- Jars: 6-10 jars (depending on the layout you prefer).Waterof
- Potting Soil: 1 bag (look for Moistureing soils to support your plants).Plants/Seeds: 6-10 (choose herbs, succulents or small flowering plants based on your preference).Screws: 1 package (to secure the jars to the pallet).Wall
- Anchors: 2-4 depending on how you plan to mount your palette (especially important if you're mounting on drywall).Wire or
- Twine: 1 roll (if you want to create decorative accents or additional support).Sealant (optional): 1 can (if you would like to add an additional layer of moisture protection to your pallet).Step-by-Step Instructions#Gather Your
Materials
and ToolsBegin by assembling all
materials
and tools. Make sure you have everything you need at hand to ensure the flows smoothly. Organizing your workspace will greatly enhance efficiency. Lay the pallet flat and check it over for any damages or areas that may need repair. Use your measuring tape to decide how many mason jars you’d like to attach. This initial assessment will guide the size and placement of the jars on the pallet.#Prepare the Wooden PalletIf the pallet is rough, sand it down thoroughly with sandpaper or a sander to eliminate rough spots and splinters. It’s essential to wear gloves and safety glasses during this step to protect your hands and eyes. Once smoothed, you can optionally paint or stain the pallet, which not only beautifies the but also helps with moisture protection. Allow the stain or paint to dry completely before ceeding.#Determine Jar PlacementUsing your measuring tape, mark where each mason jar will be placed. An ideal starting point is to place jars approximately 16 to 24 inches apart vertically to ensure they have enough room to grow. Mark the locations on the pallet with a pencil, ensuring your measurements are even. This step is crucial for creating a visually appealing arrangement as well as allowing adequate space for plant growth.#Drill Holes for Mason JarsTaking your drill, carefully drill holes at each of your marked locations. The diameter of the hole should match the diameter of the rim of your mason jars. To ensure you stay safe, keep both hands steady and drill at a slow pace. Be sure to wear safety glasses during this phase. To enhance the mounting of the jars, you can drill deeper than necessary and add a layer of potting soil inside later.#Secure the Mason JarsOnce the holes are drilled, place the mason jars into them to check the fit. Adjust the positioning if needed, then secure each jar by attaching screws from behind the pallet into the rim of the jar's opening. Ensure they're tightly fastened to prevent jars from tipping or falling. You want to make sure you feel confident that the jars are securely held, as they will contain soil and plants.#Add Potting SoilWith the jars securely in place, fill each with waterof potting soil. Leave about 1 inch of space at the top of each jar. This will allow space for watering without overflowing. When adding the soil, be cautious not to pack it too tight, as plants need air around their roots. Gently shake the jars to settle the soil but don't compress it dramatically.#Plant Your Chosen Seeds or PlantsNow comes the fun part! Choose your plants or seeds and place them in the jars. If you are using established plants, carefully remove them from their nursery containers, teasing the roots apart gently. If planting seeds, follow the specified guidelines on spacing and depth. Remember, herbs like basil or thyme work great in mason jars as they thrive in smaller spaces compared to leafy greens.#Mount the Vertical GardenWith everything prepped and planted, it’s time to mount your vertical garden. Carefully enlist the help of another person if the pallet is too heavy to lift alone. Use a level to ensure that the pallet is straight. Mark where you will insert wall anchors into the wall and repeat the drilling method as before. After securing the anchors wisely, fasten the pallet to the wall, ensuring it is securely anchored.#Water and Maintain Your Vertical GardenWater each jar gently but thoroughly after mounting. The moisture should penetrate the soil without pooling at the top. Make it a habit to check the soil moisture levels regularly — water when the top inch is dry. Prune any dead leaves or stems, and apply organic fertilizer every few weeks to stimulate growth, especially if using herbs.#Decorate and PersonalizeFinally, personalize your vertical garden to your taste! Use twine to tie around jars for additional design elements or attach decorative items to the pallet itself. You can also populate the top of the pallet with small decorative signs labeling your herbs — this adds an element of charm to the .
2026 •