Introduction
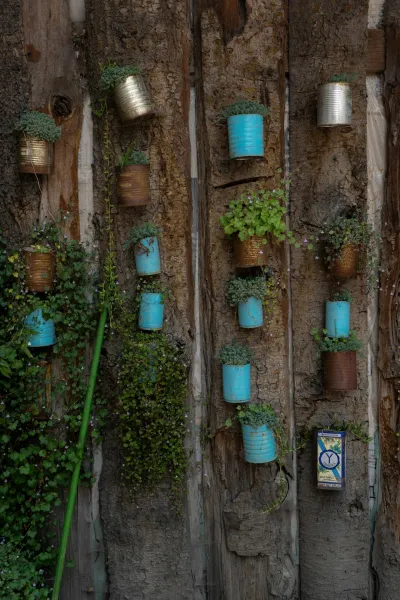
Garden Using Repurposed Pallet Wood And Recycled Plastic Bottles
fast-paced world, where urban spaces are growing tighter and greener spaces more scarce, the art of gardening can be both a challenge and a joy. Creating a vertical garden using repurposed pallet wood and recycled plastic bottles is not just a creative endeavor; it’s a solution that combines functionality with sustainability. This not only allows you to grow your own plants, herbs, and even vegetables in limited spaces, but it also encourages recycling and repurposing
materials
that would otherwise end up in the landfill. Vertical gardens are all the rage for good reason. They allow you to utilize wall space efficiently, can enhance aesthetic appeal, and improve air quality in your home. Besides, they make fantastic conversation starters! This DIY vertical garden is perfect for beginners, as it doesn’t require specialized gardening knowledge. It’s a simple yet impressive way to add greenery to your living environment—be it indoors or on a patio. For those who may feel apprehensive about starting a DIY , worry not! With a few basic tools, readily available
materials
, and a little creativity, anyone can transform old pallets and plastic bottles into a beautiful vertical garden. Even if you’re a novice, this can be tackled over a weekend, and you’ll feel a fantastic sense of achievement as you watch your plants thrive.
Tools Needed
To create your vertical garden, you will need the following tools:Hammer: Essential for nailing together pallet wood pieces. A trusty hammer will help you construct a sturdy frame for your vertical garden.Saw: A hand saw or power saw will be needed to trim the pallets and plastic bottles to your desired sizes. This tool allows precision cutting, enabling you to customize your design.Screwdriver/Drill: A cordless drill and screwdriver are required for securing screws into the wood. This makes construction quicker and helps to create a stronger structure.Measuring
- Tape: Essential for measuring your pallets and ensuring that your garden is scaled to fit your space. Accurate measurements will lead to a Well vertical planter.Paintbrush & Exterior
- Wood Stain or Sealant: If you wish to protect the wood from the elements, these will be important. They also add a personalized touch to your vertical garden.Utility
- Knife: This will help in cutting the plastic bottles down to the required height and trimming off any sharp edges that might be hazardous.Gardening
- Gloves: protect your hands while working with potentially rough wood and sharp plastic. Gloves also help in preventing soil and dirt from under your nails.Drilling
- Bit (for plastic): A specific bit for drilling holes in plastic bottles will allow you to create drainage holes, ensuring your plants thrive and don’t become waterlogged.
Materials
Gather the following
materials
to complete your vertical garden:Repurposed
- Wooden Pallets: 2-3 pallets (depending on the size of your garden). Check for any damage and choose pallets that are free of chemicals.Recycled
- Plastic Bottles: 10-15 bottles (medium to large size), which will function as planters. Soda or water bottles work perfectly.Potting
- Soil: 1-2 bags (as needed for filling the bottles). HIghy soil supports the root systems of your plants.Plants or
- Seeds: Your choice of 10-15 small plants or packs of seeds appropriate for container gardening (e.g., herbs, flowers, succulents).Nails/Screws: 1 box (should be sufficient for securing pallets and attaching bottles).Wire or
- String: 1 roll (to hang the bottles if you choose a slightly different design). This can help you create a more dynamic look.Sandpaper: A few sheets (medium and fine grit) to smooth the wooden pallets and avoid splinters.Watering
- Can or Hose: Important for keeping your plants hydrated. Check that you can easily access your vertical garden for maintenance.Optional: Paint or
- Wood Stain: (for aesthetics and protection). You can choose these based on your taste and the look you want for your garden.Optional: Fabric
- Weed Barrier: 1 roll (if desired for added drainage in the bottom of the bottles). This can prevent soil from escaping while still allowing excess water to drain out. Step-By-Step Construction
Step 1:
Find and Prepare Your PalletsStart by selecting your repurposed wooden pallets. Make sure they are not treated with harmful chemicals. Once you have your pallets, clean them thoroughly. Remove any dirt, dust, and loose splinters using sandpaper. Look for rot or structural issues, and use your saw to cut any damaged sections away.
Tip: When choosing pallets, aim for those that are marked with “HT” (Heatd), as these are safe for indoor and gardening use. It’s also wise to wear a mask when sanding to avoid inhaling wood dust.
Step 2:
Cut Plastic BottlesGather your recycled plastic bottles and files. Use the utility knife to cut each bottle in half horizontally, creating two planters from each bottle. Be careful when cutting the bottles, as plastic can easily slip and lead to cuts. Make drainage holes by puncturing the bottom of the bottles with your drill. This will prevent Overng.
Tip: Consider painting the outside of the bottles with non-toxic paint. This will add a personal touch while also protecting them from UV damage if they are placed outdoors.
Step 3:
Assemble the PalletsArrange your pallets in the desired vertical configuration. You can opt to align them vertically or horizontally, depending on your space available. Secure the pallets together using screws or nails, making sure they are stable and secure.
Tip: If you want additional stability, consider leaning the structure against a wall or using garden stakes to anchor it in place.
Step 4:
Attach the BottlesNow comes the fun part—attaching the bottles to the pallets! Space your bottles evenly apart, ensuring that they won’t shade each other once plants grow. Use strong wire or string to attach the bottles securely to the pallet wood.
Tip: If possible, vary the heights of each bottle for a more dynamic gardening look. This will also provide different light conditions, which can be beneficial for various plants.
Step 5:
Fill Bottles with SoilOnce the bottles are securely fastened to the pallets, fill them with potting soil, leaving some space at the top for your plants or seeds. Make sure to pack down the soil gently to minimize settling as the plants grow.
Tip: If you are planting seeds, follow the instructions on the seed packet to determine the right planting depth.
Step 6:
Plant Your Chosen FloraNow it’s time to get your hands a little dirty! Plant your small plants (or seeds). If you're using seedlings, gently remove them from their containers and place them in the soil, ensuring to cover the roots completely.
Tip: Consider companion planting where possible; some plants grow better together and this can enhance your garden’s ductivity!
Step 7:
Water and Place Your GardenOnce you’ve planted everything, make sure to thoroughly water each bottle to help the soil settle and give the plants the hydration they need. Next, position your vertical garden where it will receive plenty of sunlight.
- Safety
Tip: Ensure that if your garden is outside, it is placed in a safe spot away from strong winds that may topple it. If it's indoors, ensure it’s accessible for watering and maintaining.
Step 8:
Maintenance RoutineVertical gardens need routine care. Monitor the water levels in your bottles regularly and be mpt about addressing any Overng or Underng issues. Fertilize your plants occasionally to keep them nourished.
Tip: Rotate the garden every few weeks if it’s placed in sunlight to avoid one side receiving too much sun while the other side stays in the shade.
Step 9:
Monitor for Pests and DiseaseKeep an eye out for any signs of pests or plant disease. Regularly checking your plants will ensure any issues are caught early, and you can take action as needed.
Tip: You can use natural pest repellents like neem oil to keep insects at bay while being gentle on your plants.
Step 10:
Enjoy and Evolve Your GardenFinally, sit back and enjoy your hard work! Observe the growth of your plants, record your experiences, and make adjustments as needed. Over time, consider experimenting with different plant combinations or adding more layers to your garden.
Tip: Host a garden party to show off your creation or trade plant cuttings with friends. Gardening can be a community effort.
2026 •