Introduction
Garden Using Repurposed Old Pallets And Drip Irrigation Systems
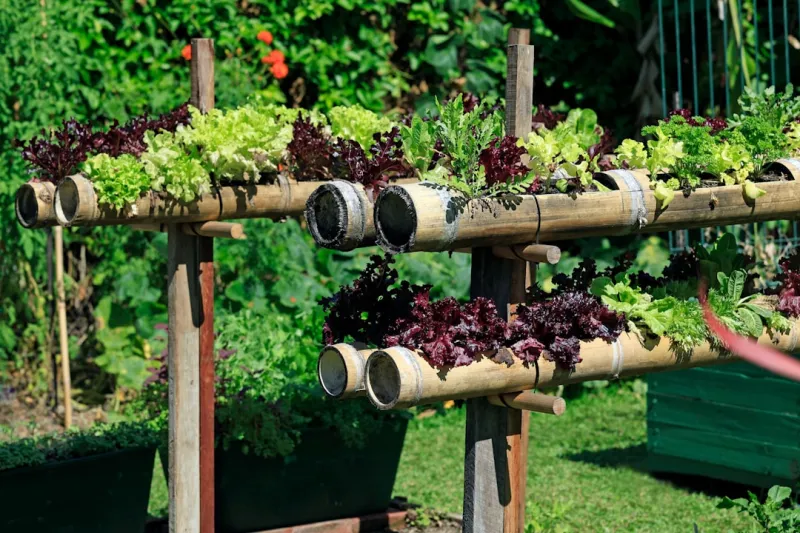
Garden Using Repurposed Old Pallets And Drip Irrigation Systemsbody.navh1.rating.hero-img.share.btn Garden Using Repurposed Old Pallets And Drip Irrigation Systems Garden Using Repurposed Old Pallets And Drip Irrigation Systemsh2.content p Garden Using Repurposed Old Pallets And Drip Irrigation Systems Garden Using Repurposed Old Pallets And Drip Irrigation Systems Garden Using Repurposed Old Pallets And Drip Irrigation Systems Garden Using Repurposed Old Pallets And Drip Irrigation Systemsh2a Garden Using Repurposed Old Pallets And Drip Irrigation Systems Garden Using Repurposed Old Pallets And Drip Irrigation Systemsh2a Garden Using Repurposed Old Pallets And Drip Irrigation Systems Garden Using Repurposed Old Pallets And Drip Irrigation Systemsh2a Garden Using Repurposed Old Pallets And Drip Irrigation Systems Garden Using Repurposed Old Pallets And Drip Irrigation Systemsh2a Garden Using Repurposed Old Pallets And Drip Irrigation Systems Garden Using Repurposed Old Pallets And Drip Irrigation Systemsh2a Garden Using Repurposed Old Pallets And Drip Irrigation Systems Garden Using Repurposed Old Pallets And Drip Irrigation Systemsh2a Garden Using Repurposed Old Pallets And Drip Irrigation Systems Garden Using Repurposed Old Pallets And Drip Irrigation Systemsbody.Nav.Nav ah1.rating-chip.hero-imgh2pulli.social-share.share-grid.btn#fb-root} Garden Using Repurposed Old Pallets And Drip Irrigation Systems Garden Using Repurposed Old Pallets And Drip Irrigation Systemsimgh2.btn-box.btn Garden Using Repurposed Old Pallets And Drip Irrigation Systems Garden Using Repurposed Old Pallets And Drip Irrigation SystemsCreating a vertical garden can be both an aesthetic and practical solution to many common gardening challenges, such as limited space and poor soil quality. With urban living becoming increasingly popular, homeowners and renters alike are often searching for creative ways to cultivate greenery without sacrificing precious floor space. Using repurposed old pallets not only motes recycling and sustainability but also enables you to add a unique touch to your outdoor or indoor space. Additionally, integrating a drip irrigation system can simplify maintenance, ensuring your plants receive adequate water without daily attention. Benefits of a vertical garden using pallets include optimal use of vertical space, easy accessibility for plant care and harvesting, and the ability to create a stunning focal point in your environment. Incorporating a drip irrigation system can further enhance this experience, allowing for efficient watering even when you're busy or away.
- Skill Level: This is designed for beginners, and though some tools and techniques may seem new, with patience and careful execution, you'll find the methods accessible. In this detailed , you'll learn how to garden using repurposed old pallets and a drip irrigation system, ensuring your new garden thrives while adding beauty to your space.
Tools Needed
- Screwdriver or Drill: Essential for screwing together the pallets. A drill will speed up the process.Saw (Handsaw or
- Jigsaw): You'll need this for cutting the pallets to the size that best fits your designated space.
- Level: Ensures your vertical garden is even and prevents tipping over, which is critical for its stability.
- Measuring Tape: Allows for precise measurements of the pallets and the space in which the garden will be placed.
- Staple Gun: Used for securing landscaping fabric to the back of the pallets, retaining soil while still allowing for drainage.
- Gloves: protects your hands from rough wood, splinters, and chemicals present in older pallets.
- Pliers: Helpful for bending or cutting wire that may hold the pallets together or for tying plants to supports.
- Watering Can or Hose: Necessary for Preg the soil and ensuring the plants are appropriately watered after setting up your drip system.
Materials
Old Wooden Pallets (3–4): Sourced from local retailers or online marketplaces; ensure they are safe and not chemically treated.Landscape Fabric (1 roll): Used to line the back of the pallet for water retention while allowing drainage. Potting Soil (3 bags, 1.5 cu ft each): A Highy potting mix that provides the right nutrients and aeration for plant growth.
- Plants and Seeds (varies): Choose a mix of herbs, flowers, and small plants that thrive vertically, such as strawberries, lettuce, and succulents. Drip Irrigation Kit (1): Commercially available kits with connectors, tubing, and drip emitters; choose one based on your garden size.
- Wood Sealer or Paint (Optional): Non-toxic options can protect the wood from rot and give your garden an appealing finish.
- Nails and Screws (medium box each): For assembling the pallets and stabilizing the structure. Wire (Heavy Duty, 1 roll): Used for securing plants that may need additional support as they grow or hold the pallets together. Step-by-Step Instructions #
Step 1:
Gather and Prep Your Pallets To begin, gather the pallets you plan to use. Look for pallets made from untreated wood, especially those marked with the heat stamp "HT," which indicates heat treatment instead of chemical treatment. Inspect them carefully for damage, rot, or mold. Replace any broken slats if necessary.
Tip: Before starting, consider disassembling one pallet to use the wood for additional support or a frame if needed.
Safety: Wear gloves while handling pallets to protect your hands from splinters. #
Step 2:
Select a Location Choose a suitable location for your vertical garden, keeping sunlight requirements and aesthetics in mind. Aim for an area that receives at least 6 hours of sunlight proper day, such as South walls. Ensure that the ground is level if placing directly on soil, or prepare a sturdy support if it’s to be mounted on a wall.
Tip: If using a wall, consider placing a tarp underneath to catch any soil or debris that may fall during setup.
Safety: If working near an existing structure, ensure that any hardware or installation doesn’t commise its integrity. #
Step 3:
Assemble the Pallets Start aligning your pallets in the desired configuration—this could be vertical or staggered. Use nails or screws to secure them together for stability. Make sure to leave space for adequate drainage as well as easy access for planting.
Tip: A level is vital here to ensure your pallets are straight. If they lean, they could collapse when filled with soil.
Safety: Ensure screws are fully driven to prevent any sharp edges from exposure. #
Step 4:
Add Landscape Fabric Cut the landscape fabric to fit the back and sides of the pallets. This fabric will prevent soil erosion while allowing excess water to drain out. Use a staple gun to secure the fabric tightly.
Tip: Fold the edges of the fabric over to enhance its durability.
Safety: Take care when using the staple gun to avoid pinching fingers. #
Step 5:
Fill the Pallets with Soil Begin to fill each section of the pallets with potting soil. Avoid compacting the soil too firmly; a light touch allows for air to circulate and supports healthy root growth. Aim to leave about an inch of space at the top to prevent soil from spilling out during watering.
Tip: It’s easier to fill each section in advance before installing plants, but you may want to leave space for certain plants that are larger.
Safety: Wear a mask if the potting soil is dusty; inhaling particles can be harmful. #
Step 6:
Plant Your Selection This is the fun part! Choose your plants and begin to place them within the soil, pressing gently to ensure they’re secure. Consider mixing herbs, flowers, or small vegetables. Group plants with similar watering and sunlight needs together.
Tip: Space your plants effectively; taller plants should be positioned at the top with trailing plants at the bottom.
Safety: Be careful when handling thorny plants or plants with strong scents (like those used for spices) that may cause allergic reactions. #
Step 7:
Set Up Drip Irrigation Refer to your drip irrigation kit instructions to properly install the system. Typically, you will attach tubing to a water source, running the tube along the top of the garden where it can reach all plants. Use drip emitters for effective watering.
Tip: Run a test of your system by turning on the water once everything is in place to ensure proper coverage without flooding.
Safety: Ensure all connections are watertight to avoid leaks; this also helps with managing water use. #
Step 8:
Secure the Structure Once everything is in place, ensure the vertical garden is secure and stable. If desired, you can attach it to a wall using brackets or post it firmly on the ground. Double-check your work for stability, especially if you’ve constructed it at any height.
Tip: Consider using additional support struts at the back for more significant builds.
Safety: If attaching to a wall, make sure to drill pilot holes to avoid cracking the wall material. #
Step 9:
Initial Watering Water the vertical garden thoroughly to ensure the soil is Wellned. Be mindful of the drip irrigation system during this process; you want to establish a baseline for how the plants will absorb water.
Tip: Observe how the plants respond to the initial watering. If certain areas seem to retain water more than others, adjust the drip emitters to ensure even distribution.
Safety: Avoid oversaturating; it can mote root rot. #
Step 10:
Monitor and Adjust As the plants begin to grow, monitor for any signs of stress or nutrient deficiency. Adjust watering schedules as needed to account for changing weather. Ensure that the structure remains stable and that the drip system continues to work properly.
Tip: Keep a journal of plant growth and conditions to help refine your care approach in the future.
Safety: Always wear gloves when performing maintenance tasks to minimize risks.
2026 •