Introduction
Create A Self Watering Herb Garden Using Repurposed Plastic Containers
Create A Self Watering Herb Garden Using Repurposed Plastic Containersbody.navh1.rating.hero-img.share.btnCreate A Self Watering Herb Garden Using Repurposed Plastic ContainersCreating a Selfng herb garden is a fantastic for both novice and seasoned gardeners alike. Why should you embark on this journey? The satisfaction of cultivating your own fresh herbs is immensely rewarding, infusing your meals with vibrant flavors and enhancing your cooking experiences. Moreover, a Selfng system is a Gamer when it comes to convenience. It allows you to maintain healthy herbs without the stress of daily watering, making it an ideal choice for busy individuals or those new to gardening.Using repurposed plastic containers not only helps the environment by keeping plastic waste out of landfills but also saves you money. With a bit of creativity and effort, you can transform everyday items into beautiful and functional gardening tools. This is particularly beneficial for those living in urban environments where space may be limited, but the desire to grow fresh herbs is strong.As far as skill level goes, this is a Beginner-friendly . If you can handle a few tools and follow simple steps, you are more than capable of creating your Selfng herb garden. You’ll learn not just about the gardening process, but also about the principles of Selfng systems and sustainable practices. So, roll up your sleeves, gather your supplies, and let’s dive into this DIY adventure!
Tools
- Needed
- Power Drill or Drill Driver: Essential for making holes in containers for drainage and assembly.Hacksaw or
- Utility Knife: To manipulate the plastic containers as needed, particularly for cutting holes or sections.
- Measuring Tape or Ruler: Important for ensuring the correct dimensions and alignment of your containers.
- Marker or Permanent Pen: Used for marking cutting lines or measurements on plastic.
- Screwdriver: Useful for tightening screws if your design includes securing parts, such as upcycled bottle tops for drainage.
- Pliers: Handy for bending wire or securing components in place, if needed.
- Safety Gloves: protects your hands while working with plastic and sharp tools.
- Safety Goggles: Keeps your eyes safe from debris when cutting or drilling.
Materials
Plastic Containers (5-7): These can be any size, but aim for at least a few larger ones (minimum 1.5 gallons) for better water retention.1-inch PVC Pipe (1 foot): Serves as a conduit for water to be distributed evenly to all containers. Cotton Rope or Wicking Material (5 feet): This will wick water up from the reservoir to the plants. Potting Soil (1-2 bags): Select a Highy, Wellng potting mix suitable for herbs. Herb Seeds or Starter Plants (5-7): Choose herbs you frequently use; basil, parsley, cilantro, and mint are popular options. Small Rocks or Gravel (1 bag): This will create a drainage layer in the bottom of the containers.
- Plastic Lids: To create a base for your container structure if using containers without a flat bottom.
- Sealant or Silicone Caulk: For waterofing any connections that may need sealing for the Selfng system.Steps to Create Your Self-Watering Herb Garden
Step 1:
Gather Your ContainersStart by collecting suitable plastic containers. Look for used containers such as water jugs, soda bottles, or large food containers.
Tip: Ensure that your containers are clean and free from harmful residues. Rinse them out with hot soapy water, and let them air dry. You might prefer clear containers to better observe root growth, but if using opaque, just ensure they have enough drainage holes.
Step 2:
Prepare Your Containers for WateringIdentify a suitable size for the Selfng feature, often incorporating at least a few inches of space at the bottom for the water reservoir. Use your utility knife or hacksaw to cut the tops off a few of your containers, which will serve as the planting area.
- Options for cutting include:Cutting horizontally near the bottom for larger containers.Drilling holes for smaller containers just big enough to fit a wick to the water source.
Step 3:
Drill Drainage HolesFor drainage, you’ll need to ensure that water can exit the containers when they’re full. Use the power drill to create holes in the bottom of each of your preparation containers. About 3-4 holes (1/2 inch wide) should suffice. This step is crucial for If the water level exceeds the right amount, it prevents waterlogging and ensures the health of your herb plants.
Step 4:
Create the ReservoirUse your larger containers or bases to form the reservoir. Fill containers with small rocks or gravel, which will act as a drainage layer, preventing water from stagnating at the soil's bottom. To ensure that the Selfng system works, measure about 2-3 inches of gravel down before adding soil. This extra precaution keeps roots above water and motes healthy growth.
Step 5:
Install the Wicking SystemTake your cotton rope or wicking material and cut it into pieces about 12-18 inches long. Thread one end of each piece through the drainage holes, ensuring that it reaches both the water reservoir and the soil above. The other end should remain submerged within the water reservoir. The wick will draw water up to the soil as needed, keeping it moist without oversaturating.
Step 6:
Add Soil and Plant Your HerbsWith your containers prepared and the wicking system in place, it’s time to add potting soil! Fill each container with soil up to about 1-2 inches from the top. Gently pack down the soil, leaving enough space for your herb seeds or small plants. You can either plant seeds directly into the soil following the packet instructions or transplant starter plants into the prepared holes in the soil.
Step 7:
Assemble Your GardenNow that every container has plants and a good water wick, it’s time to assemble your Selfng system. Place the top sections of your containers back on or, if using cut containers, stack them according to your garden design. If you’re stacking, ensure there’s enough space for sunlight to reach all plants evenly, especially those that grow taller.
Step 8:
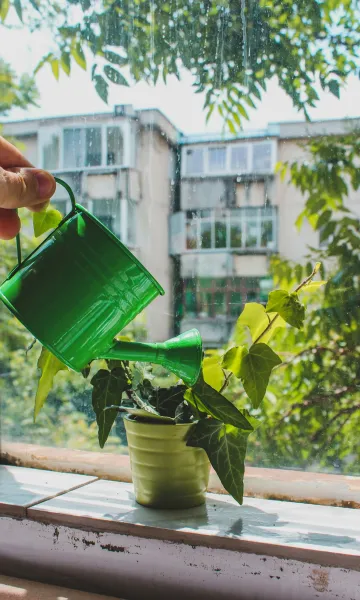
Fill the Reservoir with WaterBefore placing your garden in its final location, be sure to fill the bottom reservoir with water. You can use a watering can or a hose to gently fill it up. As a safety tip, avoid flooding the reservoir initially, as this could temporarily overwhelm the wicks. Start by filling about halfway and gradually increasing the amount as the systems adjust.
Step 9:
Position Your Herb GardenSelect an ideal location that gets a good amount of light, usually around 6-8 hours of direct sunlight daily. A sunny windowsill or a balcony is perfect. Ensure that the garden is easily accessible for yourself for watering (if it runs dry) and harvesting herbs.
Step 10:
Monitor and AdjustCheck the system periodically. You’ll want to examine the soil's moisture, the reservoir, and plant growth. If plants seem dry, top off the water reservoir. The wicking system should gradually keep soil moist once it establishes. As season changes, you may need to monitor sunlight exposure for seasonal variations accordingly.
2026 •