Introduction
Upcycle Vintage Suitcases Into Stylish Outdoor Garden Benches
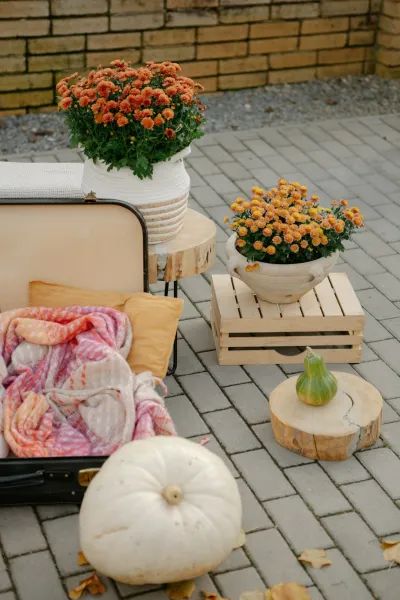
Upcycle Vintage Suitcases Into Stylish Outdoor Garden Benchesbody.navh1.rating.hero-img.share.btnUpcycle Vintage Suitcases Into Stylish Outdoor Garden BenchesIn recent years, the trend of upcycling has gained significant momentum, with people looking for creative, sustainable ways to repurpose old items. One unique and practical that combines functionality and aesthetic appeal is transforming vintage suitcases into stylish outdoor garden benches. This DIY endeavor not only provides you with a striking piece of furniture but also allows you to give new life to old suitcases that may otherwise gather dust in a corner or end up in a landfill.Why Choose This ? Vintage suitcases are typically made from durable
materials
that can withstand the test of time, including wood, metal, and sturdy fabric. By turning these quirky pieces of luggage into benches, you’re not just crafting a functional outdoor seat; you’re also adding character and nostalgia to your garden or patio. Each suitcase tells a story, and incorporating them into your outdoor space can evoke memories of travels, adventures, and explorations.This comes with a plethora of benefits. Not only will you save money by creating your own bench, but you will also have the satisfaction of creating something beautiful and practical with your own hands. It’s also an excellent way to express personal creativity and style — each bench will be unique depending on the suitcases chosen and the finishes applied.Skill
- Level: This is categorized as Beginner-friendly. With a bit of patience and the willingness to learn, anyone can tackle this task. It doesn’t require advanced woodworking skills, but basic familiarity with tools will help you achieve a polished finish.Now, let's dive into the details of how to transform those vintage suitcases into a stunning garden bench.
Tools Needed
- Drill: Essential for making holes in the suitcase and to attach legs. A drill will save you time and provide a professional touch to your finishing.Screwdriver: Useful for tightening screws and assembling the bench. It’s important for securing the legs and any other components.
- Saw: If you need to cut or modify the suitcase or wood for the bench frame, a handsaw or jigsaw will do the job well.
- Sandpaper: Perfect for smoothing rough edges on the suitcase or wooden components.
- Sanding ensures that everything is safe to touch and aesthetically pleasing
- Paintbrush: Needed if you plan to paint or apply a finish to your suitcase or wood. A good paintbrush can help you achieve even coverage.
- Measuring Tape: Critical for taking accurate measurements of the suitcases and ensuring that all pieces fit together harmoniously.
- Clamps: Useful for holding pieces together while the adhesive or screws set. This comes in handy, especially when working solo. protective
- Gear (Gloves and Safety Glasses): Always prioritize safety. Wearing gloves will protect your hands, while safety glasses shield your eyes from debris when cutting or drilling.
Materials
- Vintage Suitcases: 2-3 pieces, depending on the desired size of your bench. Look for sturdy options that have interesting designs.4 Wooden
- Legs: 2” x 2” and about 18” in height, which will support the bench. These legs should be made from treated lumber if you want to resist weather elements.
- Wood Screws: 1.5” to 2” screws, around 12-16 pieces will typically ensure a strong hold.
- Wood Glue: One bottle to reinforce joints where applicable and ensure added stability.
- Vinyl or Outdoor Fabric: 1-2 yards for cushioning the top of the bench for comfort and durability against rain and sun.
- Foam Cushion: 1” thickness, cut to fit the top of the suitcase.
- This adds comfort for sitting
- Paint or Wood Stain: One quart, depending on your desired finish. Choose WEatherant options suitable for outdoor use.
- Weatherof Sealer: 1 quart to protect the surfaces of your suitcase and wooden components from the elements.
- Screws with Washers: Optional, around 8-12 pieces as an alternative for strong fittings.
- Drawer Pull or Decor Pieces: Optional, to add a finishing touch to your bench.
Step 1:
Select Your SuitcasesBegin by finding the perfect vintage suitcases. Consider their size, condition, and aesthetic appeal.
- Look for:Suitcases with sturdy frames, as they will support the benches.Unique designs or colors that resonate with your outdoor style. Suitcases that can open fully, allowing you to store items or even serve as hidden compartments.Once you’ve chosen your suitcases, assess their overall condition. Ensure that they don’t have excessive rot or damage, particularly in the structural areas.
Tip: Thrift stores, garage sales, or online marketplaces are excellent hunting grounds for unique vintage suitcases. Don't shy away from those that appear worn – their character can add charm to your bench!
Step 2:
Prepare the SuitcasesNow it's time to clean and prepare your suitcases for upcycling.Start by removing any old labels, stickers, or hardware that may not suit your design. You can use adhesive removers for sticky residues.Wipe the surfaces down with a damp cloth to get rid of dust and dirt. If the suitcase has old fabric or interior lining, consider removing it.Next, inspect the hinges and locks. They should move smoothly so that your sitting bench remains functional. Sand any rough spots on the surface to prevent splinters.
Tip: If you intend to keep the suitcase interior usable, think about how it will be accessed. Make visions for the locking mechanism so that it doesn’t interfere with the bench’s function.
Step 3:
Cut the Wooden LegsMeasure and cut the wooden legs to your desired height.Standard bench height is usually around 18”, but you can adjust based on your preferences.Use your saw to make clean cuts, ensuring that each leg is equal in length for even seating.After cutting, use sandpaper to smooth out the edges of the legs to avoid splinters.
Tip: If you are new to using power tools, consider practicing on scrap wood first to build your confidence before cutting the actual legs.
Step 4:
Attach the Legs to the SuitcaseStart attaching the wooden legs to the suitcase.First, take your measuring tape and mark where the legs will go on the underside of the suitcase. Typically, legs are placed about 3-5 inches from each corner but can vary based on suitcase size and design.Drill pilot holes into the suitcase to prevent it from splitting when attaching the legs. Using wood screws, attach each leg securely to the suitcase. It is key to make sure they feel sturdy and do not wobble.
Safety: Always wear safety goggles when drilling, and ensure your drill is stable to avoid slipping.
Step 5:
Add ReinforcementFor added strength, reinforce the attachment of each leg with wood glue.Apply a small amount of wood glue at the joint where the leg meets the suitcase.Use clamps to hold each leg in place while the glue sets. Curing time can vary; refer to the glue instructions for specifics.Let the glue cure for at least a few hours to a day for the best results.
Tip: While waiting for the glue to set, consider preparing the other aspects of your bench, such as painting or Weatherproofing.
Step 6:
Create a Comfortable Seating SurfaceTo make your vintage suitcase bench comfortable, it’s time to add cushion.Measure the top of your suitcase and cut the foam cushion to fit.Use outdoor fabric and cover the foam, securing it tightly with a staple gun, if necessary. This gives the seating area a soft, inviting look. Attach the covered cushion to the suitcase using double-sided tape or additional fabric glue.
Tip: Choose fabrics that complement the suitcase design. Opaque covers can be used for more understated styles, while vibrant patterns can stand out.
Step 7:
Finish the SuitcaseWith the legs and cushion secured, it’s time to apply paint or wood stain to your bench.Choose a color that matches or complements your garden décor.Use a paintbrush to apply a smooth, even coat. For durability, apply at least two coats. Finish by sealing your painted surfaces with a Weatherproof sealer, ensuring the longevity of your bench against outdoor elements.
Tip: Allow ample time for each layer of paint or stain to dry before applying the next. This helps prevent peeling and provides a more professional finish.
Step 8:
Add Decorative TouchesNow that your bench is built, it’s time to personalize it further.Consider adding item pulls to the suitcase, giving it a more functional and whimsical appeal.Decorative pillows can also be included for extra comfort and style, complementing the colors and patterns of the suitcase and fabric cover.Incorporating plants or garden ornaments around your bench can create a lovely focal point in your outdoor space.
Tip: Seek inspiration from online platforms or magazines to catch the latest trends in outdoor garden décor that can pair nicely with your newly crafted bench.
2026 •