How to create an indoor vertical garden using repurposed wine crates and LED grow lights
Intro
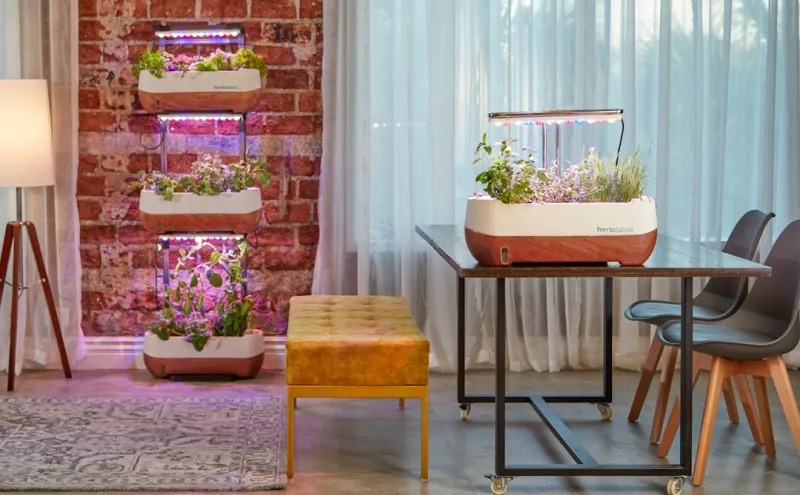
Creating an indoor vertical garden is not only a delightful way to add greenery to your living space but also a rewarding project that can enhance your overall well-being. With the increasing urbanization and limited outdoor space, more people are turning to indoor gardening. The idea of using repurposed wine crates as planting containers is both economical and eco-friendly, making it an excellent choice for sustainability enthusiasts. Moreover, incorporating LED grow lights into your vertical garden will allow you to cultivate a wide variety of plants indoors, regardless of the natural sunlight available in your space.
The benefits of a vertical garden are manifold. They serve as beautiful living installations that improve air quality and contribute to a healthier lifestyle by providing fresh herbs and vegetables right at your fingertips. Additionally, maintaining a vertical garden can be a therapeutic activity, instilling a sense of accomplishment and connection with nature. It’s a perfect project for beginners since it requires minimal investment and can be easily customized to fit any indoor space.
This project is suitable for anyone from complete novices to seasoned gardeners looking to expand their indoor gardening skills. You’ll learn how to turn beautifully aged wine crates into functional planters and harness the power of LED lights to ensure your plants thrive year-round. With just a few tools and materials, you can transform an unused wall or corner into a vibrant green oasis.
---
Tools Needed
1. Screwdriver:
- A crucial tool for assembling the wine crates and attaching them to walls or each other.
- Speeds up the process of creating holes for drainage and securing crates to a frame or wall.
- Ensures your vertical garden is perfectly aligned, which is particularly important for aesthetics and water drainage.
- Useful for attaching landscaping fabric or mesh to the inside of wine crates to prevent soil loss.
- For measuring the dimensions of your wall and crates to avoid any miscalculations.
- If you choose to paint or seal your crates, a brush or roller helps apply the finish evenly.
- Protect your hands while handling soil and plants, especially from any chemicals or sharp edges when working with crates.
- A sturdy container or wheelbarrow is helpful for mixing your potting soil and amendments thoroughly.
Materials
1. Repurposed Wine Crates (4-6):
- Depending on your space and aesthetic preference, 4-6 crates will create a small to medium vertical garden.
- High-quality potting soil is essential for good drainage and plant health.
- This will keep the soil from spilling out while allowing for drainage.
- These amendments will improve soil structure and provide essential nutrients for your plants.
- Choose a full-spectrum LED grow light designed for plant growth, with adjustable hanging options.
- For gentle watering of your plants without disturbing the soil.
- Choose a mix of herbs, succulents, or leafy greens that thrive indoors. Options may include basil, mint, or lettuce.
- To securely fasten the crates to your wall or frame.
- If desired, to protect wood from moisture and enhance appearance.
- To help you remember what you planted where, especially for beginners.
Step-by-Step Instructions
### 1. Select Your Location
What: Choose the ideal spot for your vertical garden, considering factors like lighting and accessibility.
How: Look for a wall that gets adequate natural light (if possible) or is near an electrical outlet for your LED grow lights. A southern-facing wall typically gets the most light. Avoid placing your garden in areas that are too humid or drafty.
Tips: If you don't have enough natural light, plan your garden around where you can easily set up your grow lights.
Safety: Ensure that any chosen wall can support the weight of the filled crates. Before drilling into walls, check for wiring and plumbing.
---
### 2. Prepare Your Wine Crates
What: Each wine crate needs to be suited for planting.
How: Remove any nails or staples from the crates to ensure a smooth finish. If you’ve opted to paint or stain the crates, now is the time to do so. Apply a sealant to protect them from moisture and decay.
Tips: Look for any cracked wood; it can be a weak point. You can line the crates with landscaping fabric or mesh to prevent soil from leaking out while still allowing for proper drainage.
Safety: Sand down any rough edges or splinters from the crates to avoid any injury during the planting process.
---
### 3. Create Drainage Holes
What: Ensuring proper drainage in your crates is crucial to keep your plants healthy.
How: Use the drill to make several holes in the bottom of each crate. This aids in preventing water from pooling and causing root rot.
Tips: If you’re planting higher moisture-loving plants, keep additional holes minimal. However, for herbs and succulents, ensure larger holes for better drainage.
Safety: Be cautious of any flying wood shavings or splinters while drilling. Always wear protective eyewear.
---
### 4. Line the Crates
What: Lining the crates prevents soil from escaping while allowing water to drain.
How: Take your landscaping fabric or mesh and cut it to fit the inside of the crate. Staple or attach it using a staple gun to the interior walls of the crate.
Tips: If you notice your fabric isn’t staying in place, you can also use some soil to help weigh it down.
Safety: Ensure you’re using a proper stapler for the project to prevent any finger injuries.
---
### 5. Mix Your Soil
What: A rich, nutrient-filled potting mix is essential for plant success.
How: In a container or wheelbarrow, combine your potting soil with the amendments: compost, perlite, and worm castings. Mix them thoroughly until well-blended.
Tips: Avoid compacting the soil too tightly as it needs to allow for air pockets, which are important for root health.
Safety: Ensure to lift heavy bags with your legs, not your back, to avoid strain.
---
### 6. Fill the Crates
What: It’s time to set up the growing environment for your plants.
How: Carefully fill each of your lined crates with the potting mix, leaving about an inch or so from the top to allow for watering without overflow.
Tips: Make sure the soil is moistened slightly, which will help when placing seeds or seedlings in their new homes.
Safety: Wear gardening gloves to protect your hands from soil microbes and other potential irritants.
---
### 7. Plant Your Seeds or Plants
What: Now the fun part: get your green friends settled in their new home.
How: Depending on your selection, follow guidelines for each plant regarding spacing and depth. If you’re using seeds, plant them according to the instructions on the seed packet.
Tips: Consider companion planting—mixing plants that grow well together can deter pests and improve growth.
Safety: Be mindful of any plants that may be toxic to pets or children in your household.
---
### 8. Set Up LED Grow Lights
What: If you lack natural light, an LED grow light is essential for plant growth.
How: Depending on your choice, hang the LED grow lights above your vertical garden at an appropriate distance (typically about 12-24 inches above the canopy of the plants). Ensure that they can be adjusted as your plants grow.
Tips: Time your grow lights to be on for 10-12 hours a day to mimic natural sunlight.
Safety: Ensure your cords aren’t hanging where they could become a trip hazard and check that the lights are safely mounted to avoid falls.
---
### 9. Water and Care for Your Garden
What: Establish a regular watering routine.
How: Water your plants when the top inch of soil feels dry. Use a watering can or spray bottle to keep moisture consistent.
Tips: Some plants prefer less moisture, so familiarize yourself with their care needs. Mist your garden regularly to increase humidity, especially for tropical plants.
Safety: Make sure not to over-water; using a moisture meter can help gauge moisture levels in the soil.
---
### 10. Monitor and Adjust
What: Regularly checking on your plants ensures a healthy garden.
How: Observe your plants for signs of distress (yellow leaves, wilting, etc.), pests, or diseases. Adjust your light, watering schedule, and nutrients as necessary.
Tips: Keep a journal, especially as a beginner, to note what grows well and what doesn’t. This will help you refine your gardening skills.
Safety: When handling plants, especially if they are prickly or toxic, always use gloves or protective gear.
---
Troubleshooting
1. Plants Wilting or Yellowing:
- Fix: Check drainage; if water is pooling, consider adding more drainage holes. Adjust your watering habits; over or under-watering could lead to these symptoms.
- Fix: Ensure your LED lights are positioned correctly (12-24 inches away) and that they are full spectrum. Additionally, check if your potting mix is rich enough in nutrients.
- Fix/Prevent: Regularly inspect your plants. Use natural pest deterrents like neem oil or insecticidal soap at the first sign of pests.
- Fix: Make sure your landscaping fabric is correctly installed and secure. You may also need to lower the amount of soil in each crate.
- Fix: If you notice your plants are yellow or scorched, it may be time to raise your grow lights or reduce the hours they're on.
Conclusion
Creating an indoor vertical garden using repurposed wine crates and LED grow lights is not just an aesthetic endeavor; it’s an enriching experience that connects you with nature while enhancing your living space. You have successfully created a thriving ecosystem tailored to your preferences, right in the comfort of your home. This DIY project is not just limited to herbs or greens; you can experiment with various plants to customize your arrangement.
Remember to maintain your garden with regular watering, care, and monitoring to ensure its thriving condition. You may even decide to expand your vertical garden by adding more crates or introducing more plant varieties as you gain gardening confidence.
Overall, an indoor garden provides an outlet for creativity; don’t hesitate to explore various arrangements or divider techniques for your crates to give your garden a unique touch. With the right balance of care and attention, your vertical garden will flourish, providing you with beauty, relaxation, and perhaps even homegrown herbs or vegetables.
---