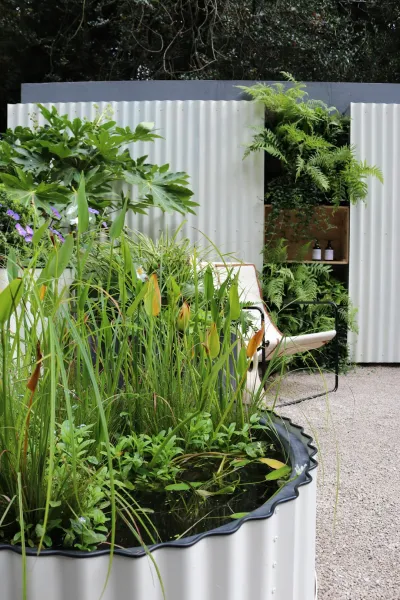
How to create an indoor vertical garden using repurposed pallets and self-watering systems
Creating an indoor vertical garden using repurposed pallets is not only an exciting DIY project but also a sustainable and rewarding way to enhance your living space. Imagine the beauty of greenery cascading down your walls or the fresh herbs readily available for cooking—all without taking up extensive floor space. With an increasing number of people living in urban environments where outdoor gardening may be limited, vertical gardening serves as an ideal solution to bring nature indoors.
This project offers numerous benefits, such as improved air quality, a boost in mood, and a touch of natural beauty to your home. Moreover, cultivating your own herbs, vegetables, and flowers can lower your grocery bills and encourage a healthier lifestyle. With a self-watering system, you can ensure your plants receive consistent moisture, making this an excellent option for busy individuals with limited time for upkeep.
This guide is tailored for beginners, so you don’t need extensive gardening knowledge or woodworking experience. By the end of this project, you'll have a unique, eco-friendly indoor garden that thrives with minimal maintenance. Let’s roll up our sleeves and get started on transforming those old pallets into a vertical paradise!
Tools Needed
- Hammer: Essential for assembling the pallets and securing any parts that may come loose.
- Screwdriver Set: Necessary for tightening screws and making adjustments.
- Saw (Hand or Power): To cut the pallets to your desired size and shape if needed.
- Sandpaper or Power Sander: Ensures that any rough edges on the wood are smoothed out, reducing the risk of injury.
- Drill with Drill Bits: Required for creating holes for drainage and planting.
- Measuring Tape: To ensure your garden dimensions fit the available space accurately.
- Level: Ensures that your vertical garden hangs straight and maintains balance.
- Safety Goggles: Protects your eyes during cutting and drilling.
Materials
- Repurposed Wooden Pallets (2-3, depending on size)
- Coconut Coir or Potting Soil (4 bags, to fill the pallets for planting)
- Self-Watering Reservoir (1 large plastic container or two smaller ones)
- Plastic Plant Pots or Liners (8-10, depending on plant selection)
- Nylon Rope or Twine (100 feet, for stringing up the pallets if you choose a hanging vertical garden)
- Screws and Nails (1 pound each, for securing the pallets together and attaching to the wall or a frame)
- Stain or Non-toxic Sealer (1 gallon, to protect the wood)
- Plants (Herbs, succulents, or small vegetables—your choice, based on personal preference)
- Drip Irrigation Tubing (1 roll, if setting up a more sophisticated self-watering system)
- Watering Can or Hose: For filling the self-watering reservoir.
Step 1: Gather Your Materials and Tools
Before diving into the project, ensure you have all your tools and materials ready. Gather your repurposed pallets, soil, plants, and all necessary tools. Experimenting with varied plant types can lead to a visually striking display; consider herbs like basil and cilantro, or succulents that require minimal care. Ensure your pallets are in good condition—free from mold, large cracks, or chemicals, as these could harm your plants.
Step 2: Choose the Right Location
Identify the ideal location for your vertical garden. Look for a spot that receives ample sunlight (around 6 hours a day) and is close to a water source if you're using a self-watering system. It's typically best to place your vertical garden against a wall and ensure there is enough space for the entire project while leaving room for light penetration.
Step 3: Prepare the Pallets
Once you've selected your location, it’s time to prepare the pallets. Start by using the measuring tape and saw to cut the pallets to desired lengths, especially if they are too tall for your space. Sand down any rough areas to avoid splinters. If you wish to improve the aesthetic, apply a layer of stain or non-toxic sealer for protection. Allow it to dry completely before proceeding.
Step 4: Create Planting Spaces
Using your drill, create holes for drainage in the pallets. Drilling in the bottom slats will provide necessary drainage for the plants and prevent root rot. After preparing the pallets, you can optionally attach plastic plant pots or liners to the backside of the pallet, making it easier to swap out plants regularly.
Step 5: Attach String or Twine
If you wish to suspend your garden vertically, use nylon rope or twine to create a hanging system. Drill holes in the corners of the pallet and feed the rope through. Secure knots at the ends and hang your pallet at your chosen location. If mounting to a wall, utilize screws and ensure your pallet is level and securely fastened.
Step 6: Establish Self-Watering System
To ensure your plants receive consistent moisture, set up a self-watering system. You can do this by placing a large reservoir or container at the bottom of your vertical garden. Fit drip irrigation tubing connected to this reservoir to the planting spaces. Alternatively, smaller pots can have wicking systems through which water draws up into the soil, ensuring that the plants have sufficient moisture at their roots.
Step 7: Fill with Soil
Carefully fill the planting areas with coconut coir or potting soil, ensuring that it is evenly distributed. Don’t overfill, as you want some space on top for planting. Consider mixing in some slow-release fertilizer to give your plants added nutrients, especially if you’re growing vegetables or herbs.
Step 8: Plant Selection and Arrangement
Choose your plants based on varying light requirements, growth rates, and attractive visuals. Place taller plants at the top for better visibility and shorter plants at the bottom. Be sure to leave enough space between each plant to allow for growth and promote good air circulation. This arrangement will facilitate a healthy garden.
Step 9: Water Wisely
Once your plants are in, give them a good initial watering to help them settle into their new environment. Monitor moisture levels over the next few days to gauge how often to refill your reservoir or adjust the watering mechanism. If everything is set correctly, your self-watering system should minimize your need for daily watering.
Step 10: Maintain and Adjust
After establishing your vertical garden, set a weekly schedule for maintenance. Check for pests, trim dead leaves, and monitor the health of your plants. Adjust any watering systems as necessary and keep an eye on the growth patterns. You may have to rotate some plants or swap arrangements based on how they thrive over time.
Troubleshooting
Even with planning, you may run into a few common challenges when creating and maintaining your vertical garden. Here are some effective fixes:
- Wilting Plants: This issue can arise from inconsistent moisture levels. Ensure your self-watering system is functioning properly, and check that the drainage holes are not blocked.
- Overwatered Plants: Look for signs such as yellowing leaves or mold. Adjust your watering schedule and ensure your reservoir is not being overfilled.
- Pests: Keep an eye out for aphids or spider mites that like to infest indoor plants. Use neem oil or insecticidal soap as a natural pesticide.
- Insufficient Sunlight: If your plants seem to be growing poorly, reassess their location. Consider rotating or moving different plants around based on how much natural light they receive.
- Soil Compaction: Over time, soil can become dense, hindering plant growth. Gently aerate the soil by loosening it with a small tool to let air flow through the roots.
Conclusion
In summary, creating an indoor vertical garden using repurposed pallets and self-watering systems is a fulfilling and attractive project for both novice and seasoned gardeners. The benefits range from enhancing your décor to promoting a healthier lifestyle with fresh produce. As you refine your gardening skills, consider variations like varying plant types, layout designs, or incorporating decorative elements like lights or signs.
Regular maintenance ensures that your vertical garden thrives, providing you with years of enjoyment and utility. Remember, gardening is a journey; don't hesitate to try new things, adapt your approach, and get creative in how you cultivate your indoor oasis.