Introduction
Friendly Vertical Garden Using Repurposed Plastic Bottles And Led Grow Lights
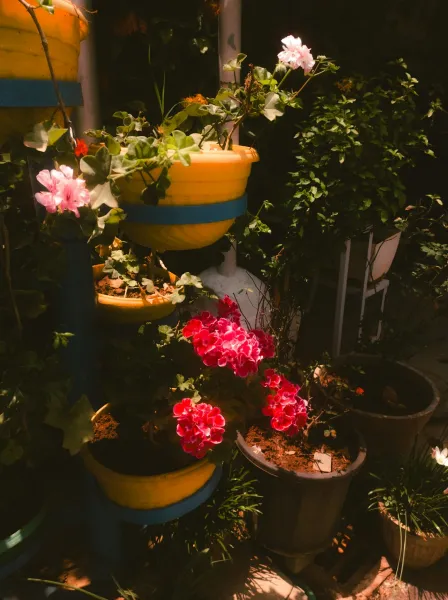
Eco-friendly vertical garden is not only an innovative way to recycle but also a fantastic opportunity to bring greenery into your living space, even if you're working with limited soil and sun exposure. Utilizing repurposed plastic bottles for this is a sustainable choice that helps reduce waste while offering a unique aesthetic to small urban areas or indoor environments. Pairing this with LED grow lights makes it even more exciting, as these Energyent lights ensure your plants receive the adequate light conditions they need to thrive, regardless of where you live.Vertical gardens bring numerous benefits. They maximize space, purify indoor air, and can even help to reduce your energy bills by providing insulation against temperature fluctuations. Starting such a is also Beginner-friendly, as it requires little more than basic gardening skills and a bit of creativity. This makes it appealing for those new to planting or anyone interested in a DIY that champions sustainability.In this detailed guide, we'll walk you through the process of creating your own vertical garden using
materials
readily available at home, ensuring that Ecoous choices are at the forefront of your . The following sections will provide all the necessary tools,
materials
, and a step-by-step process for building your vertical garden. So, grab your gloves and let's get started!
Tools
- Needed
- Utility Knife or Scissors: Essential for cutting the plastic bottles to create planters. Make sure to use a sharp tool to achieve clean edges, reducing the risk of cuts.Drill or
- Screwdriver: You'll need this for making drainage holes at the bottom of each bottle to ensure excess water can escape and plants don’t drown.
- Measuring Tape or Ruler: Use this to ensure uniformity in the dimensions of your bottles if you're creating multiple layers.
- Level: To ensure that your vertical garden is evenly aligned when put together.
- This prevents plants from tilting and helps in effective water drainage
- Paintbrush and Paint (optional): If you wish to decorate your plastic bottles or coat them to help preserve them from the elements, a paintbrush and some non-toxic paint will be handy.
- Spray Bottle: This will help in misting your plants, which is particularly useful after planting to keep soil moist without Overting it.
- String or Wire: For hanging your vertical garden frame if it’s designed to be suspended. This material must be sturdy enough to hold the weight of soil and plants.
- Trowel or Small Spade: Useful for filling the bottles with potting soil and planting seeds or seedlings.
Materials
- Plastic Bottles: 10-15 two-liter bottles to create a larger structure.Potting
- Soil: approximately 2-3 bags (each 1.5 cu. ft.) to fill the bottles adequately. Seeds/Seedlings: Choose a mix of herbs and small vegetables—like basil, lettuce, or strawberries—enough to plant in all the bottles.
- Nutrients: A bottle of liquid fertilizer to boost plant growth, specifically tailored for your chosen plants.
- LED Grow Lights: One or two depending on the size of your garden; choose a kit that includes a power supply and hanging equipment.
- Drainage Material: Crushed charcoal or small pebbles, about 1 bag, to provide good drainage at the bottom of the bottles.
- Wire Mesh (optional): To protect the soil from falling out of the drainage holes.
- Plastic Tubing or Siphoning System (optional): If you want an automatic watering system to ensure consistent moisture.
- Hanging Hardware: Hooks or brackets if you want to secure your vertical garden to a wall.
Step 1:
Gather and
- Clean Bottles
What: The first step requires collecting the plastic bottles you’ll be using for your garden.
How: Gather 10-15 empty two-liter bottles. Remove labels to eliminate any glue residues and thoroughly wash the bottles with soapy water to remove any remaining residues or chemicals. Rinse thoroughly.
Tips: If possible, choose bottles that are opaque to prevent excessive algal growth in the soil with too much sunlight exposure.
Safety: Wear gloves while washing to protect your hands from any abrasive labels or sharp edges from cut bottles.
Step 2:
Cut and
- Prepare Bottles
What: Next, you’ll need to cut the bottles to create individual planters.
How: Use a utility knife or scissors to cut each bottle in half horizontally, ensuring at least 4-5 inches in height remains for planting. You can also choose to make smaller cut-outs on the sides for easier access to the roots of the plants.
Tips: Make sure your cuts are straight to facilitate easy stacking later on. You may choose to cut a few extra bottles in case of errors or to adjust your design later.
Safety: Be cautious when using sharp tools. Cut away from your body and keep fingers out of the way.
Step 3:
Drill
- Drainage Holes
What: Creating drainage holes prevents water from pooling at the bottom of each planter.
How: Use a drill or screwdriver to make several small holes in the base of each bottle. Aim for at least 4-6 holes to ensure extra drainage.
Tips: Consider placing a piece of wire mesh inside the bottle before filling it to keep soil intact while allowing for drainage.
Safety: Always wear safety goggles when drilling to protect your eyes from plastic debris.
Step 4:
Assemble the
- Vertical Frame
What: Design a frame that can hold the bottles in a vertical format.
How: You can use a wooden pallet, old ladder, or create a frame using timber. Measure the space for each bottle, ensuring they’re at a distance that allows for full growth. If using a wall, you can also directly attach the bottles with screws or hanging wires.
Tips: If you want an adjustable garden, consider a design with slots for easier relocation.
Safety: If using power tools, follow all safety cedures, and wear protective eyewear.
Step 5:
- Bottles with Soil and Drainage Material
What: Once your frame is ready, it’s time to prepare each planter.
How: Start by adding a layer of small pebbles or crushed charcoal at the bottom of each bottle for drainage, then fill with potting soil leaving about an inch of space at the top.
Tips: Mix in some Slowe fertilizer with the potting soil to support your plants’ growth right from the start.
Safety: If using a large bag of soil, be cautious when lifting to avoid back injury.
Step 6:
Plant
- Seeds or Seedlings
What: Now comes the most rewarding part—planting!
How: Depending on your choice, add a few seeds or a small seedling to each planter, ensuring to follow the planting depth recommended on the seed packet. For seedlings, carefully remove them from their cell trays while minimizing root disturbance.
Tips: Group similar plants together to ensure maintenance is manageable, especially concerning watering needs.
Safety: Wash your hands after handling soil and seeds to avoid transfer of any potential allergens.
Step 7:
Install
- LED Grow Lights
What: To ensure your plants get enough light, set up your LED grow lights.
How: Depending on your garden design, position the grow lights a foot above the tallest plants. Follow the manufacturer’s instructions for setting up the lights securely, and ensure plugs are in reach of power outlets.
Tips: Use a timer for your grow lights to simulate natural daylight cycles; generally, plants benefit from 12-16 hours of light.
Safety: Ensure electrical cords are safely managed to avoid tripping hazards and damage to the cords.
Step 8:
Water and
- Monitor Growth
What: Finally, keep an eye on your plants and water as needed.
How: Lightly mist the plants and soil surface with a spray bottle after planting to keep them moist. Check for soil moisture every few days, and water when it starts to look dry.
Tips: Consider giving the plants a weekly nutrient boost with liquid fertilizer. Document your plants’ growth—this will help you learn and improve your gardening skills as you go!
Safety: If you plan to use fertilizers, ensure you read the labels and use gloves when applying.
2026 •