How to create an eco-friendly vertical garden using repurposed pallets and sustainable materials
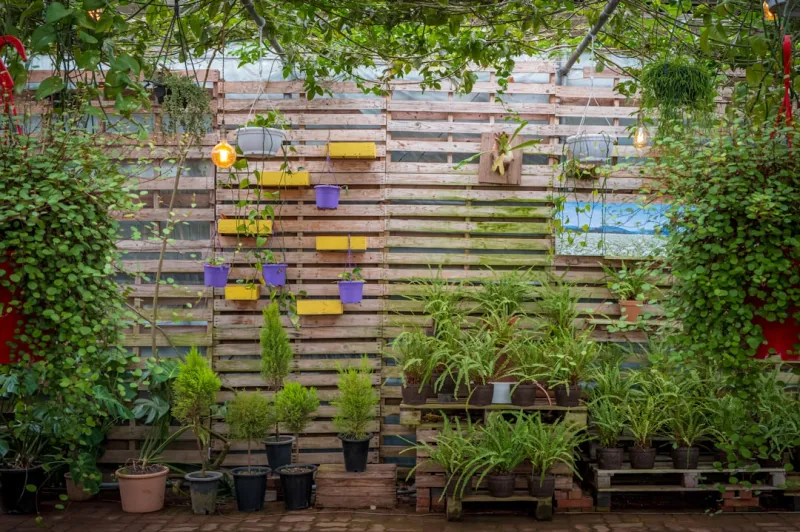
Creating an eco-friendly vertical garden not only beautifies your space but also contributes positively to the environment. With urbanization leading to diminishing green spaces, vertical gardens have surged in popularity as they allow individuals to cultivate plants in limited spaces, like balconies or small yards. This project utilizes repurposed pallets, transforming what would typically be waste materials into vibrant, living installations that provide fresh herbs, vegetables, or flowers.
This guide is perfect for beginners, as it requires minimal experience and utilizes sustainable practices. Imagine the satisfaction of growing your own food or creating a lush greenery wall, all while being kind to the planet! In addition to reducing waste, planting your own vertical garden can improve air quality, promote biodiversity, and save money on grocery bills.
The benefits extend beyond aesthetics. Vertical gardens can help reduce heat and energy costs in your home by acting as effective insulators. They also provide a natural habitat for local wildlife, which is essential for biodiversity in our increasingly developed world. With this DIY project, you’ll learn how to create a functional, stylish vertical garden that contributes to both environmental sustainability and your personal well-being.
Skill Level
This project is suitable for all skill levels, especially beginners. It requires basic woodworking skills and no heavy machinery, making it accessible. It’s a fantastic way to engage with nature while demonstrating your creativity and resourcefulness.
Tools Needed
- Hammer: Essential for assembling the pallet structure safely and securely, ensuring durability.
- Nails: Used to fasten the pallets together and secure your hanging planters.
- Screwdriver: Useful for tightening screws in the reclaimed pallet frame if necessary.
- Saw: A handsaw or jigsaw will help in cutting the pallets to the desired size and shape.
- Sandpaper or Sander: To smooth out rough edges on the pallet wood, preventing splinters and enhancing aesthetics.
- Drill: To create drainage holes in the bottom of planters and any necessary pilot holes.
- Measuring Tape: For precise measurements when cutting, ensuring a balanced and stable vertical garden.
- Gloves: Protects your hands while working with wood and plants.
Materials
- Repurposed Pallets: 2-3 pallets (standard size) to form the main structure of your vertical garden. Check for quality and ensure they are free from chemicals.
- Coconut Coir or Landscape Fabric: About 1-2 square yards. Used for lining the pockets of the pallets to hold soil.
- Potting Soil: Approximately 2-3 bags (2 cubic feet each) to fill the planter sections with nutrient-rich soil.
- Plants or Seeds: Choose your favorites – herbs (like basil or mint), vegetables (like lettuce or tomatoes), or flowers (like petunias or geraniums).
- Wood Screws: Approximately 50–80, depending on your pallet design.
- Wooden Planks: 2-3 planks for creating additional shelves or stable bases if needed.
- Watering Can or Hose: For maintaining the moisture levels in your vertical garden once it’s complete.
- Staple Gun: For attaching coir or landscape fabric securely to the pallets.
- Plastic Pockets or Small Pots: Optional, about 5-10, if you want to create more defined planting areas.
- Sealant or Non-Toxic Wood Treatment: To protect the wood from the elements and ensure its longevity.
Step 1: Select Your Location
Choose a location for your vertical garden that receives adequate sunlight, generally 6-8 hours daily is ideal for most plants. Ensure the ground is level, and check for easy access to water since this makes maintenance simpler. A sunny wall, patio, or balcony railing would be superb choices. Consider the view; a vertical garden can serve as a natural privacy screen.Tips
- North-facing walls typically get less light; therefore, it's better to select a south or west-facing wall.
- Observe the area throughout the day to ensure you choose an optimal spot.
Step 2: Source and Prepare Pallets
Find repurposed pallets from local warehouses, stores, or pallets that would otherwise be discarded. Ensure they are clean and free from harmful chemicals such as pesticides.What to Do
- Check pallets for stamps indicating they are heat-treated (HT), which signifies they’re safe for gardening.
- Remove any nails or sharp edges with the hammer or a pry bar.
- Give the pallets a good clean with soap and water, and let them dry.
Tips
- Ask local businesses if they have any to spare, as many are happy to give them away.
- Don’t be afraid to collect different-sized pallets for more variety.
Step 3: Sand the Edges
Use sandpaper or a power sander to smooth rough spots on the pallets. This will help avoid injuries from splinters when you work with the pallets and when you or others interact with the garden.Safety Considerations
- Wear a dust mask and goggles while sanding to prevent inhaling wood dust and protect your eyes.
Tips
- Sand down edges that are particularly sharp or damaged.
Step 4: Assemble the Pallet Structure
Decide whether you want a single vertical frame or multiple tiers. Use wood screws to securely assemble the pallets into your desired configuration.What to Do
- If constructing a tiered structure, use screws to fasten each pallet one on top of the other, ensuring they are balanced.
- Check for stability while assembling.
Tips
- It's best to lay the pallets on a flat surface while constructing them to avoid misalignment.
Step 5: Add a Liner
Line the back and sides of the pallets with coconut coir or landscape fabric. This will hold the soil in while allowing proper drainage.What to Do
- Cut the fabric to size, leaving extra to overlap the edges.
- Use a staple gun to secure the fabric tightly against the pallet boards.
Tips
- Make sure the bottom has drainage holes; without them, plants may become waterlogged.
Step 6: Fill with Soil
Gently fill the pockets of the pallets with good quality potting soil. Make sure to compact it slightly, but avoid over-packing.What to Do
- Leave about an inch of space below the top surface of the fabric for watering.
- Water the soil after filling to ensure it settles, adding more soil if necessary.
Tips
- Consider adding fertilizer or compost to enrich the soil for better plant growth.
Step 7: Choose and Plant
Select plants that thrive in vertical gardens. Begin with herbs, followed by smaller vegetables and flowers.What to Do
- Make a plan for what you want to plant, taking into account sunlight needs and growth habits.
- Carefully transplant seedlings or sow seeds directly, ensuring adequate spacing for growth.
Tips
- Start with easier plants like mint, radishes, or petunias if you’re new to gardening.
Step 8: Water and Maintain
Once planted, water your vertical garden regularly. Monitor your plants for signs of drying out or over-watering.What to Do
- Water from the top so that water seeps down into the lower pockets.
- Check moisture levels in the soil by sticking your finger about an inch deep into the soil.
Tips
- Set up a watering schedule, especially during hot months. Consider installing a drip irrigation system if you prefer automation.
Troubleshooting
Common Issues & Fixes
1. Overwatering: If plants are wilting or yellowing dramatically, reduce frequency or improve drainage.
- Fix: Drill additional drainage holes or elevate the pallet slightly from the ground.
- Fix: Consider relocating the garden to a sunnier spot or choosing shade-tolerant plants.
- Fix: Regularly check and pull weeds or lay down natural mulch to suffocate them.
- Fix: Stabilize with stakes in the ground or secure it to a wall.
- Fix: Use natural deterrents like neem oil or introduce beneficial insects like ladybugs.
Conclusion
Creating an eco-friendly vertical garden using repurposed pallets is not just a sustainable gardening choice; it's a fulfilling hobby that brings a piece of nature closer to home. Throughout this guide, you’ve learned step-by-step how to build an aesthetically pleasing and functional garden.Consider variations in design by mixing materials or adjusting vertical structures to suit your style. The flavor of herbs and the vibrancy of flowers add joy to nurturing your space. Remember that maintenance is key! Regular watering and checks for pests or weeds will ensure a thriving, productive garden.
As you enjoy the fruits (and veggies) of your labor, take pride in knowing you’ve made a positive environmental impact, reduced waste, and cultivated a lovely green sanctuary in your home.