Introduction
Friendly Vertical Garden Using Repurposed Pallets And Drip Irrigation
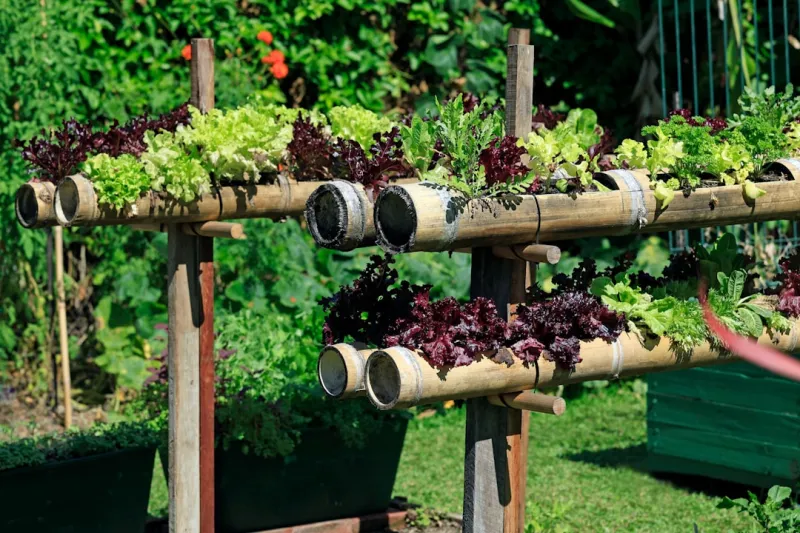
Eco-friendly vertical garden using repurposed pallets and drip irrigation presents an innovative way to cultivate a fresh green oasis right in your backyard, balcony, or even inside your home. This embraces sustainability by reusing
materials
that would typically end up in landfills, while also tackling the issue of limited space for traditional gardens.Vertical gardening is not only a Space solution but also a way to create stunning green walls that enhance air quality and provide a habitat for local wildlife. Moreover, this method encourages the growth of herbs, vegetables, and flowers, offering you fresh duce right at your fingertips. With a robust drip irrigation system, watering becomes a breeze, ensuring your green friends receive just the right amount of moisture without waste.This is Beginner-friendly and rewards you with the joy of nurturing plants while conserving resources. If you’re eager to start your own eco-friendly vertical garden but don’t know where to begin, you’ve come to the right place. This guide will walk you through the essentials of crafting a vertical garden using repurposed pallets and setting up an efficient drip irrigation system—so let's dig in!
Tools
- Needed
- Hammer: Essential for assembling pallets and securing any loose boards. You'll be manipulating wood, and a hammer will help fasten pieces together effectively.Screwdriver: Useful for removing screws or securing components more firmly than nails sometimes allow.Saw: A handsaw or jigsaw will help you cut pallets to the desired size for your vertical garden.Sandpaper: To smooth out rough edges on the pallets, making them safe to handle and more aesthetically pleasing.Drill: A power drill is necessary for creating drainage holes and securing the pallets. It speeds up the process of assembly significantly.Measuring
- Tape: To ensure accurate cutting and spacing design in your vertical garden.Garden
- Gloves: protect your hands from splinters and dirt while you work.Level: Ensures that your vertical garden is straight and properly aligned when mounted.
Materials
- Wooden Pallets: 2-3 standard pallets, depending on your desired height and the size of your garden.Landscape
- Fabric: approximately 1-2 yards to line the back of the pallet and hold soil in place.
- Potting Soil: About 2-3 cubic feet, enough to fill the planters you'll create within the pallets. Seeds/Seedlings: Choose based on your growing climate; select 5-10 varieties of herbs, vegetables, or flowers.
- Drip Irrigation Kit: One complete kit should have plenty of tubing, connectors, and emitters to set up irrigation.
- Hook and Eye Screws: A few packs to secure your drip lines and help attach the landscape fabric. Wood Stain or Non-toxic
- Sealant (optional): To protect your pallets from weather damage if your garden will be placed outdoors. Brackets or Heavy-duty
- Zip Ties: For securing the pallets against a wall or fence if needed.
- Plastic Storage Container or Bucket: For mixing the potting soil and water if you need to prep your soil mix.Step-by-Step Instructions
Step 1:
Choosing the Right PalletsTo begin, you’ll need to find suitable wooden pallets. Look for those that are clean, intact, and free from chemicals. HEatd pallets are usually the safest option since they were treated with heat rather than chemicals, and are often marked with an “HT.” Aim to select pallets with no large cracks or broken pieces that might commise stability or plant health.
Tip: Check local businesses or retailers; many are eager to get rid of pallets. Always ask for permission before taking pallets from any site.
Step 2:
Prepping PalletsOnce you've secured your pallets, it’s time to prep them for planting. Use the hammer and screwdriver to dismantle any broken parts and remove any nails or screws sticking out.Then, use sandpaper to smooth all surfaces, eliminating splinters. This will ensure safe handling while working with your pallets. If desired, apply a wood stain or sealant to enhance resistance against weather and insects, allowing you to long the life of your vertical garden.Safety
Tip: Wear gloves to protect your hands, and consider eye protection when removing old screws or nails.
Step 3:
Creating the PlantersNow it’s time to create planter pockets within the pallets. You can choose to create individual pockets or more extensive sections to house specific plants.Lay the pallet flat horizontally on the ground.Use landscape fabric to line the back and bottom of the pallet. This will act like a barrier, holding soil in place while allowing water drainage. Secure fabric with hook and eye screws or staples. Cut openings in the fabric to match the size of the plant pockets—these should be spaced evenly apart based on what plants you intend to grow.
Tip: If you have smaller plants, narrow pockets will work best. For larger plants, ensure the pockets give them enough growing space.
Step 4:
Filling the PlantersFill the newly created planter pockets with potting soil, ensuring that you have quality soil tailored to the plants you’ve selected.Make sure to compost a little if you're growing vegetables, as they thrive in nutrient-rich environments.Take care not to overfill to avoid soil spilling out when you move or hang the pallets.Once you've filled the pockets, moisten the soil for an ease of planting and to eliminate air pockets.
Tip: Use a mixture of potting soil and compost for optimal plant growth.
Step 5:
PlantingThis is where you bring your garden to life! Select your seeds or seedlings, keeping in mind the growth patterns and spacing needs.Plant according to the specific needs of your plants.Consider grouping plants by their water and sunlight needs—this will simplify care later on. Gently fill in around the plants with more potting soil to ensure they're securely placed.Safety
Tip: Be aware of plant toxicity, especially if you have children or pets who may be drawn to your garden.
Step 6:
Mounting the PalletsNext, it’s time to mount your vertical garden. If you are hanging it, prepare your wall or fence where the garden will be installed.Use brackets or heavy-duty zip ties to securely fasten the pallet to the wall.Ensure the installation is strong as the pallet will get heavier once the plants are watered.
Tip: Use a level to ensure that the pallet hangs straight.
Step 7:
Setting Up Drip IrrigationTo ensure your plants thrive, install a drip irrigation system that provides consistent moisture while conserving water.Refer to the instructions included with your drip irrigation kit. Install tubing along the top of the pallet, running drops down near each plant pocket.Use emitters to regulate the flow of water to individual plants. Adjust as necessary based on the needs of your plants.
Tip: Test the system to ensure all plants receive adequate water.
Step 8:
Watering and FertilizingNow that your vertical garden is up and running, incorporate a routine for watering and fertilizing. The drip system will make watering easy, but observe your plants regularly to ensure they’re getting enough moisture.Use a Watere fertilizer ensuring to follow the package instructions for dilution and absorption.Monitor for signs of overwatering (yellowing leaves, soggy soil) or underwatering (wilted leaves).
Tip: During hotter months, check your drip irrigation system to make any necessary adjustments.
Step 9:
Maintaining Your Vertical GardenAs your garden grows, routine maintenance becomes essential.Regularly check for pests or diseases. Use natural remedies when possible, to keep your garden chemical-free.Prune dead or overgrown plants to mote healthy growth and airflow.Safety
Tip: If you’re using any natural pesticides or fertilizers, always follow application safety recommendations.
Step 10:
Harvesting and ReplantingAs your plants mature, enjoy the fruits of your labor by regularly harvesting fresh herbs and vegetables.Remember that many plants can continue to grow if harvested correctly. For instance, herbs should be trimmed above the leaves to ensure a plentiful regrowth.Plan to replant your vertical garden with new seeds or seedlings every growing season for a fresh take every year.
2026 •