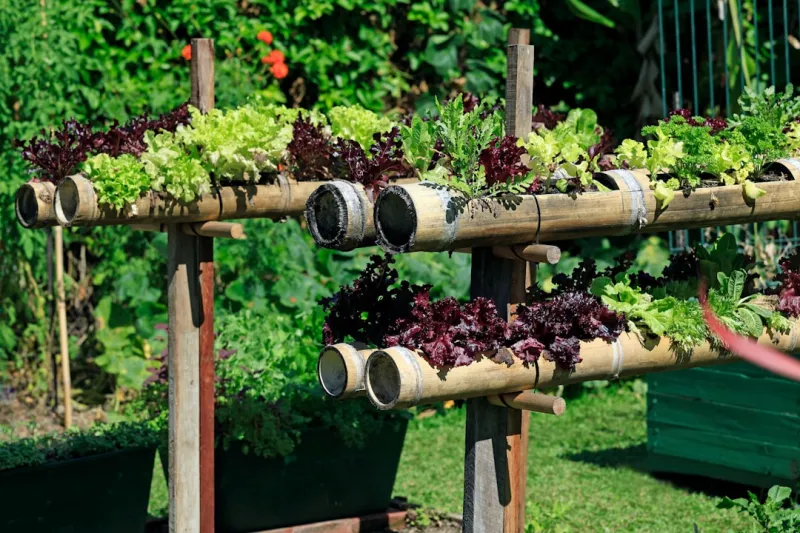
How to create a vertical vegetable garden using repurposed wooden pallets and drip irrigation
Creating a vertical vegetable garden using repurposed wooden pallets is a fantastic way to maximize limited space while adding beauty and functionality to your outdoor area. With urban gardening on the rise, more people are finding ways to grow their own veggies right on their balconies, terraces, or small backyards. This project not only helps you cultivate your own fresh produce but also promotes sustainability by reusing materials that might otherwise end up in a landfill.
The benefits of a vertical garden extend beyond just aesthetics. It allows for better air circulation around plants, reduces the risk of soil-borne diseases, and makes harvesting easier on your back. Vertical gardens also provide a natural decoration, transforming an ordinary wall into a vibrant display of green. With the incorporation of drip irrigation, you can ensure that your plants receive consistent moisture without overwhelming them. Drip irrigation minimizes water waste and can be set up to work automatically, significantly reducing the time you’ll need to spend maintaining your garden.
This DIY project is beginner-friendly, requiring basic woodworking skills and a little bit of patience. However, those with more experience can apply their knowledge to enhance the design. Whether you’re a seasoned gardener or a complete novice, this guide will walk you through every step of creating an eye-catching and productive vertical vegetable garden that you can be proud of.
Tools Needed
1. Screwdriver: Required for assembling the pallet structure and fastening other components together. A power drill with screwdriver bits will make the work faster and easier.
2. Saw: A handsaw or power saw will be necessary to cut the pallet to your desired height, especially if you plan to stack multiple pallets.
3. Staple Gun: Ideal for fastening landscape fabric to the back of the pallet. It ensures that soil stays in while allowing water to drain effectively.
4. Garden Shovel: Useful for scooping soil into the pallet boxes. Choose a small-sized shovel that allows for easy maneuvering.
5. Level: Ensures that your vertical garden is properly aligned and stable. A level will help avoid any plant structure collapsing due to unevenness.
6. Measuring Tape: Essential for measuring the size of your pallets and ensuring your drip irrigation system is correctly set up.
7. Gloves: Protect your hands from splinters, dirt, and potential allergens. Gardening gloves also provide a better grip on tools.
8. Watering Can or Hose: While a drip irrigation system will automate watering, it's always good to have a manual method ready for specific needs or adjustments.
Materials
- Wooden pallets (3–4 units, depending on height): Repurpose these pallets as the main structure of your vertical garden. Ensure they are clean and free from chemicals.
- Landscape fabric (1–2 yards): This will line the back and sides of the pallet to hold soil and prevent erosion.
- Potting soil (3–4 bags, 1.5 cubic feet each): A lightweight, nutrient-rich option perfect for growing vegetables.
- Drip irrigation kit (1 set): Kits come with hoses, fittings, and other components to set up an efficient watering system.
- Wood screws (1 box, approx. 50 screws): Used to secure the pallets more robustly together and attach any additional components.
- Plastic containers or soil boxes (varies based on pallet design): These may be installed on each layer for additional growing space.
- Seedlings or seeds (multiple varieties): Choose vegetables that grow well vertically like tomatoes, cucumbers, or herbs.
- Sandpaper (1–2 sheets): Use this to smooth the edges of the pallet to prevent injuries or splinters.
- Paint or wood sealer (optional): If you want your pallet to be weatherproof or visually appealing, you can paint or seal it before planting.
- Cordless drill: (if available): For driving screws, it can save time and effort compared to a manual screwdriver.
Step 1: Choosing and Preparing Your Pallets
Choosing the right pallets is the first step in your vertical garden project. Look for heat-treated pallets marked with “HT,” which means they have not been treated with harmful chemicals. Avoid those marked with “MB,” as they may contain methyl bromide, a toxic pesticide. Inspect the pallets for damage; they should be structurally sound.
Preparation is key. Start by cleaning the pallets with a scrub brush and water to remove any dirt or residue. Once cleaned, allow them to dry completely. After drying, use sandpaper to smooth out any rough edges that may lead to splintering. If you plan to paint or seal your pallets to enhance durability or aesthetics, do so after sanding.
Tip: It’s common to find pallets in factories, hardware stores, or online platforms. Make sure to ask if they are safe for gardening.
Step 2: Assembling the Vertical Garden Structure
Once your pallets are clean and prepped, it’s time to assemble them into a structure. Start by placing one pallet upright, ensuring it’s stable. If you have several pallets, consider stacking them vertically to increase planting space.
Secure each pallet with wood screws. Drill screws at each corner and in the middle for better stability. If your stacked pallets are too tall, you can cut them down to a manageable height using a saw.
Tip: To keep your structure steady, you can anchor it to the ground or a wall by using L-brackets and screws for added support.
Step 3: Lining the Pallet with Landscape Fabric
Now that your structural design looks good, you will need to line the back and sides of the pallets with landscape fabric. This fabric allows for proper drainage while holding the soil in place.
Cut the landscape fabric to size, ensuring it covers the entire back and flaps around the sides of the pallet. Use a staple gun to secure it in place. Make sure it is taut to prevent soil from falling out but not too tight that it may tear.
Safety Tip: Wear gloves to protect your hands while working with sharp staples and fabric.
Step 4: Filling the Pallets with Soil
With the fabric secured, it’s time to add the potting soil. Use your garden shovel to fill each compartment of the pallet. If your pallets have gaps, make sure to press the soil down gently to ensure it’s compact but not too tightly packed, hindering plant growth.
Fill each section until it is level with the top. Be cautious not to fill too much or it will overflow when watering.
Tip: Mixing in some organic compost with your potting soil can provide your plants with additional nutrients.
Step 5: Installing the Drip Irrigation System
To ensure that your vertical garden receives the right amount of moisture, install a drip irrigation system. Begin by laying out the main hose at the top of the garden and work your way down. Each section of the pallet should have a small drip emitter for even watering.
Follow the instructions that come with your drip kit; usually, it involves cutting the main hose to length and attaching emitters at intervals. Make sure to test the system once installed to see if all parts are functioning properly.
Tip: Consider using a timer feature on your drip system to provide automated watering, making your gardening experience more hands-free.
Step 6: Selecting and Planting Your Vegetables
Now that the structure is ready and the irrigation is in place, it’s time to select and plant your vegetables. Opt for plants that naturally grow upwards, such as tomatoes, cucumbers, and pole beans. Herbs also do well in vertical gardens.
Start by planting small seedlings or sowing seeds directly into the soil-filled sections. Leave adequate space between plants to allow for healthy growth.
Tip: Plant companion plants next to each other to maximize yield and protect each other from pests.
Step 7: Maintaining Your Vertical Garden
Maintaining a vertical garden revolves around consistent watering, weeding, and monitoring your plants for pests and diseases. Check the moisture levels frequently, especially during hot weather. Adjust your drip irrigation system if you notice any dryness.
Weeding is also essential to prevent competition for nutrients. While the vertical setup minimizes weed growth, it’s crucial to check regularly.
Safety Tip: Always use gloves when handling plants, particularly if you are trying out new species.
Step 8: Harvesting Your Crops
Once your plants start yielding fruits or vegetables, it’s time to enjoy your hard work! Regularly check your plants and harvest when they reach peak ripeness for the best flavor and nutrition.
Use scissors or pruning shears to avoid damaging the plant. Regular harvesting encourages further growth and improves overall plant health.
Tip: Keep records of what you’ve planted and their yields for future reference. This information can help you choose what to plant next season based on what grows best in your environment.
Troubleshooting
1. Pests Eating Your Plants: If you notice pests like aphids or slugs, consider introducing beneficial insects such as ladybugs or using organic insecticides.
2. Plants Wilting: If your plants appear wilty, they may be receiving too little or too much water. Adjust your irrigation system and check for clogged emitters.
3. Soil Erosion: If soil is leaking out of the sides of the pallet, consider adding extra landscape fabric on the outside for support and to hold soil in.
4. Overcrowded Plants: If plants seem too crowded, they may compete for nutrients. Consider thinning them out by replanting or giving away some seedlings.
5. Structural Instability: If your vertical structure wobbles, ensure that the pallets are properly secured and consider anchoring them to a wall or supporting frame for added stability.
Conclusion
Creating a vertical vegetable garden using repurposed wooden pallets and a drip irrigation system is a rewarding and eco-friendly project that provides a sustainable way to grow your own food and beautify your space. This DIY project allows you to express creativity while addressing the challenge of limited gardening space.
Consider variations such as painting your pallets with vibrant colors or using different styles of containers for more variety. Maintenance is crucial, so regularly check your plants and irrigation system to keep everything flowing smoothly.
With a little effort and care, your vertical garden can flourish, supplying you with healthy, homegrown produce right at your fingertips. Remember, gardening is not just about the harvest but also the joy of watching your plants thrive. Happy gardening!