Introduction
Garden Wall Using Repurposed Pallets And Lightweight Soil Mix
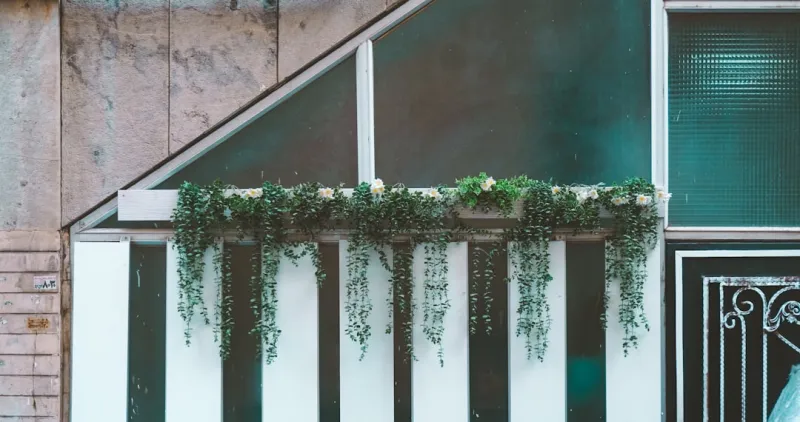
Garden Wall Using Repurposed Pallets And Lightweight Soil Mixbody.navh1.rating.hero-img.share.btn Garden Wall Using Repurposed Pallets And Lightweight Soil MixCreating a vertical garden wall is an exciting way to bring greenery into your home or outdoor space without taking up much floor area. As urbanization increases, many people find themselves living in smaller spaces, with limited room to garden horizontally. A vertical garden presents a perfect solution, allowing you to cultivate an array of plants while adding beauty and character to your environment. Furthermore, repurposing pallets makes this not just eco-friendly, but also Budgetous!Building a vertical garden wall using repurposed pallets and lightweight soil is a delightful DIY that even beginners can tackle. Not only will you contribute to reducing waste by recycling pallets, but you will also enjoy the benefits of fresh herbs, vibrant flowers, or luscious vegetables at your fingertips. Additionally, vertical gardens can improve air quality, create a natural insulation layer for your walls, and even boost your mood and ductivity.This is ideal for anyone from gardening enthusiasts to interior decorators and Ecoous individuals. The skills required are minimal; you’ll mainly need some basic assembly and planting techniques. As you dive into this guide, you’ll be equipped with all the knowledge necessary to create your vertical garden wall and enjoy the benefits of living greenery in your space.
Tools Needed
- Screwdriver or Drill: Essential for assembling the pallets, ensuring a sturdy structure for your vertical garden.Saw: If you need to resize or modify your pallets to fit your space, a saw will make clean cuts.
- Measuring Tape: Accurate measurements ensure your garden wall fits the designated area and that the plants have enough room to grow.
- Landscape Fabric or Coconut Coir: Useful for lining the pallets, preventing soil from spilling out while allowing water drainage.
- Garden Trowel: Ideal for filling the pallet pockets with soil and for planting your herbs, flowers, or vegetables easily.
- Gloves: protect your hands while handling the pallets and soil, especially when working with potentially rough surfaces and dirt
- Paint or Sealant (Optional): If you want to improve the aesthetics of your pallets, adding a coat of non-toxic paint or sealant will enhance their longevity and appearance.
- Hose or Watering Can: A reliable method for watering your plants once your garden wall is complete.
Materials
- Repurposed Pallets: 2-3 pallets (depending on desired size).Landscape
- Fabric or Coconut Coir: 1-2 yards (enough to line the pocket spaces of each pallet).
- Lightweight Soil Mix: 2-3 cubic feet (choose a blend that retains moisture but provides good drainage).
- Potting Plants or Seeds: A variety (6-12 plants depending on pallet size; herbs like basil, parsley, and decorative plants like succulents).
- Wood Screws: 1 pound (for connecting pallets if stacking or tacking down).
- Wooden Brackets: 4-6 (to secure the wall to the main surface, especially if it’s against a wall).
- Hinges (Optional): 2-4 (if you want to create a movable feature for easy maintenance).
- Watering System (Optional): Drip irrigation kit or similar (for automated watering if you plan to grow a larger selection of plants).Step-by-Step Guide
Step 1:
Gather and Prepare Your
Materials
Start by collecting all the
materials
and tools listed. Ensure you have your pallets free of nails and splinters. Check for damage, such as rotting or breaks, as it could affect the durability of your garden wall.
Tips: If pallets are dirty or stained, consider cleaning them before use. You can power wash or scrub them with soap and water; let them dry completely before ceeding.
Step 2:
Measure and Cut PalletsUsing the measuring tape, determine how much space you want your vertical garden to take up. Measure how many pallets you’ll need to cover that space, and cut the pallets to size with your saw if necessary. Double-check that the cuts are clean and safe to avoid injury.
Tips: You may choose to use one tall pallet, or stack multiple pallets horizontally—whatever suits your design aesthetics.
Step 3:
Line the PalletsCut your landscape fabric or coconut coir into appropriate pieces to line the back and sides of each pallet. This will help retain soil and provide drainage. Secure the fabric in place using a staple gun, tacks, or strong adhesive as needed.
Tips: Make sure the fabric isn’t too tight, as plants will need both support and room for their roots.
Step 4:
Assemble Your Pallet StructureIf you have multiple pallets, stack or connect them using wood screws and brackets to create a solid structure. Ensure everything is tightly fitted, and check for stability. Depending on your design, you can create a single wall or a tiered effect.
Tips: Always use a level to ensure that the pallets are properly aligned. This will not only give a professional appearance but also ensure watering remains effective.
Step 5:
Prepare the Soil MixIn a large container or wheelbarrow, mix your lightweight soil with any additives, such as perlite or vermiculite, to improve drainage and moisture retention. Depending on the plants you want to grow, this mix should support their needs.
Tips: Always follow the manufacturer’s instructions for any commercial soil mix and keep in mind that succulent plants will require a drier mix.
Step 6:
Fill the Pallet PocketsUsing your garden trowel, fill each pocket of your lined pallet with the soil mix. Leave an inch or two at the top to avoid overflow while watering. Make sure to pack it down lightly to eliminate air pockets.
Tips: It’s better to under-fill initially and add more soil later – remember that you need to leave room for plant roots.
Step 7:
Choose and Plant Your VegetationSelect plants that match the environmental light and moisture conditions of the location you’ve chosen. Fill each pocket with your chosen plants, whether starting from seeds or small plants. Be sure to plant them firmly so they stay in place.
Tips: Start with lower maintenance plants such as herbs or succulents if you are a beginner, and move on to more complex plants as you gain experience.
Step 8:
Secure and WaterOnce planted, your vertical garden wall requires secure placement. If it’s not freestanding, use wooden brackets and screws to fix the wall to an existing structure to prevent tipping. Give the entire garden a good watering to settle the soil and activate it for plant growth.
Tips: If you plan to have a drip irrigation system, now is the time to install it while the wall is accessible!
Step 9:
Maintain Your Garden WallCheck on your vertical garden regularly. Plants will require watering, especially in hot months, and some may need to be pruned or replaced as they grow. Fertilize as needed based on the types of plants present.
Tips: Rotate any plants if you can, allowing light to distribute evenly throughout the growth, especially if you’re limited on space.
Step 10:
Enjoy Your Greenery!Sit back and enjoy the fruits (and vegetables) of your labor! Your new vertical garden wall not only beautifies your space but can also provide culinary herbs, enhance air quality, and foster a soothing atmosphere.
Tips: Document your plants' growth with pictures, which can help you learn and appreciate the gardening process over time!
2026 •