Introduction
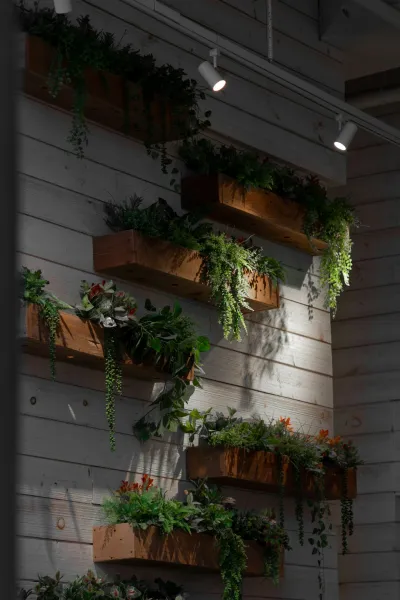
Garden Wall Using Repurposed Pallets And Led Grow Lights
).Plants - 12-20 plants (herbs, flowers, or small vegetables depending on the size).LED Grow Lights - 1-2 lights (depending on the height and width of your vertical garden).Drip Tray - 1 (to catch any excess water—an essential element to maintain indoor spaces).Wood Stain or Sealant (optional) - 1 can (to protect the wood from moisture if you plan to leave it outdoors).Step-by-Step Instructions
Step 1:
Choosing the
- Right Location
What: Decide where you want your vertical garden wall to be installed.
How: Take your time to choose a location that gets sufficient sunlight (if planning to use natural light) and is easily accessible for watering and picking plants. An indoor wall or an outdoor deck works well.
Tips: Look for a sturdy wall that can support the weight of the soil and plants. Avoid areas with extreme weather conditions unless you have a protective covering.
Safety: Ensure there are no concealed electrical wires or plumbing in the wall where you plan to drill or secure the garden.
Step 2:
Preparing the
- Pallet
What: Get your repurposed pallet ready for planting.
How: Clean the pallet to remove dirt and debris. Check for any sharp edges or truding nails and sand them down if necessary. If the pallet is weathered or damaged, it’s advisable to repair it with screws or replace any broken boards.
Tips: Applying wood stain or sealant can add durability and protect the pallet from moisture and pests.
Safety: Always wear safety glasses and gloves while handling pallets to prevent splinters and injuries.
Step 3:
Lining the
- Pallet
What: Line the back of the pallet to contain soil.
How: Cut a piece of landscaping fabric to cover the back and sides of the pallet. Staple the fabric securely, ensuring it holds firmly in place while leaving enough space for drainage.
Tips: Allow the fabric to extend over the bottom slightly to catch excess soil during planting.
Safety: Be cautious with the staple gun to prevent pinching your fingers.
Step 4:
Attaching the
- Drip Tray
What: Prepare to catch excess water.
How: Position the drip tray underneath the pallet. Secure it with screws or brackets so it won’t tip over with the weight of the soil and plants.
Tips: Choose a tray that complements your aesthetic; this is especially important for indoor gardens.
Safety: Ensure the tray is installed firmly to avoid water spills that might damage floors.
Step 5:
Filling with
- Soil
What: Add a nutrient-rich soil mix suitable for your plants.
How: Begin by adding soil to the pallet, making sure you fill each section completely. Aim for a depth of at least 4-6 inches.
Tips: Moisten the soil slightly to help it settle. Avoid compacting it too much to ensure proper drainage and root health.
Safety: Use gloves to protect your hands from any Soild irritants.
Step 6:
Planting
What: Decide on a floral or practical arrangement for your plants.
How: Plant your chosen herbs, flowers, or vegetables in the soil. Be mindful of their light requirements and growth habits.
Tips: Consider placement based on growth height so taller plants don’t overshadow shorter ones.
Safety: Handle all plants carefully to avoid injury from any prickly or sharp leaves.
Step 7:
Installing
- LED Grow Lights
What: provide adequate light for plant growth.
How: Mount the LED grow lights above the vertical garden wall. Ensure they are positioned to provide even light distribution across all plants.
Tips: Aim for a light that’s adjustable in intensity. Set timers to mimic natural light cycles for optimal growth.
Safety: Follow the manufacturer's instructions for installation, ensuring that the electrical parts are sheltered from water.
Step 8:
Mounting the
- Vertical Garden
What: Secure your vertical garden to the wall.
How: With help, lift the pallet into position and use a level to ensure it’s straight. Use screws to secure the pallet to the wall framing, placing them in the corners and in the middle for added stability.
Tips: If mounting to drywall, use wall anchors to provide extra support.
Safety: Have someone assist you during this step to prevent accidents from a heavy pallet falling.
Step 9:
Watering and
- Maintenance
What: Ensure your plants thrive.
How: Water your plants according to their needs, keeping in mind soil moisture levels. Regularly check for pests, diseases, and dead leaves.
Tips: If using LED grow lights, follow the recommended distance from plants to avoid burning them.
Safety: Be cautious not to over-water, which can damage both plant roots and wall surfaces.
Step 10:
Enjoying
- Your Vertical Garden
What: Step back and admire your work.
How: As your plants begin to grow, ensure you enjoy the fruits of your labor by frequently tending to them. Collect fresh herbs, enjoy flowers, or admire the aesthetics of your beautiful living wall.
Tips: Take the opportunity to share your vertical garden with friends, and use it as a backdrop for gatherings.
Safety: Remain vigilant for any potential hazards, like loose cables for the lights or excess water that may pool on the floor.
2026 •