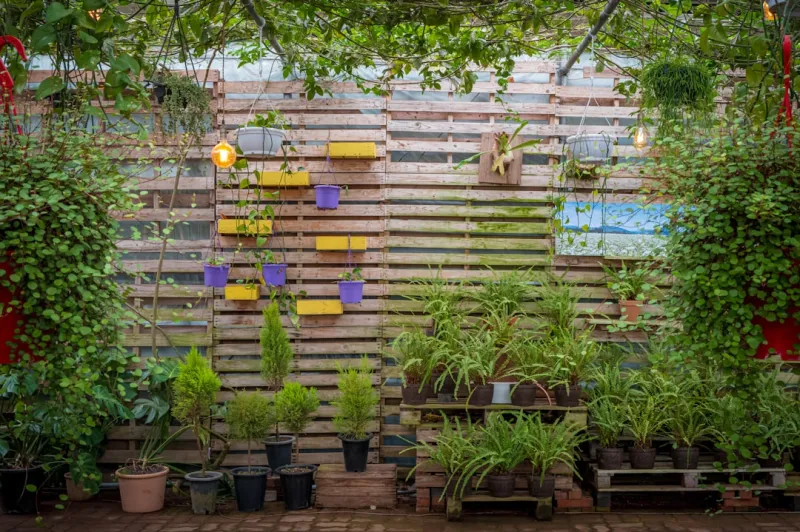
How to create a vertical garden wall using repurposed pallets and colorful succulents
Introduction
In today’s busy world, finding ways to add greenery to our lives can be both a therapeutic and stylish endeavor. One productive approach that merges sustainability with beauty is creating a vertical garden wall using repurposed pallets and colorful succulents. This DIY project is not only a fantastic way to breathe life into your living space, but it also offers numerous benefits including air purification, aesthetic enhancement, and superior space utilization.
Vertical gardens are perfect for individuals and families who might lack the outdoor space for traditional gardening or for those who wish to transform a dull wall into a vibrant focal point. Utilizing repurposed materials is an environmental boon, allowing you to reduce waste and embrace a more sustainable lifestyle. Working with succulents is an added advantage, as they are hardy, low-maintenance plants that do well in vertical formats due to their minimal root systems.
This project is suitable for beginners and offers a moderate skill level. If you can wield a screwdriver and are comfortable working with basic tools, you can create your own vertical garden wall in a matter of hours. Prepare to unleash your creativity as you select from a vibrant palette of succulents, turning your vertical garden into a living piece of art that can enhance your home’s ambiance.
Let’s dive into this engaging project, providing you with all the tools, materials, and step-by-step instructions you need to embark on your succulent garden adventure!
Tools Needed
1. Screwdriver/Drill — Essential for fastening the pallets and any hardware needed for support. A drill is especially helpful for pre-drilling holes.
2. Saw — A hand saw or power saw is necessary for cutting pallets to the right dimensions. It allows you to customize the size of your vertical garden.
3. Sandpaper/Orbital Sander — Used to smooth the edges of the pallets and remove any splinters, ensuring a safe and appealing finish.
4. Measuring Tape — This will help you obtain the accurate dimensions you’ll need for cutting and assembling the pallets.
5. Landscape Fabric — Crucial for lining the back of the pallet to prevent soil from spilling out while allowing for proper drainage.
6. Staple Gun — Ideal for affixing the landscape fabric to the pallet securely, ensuring long-term stability of your soil and plants.
7. Soil Scoop — This tool aids in filling your pallet planters with soil without spilling, making the planting process neater.
8. Watering Can — While succulents do not require frequent watering, having one on hand is essential for ensuring your plants establish roots after planting.
Materials
1. Repurposed Pallets — 1 or 2 (depending on desired dimensions and size of your garden wall)
2. Landscape Fabric — 1 roll (at least 3 feet by 10 feet)
3. Potting Soil — 2 bags (preferably cactus mix for better drainage)
4. Colorful Succulents — Various (approximately 10-20 depending on pallet size and design)
5. Wood Screws — 1 bag (2.5-inch screws for securing pallets together)
6. Wood Stain/Paint (optional) — 1 small can or sample (for aesthetic enhancements)
7. Water Booster Liquid Fertilizer — 1 bottle (to promote root establishment post-planting)
8. Hanging Hardware — 2-3 brackets (depending on weight of structure, for wall mounting)
9. Drill Bits — Various sizes (to suit the screws and for pre-drilling holes)
10. Burlap or Twine (optional) — For decorative touches or securing larger plants.
Steps To Create Your Vertical Garden Wall
Step 1: Select Your Pallet and Prepare It
What: Start by choosing a sturdy, undamaged pallet that will support the weight of your garden. Look for pallets that are made from untreated wood to avoid chemical contamination in your soil.
How: Inspect your pallet for any loose boards or splinters. If you find any damaged areas, use your saw to remove them. Once satisfied, use sandpaper or an orbital sander to smooth rough edges.
Tips: Opt for heat-treated pallets if you’re concerned about chemicals. After sanding, give your pallet a good wipe-down to remove any dust or debris. You may also choose to paint or stain your pallet at this stage for added longevity and aesthetic appeal.
Safety: Wear a dust mask while sanding to avoid inhaling wood particles. Safety goggles are also advised to protect your eyes from splinters.
Step 2: Measure and Cut Landscape Fabric
What: This step involves preparing the lining of your “planter boxes” that the pallets will create.
How: Measure the back and the sides of each pallet board and cut the landscape fabric accordingly. Leave some extra fabric at the top to fold over and secure, which aids in keeping the soil in.
Tips: Consider using a heavy-duty pair of scissors or a utility knife for clean cuts. Make sure your pieces cover the bottom and the sides adequately to hold the soil while allowing for water drainage.
Safety: Be careful with cutting tools, ensuring your fingers are at a safe distance while cutting.
Step 3: Secure Landscape Fabric to the Pallet
What: Now that you have your landscape fabric cut, it’s time to secure it onto the pallet.
How: Using a staple gun, attach the landscape fabric to the back and sides of the pallet boards, ensuring it’s taut but not overly stretched.
Tips: Staple in a zigzag pattern to help the fabric stay securely in place. Don’t be afraid to use several staples along each edge to ensure durability.
Safety: Ensure the staple gun is pointed away from your body when applying staples to avoid accidents.
Step 4: Prepare the Soil Mix
What: A well-draining soil mix is vital for succulents since they thrive in drier conditions.
How: In a large mixing container or wheelbarrow, combine your potting soil and a small amount of sand or perlite. A mix of around 70% potting soil to 30% drainage material can be ideal.
Tips: Test the soil for fluffiness. It should not feel too compact, allowing oxygen to reach the roots once the succulents are planted. If it feels too dense, add more perlite or sand.
Safety: Be careful not to overexert yourself during this step, especially if using heavy bags of soil. Use proper lifting techniques.
Step 5: Plant the Succulents
What: This is the fun part—actual planting!
How: Take your soil mix and fill each section of the pallet with about two-thirds of the way full. Once planted, dig small holes for each succulent, gently remove them from their pots, and place them into the holes. Cover the roots with soil and gently pat down to secure.
Tips: Choose a variety of colors and textures to create an eye-catching arrangement. Consider placing taller succulents at the bottom and trailing ones at the top for a cascading effect.
Safety: Handle small tools carefully when planting and be conscious of your posture to avoid straining your back.
Step 6: Water the Succulents
What: After planting, your succulents need a good initial watering to settle the roots.
How: Fill your watering can with water and gently water each of the planted succulents until you see some water draining from the back of the pallet.
Tips: Make sure not to over-water. Succulents are resilient but still need a balance between moisture and dryness. Wait a few days before watering again and monitor the dampness of your soil.
Safety: Ensure the surface under the pallet can handle water runoff; using a tarp or old towel can protect surfaces from stains.
Step 7: Mount the Vertical Garden Wall
What: To display your creation, you'll need to securely mount it to a wall.
How: In the area where you want your garden to hang, assess the wall type. Using a level, align your pallet and mark the spots where you will attach the hanging hardware. Drill screws or brackets into place based on your measurements.
Tips: Ensure the mounting area can bear the weight of the pallet once planted—usually around 50-70 lbs. You may want to use additional support brackets for larger installations.
Safety: Wear adhesive gloves if handling screws or brackets as they can be sharp.
Step 8: Care for Your Vertical Garden
What: Once your vertical garden wall is mounted, a few maintenance steps can ensure it thrives.
How: Monitor the humidity and moisture levels. As succulents require very little water, only check weekly. Also, consider rotating the pallet occasionally for even sunlight exposure.
Tips: Quickly remove any dead leaves or wilted plants to maintain the appearance of your garden. Make sure to fertilize with a water booster during the growing season for enhanced growth.
Safety: Use garden gloves when handling succulents to protect your skin from their sharp edges.
Troubleshooting Common Issues
Creating a vertical garden wall is a rewarding experience, but issues can arise. Here are some common challenges with potential fixes:
1. Overwatering — If you notice your succulents are wilting or rotting, reduce watering frequency. Implement a precise watering schedule and allow the soil to dry between waterings.
2. Underwatering — Conversely, if the leaves appear shriveled, increase your watering sessions, ensuring roots are receiving adequate moisture.
3. Pests — If you notice small pests, use a mild soap solution or neem oil to clean the leaves. Regular inspection can help detect infestations early.
4. Insufficient sunlight — If your plants look pale, they might need more light. Consider relocating the vertical garden to a sunnier spot, as most succulents prefer bright, indirect sunlight.
5. Worn-out soil — After a few months, the nutrients in the soil may become depleted. Refresh the top layer of soil or fertilize using a diluted succulent-specific fertilizer.
Conclusion
Creating a vertical garden wall using repurposed pallets and colorful succulents is a fulfilling project that can breathe life into any space. With the steps laid out, you can not only beautify your home but also engage in sustainable practices by utilizing materials you may have lying around.
Variations can include:
- Different pallet styles for a unique look.
- Diverse plant choices such as herbs or small flowering plants.
- Customized paint/stain finishes to fit your home’s decor.