Introduction
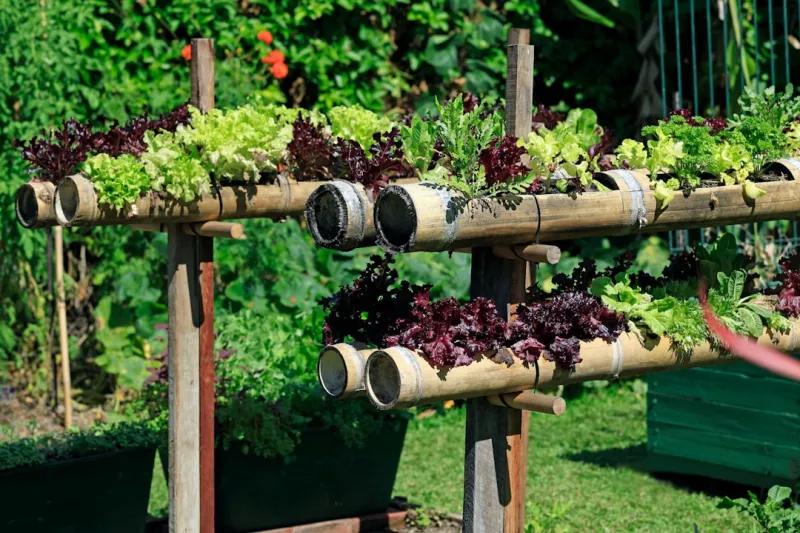
Garden Using Upcycled Wine Bottles And Pallet Wood
has gained immense popularity in recent years, providing an innovative way to maximize space while enhancing the aesthetics of your home or garden. This creative involves using upcycled wine bottles and pallet wood, two readily available
materials
that not only reduce waste but also add a rustic charm to any environment. Imagine a stunning, green wall filled with vibrant plants, herbs, or even flowers, all while giving a second life to
materials
that might otherwise end up in landfills.Benefits of creating a vertical garden are plentiful:Space-Saving: Perfect for small spaces, vertical gardens allow you to grow a variety of plants without requiring hefty ground space.Aesthetic
- Appeal: Vertical gardens can serve as living art, transforming any dull wall into a lush, beautiful backdrop.
- Easy Access: It allows easy access for watering and harvesting, making gardening more enjoyable.
- Environmental Impact: Upcycling
materials
motes sustainability and encourages a greener lifestyle.
- Educational Opportunities: It’s a great for families and children, perfect for teaching about sustainability, gardening, and nature.This is suitable for beginners of all skill levels, as it requires only basic tools and minimal construction experience. With some patience and a little creativity, anyone can create their unique vertical garden.
Tools Needed
- Drill: Essential for making holes in wine bottles and pallet wood for screws and drainage systems.Screwdriver: For securing the pallet wood structure and attaching the vertical garden unit to the wall or a support.Wire
- Cutter: Helpful for trimming and shaping the wire you might use for securing the bottles or plants.Wood Saw (Hand saw/Power saw): Used for cutting the pallet wood to the desired size, ensuring a clean and precise cut.Sandpaper or
- Sander: To smooth the pallet wood edges, preventing splinters during the assembly process.Measuring
- Tape: Critical for ensuring accurate measurements to fit your available space.Gloves: Important for protecting your hands from sharp edges on wood and glass while crafting your vertical garden.Safety
- Goggles: To protect your eyes from debris when drilling, cutting, or sanding.
Materials
- Wine Bottles: 6-10 bottles, collected based on the width of your garden.Pallet
- Wood: 1-2 standard-sized pallets, depending on how large you want your vertical garden.
- Nails or Screws: approximately 25-50 for securing the pallets and attaching the wine bottles.
- Landscape Fabric: 1-2 yards, to line the bottles and ensure proper drainage for the plants.
- Potting Soil: 2-4 bags, based on the number of bottles you have, to fill with nutritious soil for your plants.
- Plants or Seeds: A selection of 6-12 plants (consider using herbs, succulents, or flowers based on sunlight exposure).
- Wire or Twine: 1 roll, for securing plants and bottles together. Wood Sealant/Paint (optional): 1 quart, to protect the wood from moisture and enhance its appearance.
- Drill Bits (for glass): 1 set, specifically designed for drilling through glass wine bottles safely.
Step 1:
Gather Your
Materials
Before diving into the construction process, gather all the necessary
materials
listed. Collect wine bottles; you’ll need both empty and clean bottles with labels removed. Choose pallet wood that is not only sturdy but also free from mold and splinters. If possible, obtain untreated wood to avoid chemicals leaching into your plants. When sourcing, consider reaching out to local bars, wineries, or restaurants for used wine bottles.
Step 2:
Prepare the Wine BottlesTo prepare your wine bottles, wear gloves to protect your hands. Use the glass drill bit to create drainage holes at the bottom of each bottle. This is essential to prevent root rot and facilitate proper drainage. To do so, fill the bottle with ice, then place it horizontally in a vice or clamps, which prevents it from rolling. This method keeps the temperature low and reduces the risk of the glass cracking while drilling. Go slow and steady with the drill as you create the holes.
Step 3:
Prepare the Pallet WoodExamine your pallets for structural integrity. Remove any splinters or truding nails using sandpaper or a sander. Cut your pallet wood according to your desired vertical garden height and width, ensuring stability. Typically, each pallet section measures around 48 inches wide, but you can adjust based on your specific design. A shorter vertical garden might only require half of that. Be sure to wear your safety goggles while cutting to protect your eyes from flying debris.
Step 4:
Assemble the Pallet FrameOnce your wood pieces are cut, assemble the frame by attaching the pallet sections vertically or horizontally, depending on your layout preference. Use nails or screws, ensuring each piece is securely in place. It might be helpful to create a grid or a ladder structure to allow equal spacing for each wine bottle placement. For added stability, consider reinforcing the back with extra wood or screws.
Step 5:
Line the BottlesYou want to ensure the plants thrive in your wine bottles, so line them with landscape fabric.
- This serves multiple purposes: it acts as a barrier to keep soil from washing out, maintains moisture, and helps prevent root rot. Measure and cut pieces of landscape fabric that will fit inside the bottles and staple or glue them into place.
Step 6:
Fill with SoilStart filling your lined wine bottles with potting soil. Leave about an inch of space from the top for planting. Moisture retention is crucial, so select Goody potting soil that has organic matter to help your plants with nutrients. To fill the bottles, you can use a funnel for a mess-free transfer. Compact the soil gently to ensure there are no large air pockets but leave enough space for root growth.
Step 7:
Plant
- Your GreensNow comes the fun part: planting! Depending on the plants you've chosen, insert seedlings, seeds, or cuttings into the soil of each bottle. Make sure to select plants that have similar light and water requirements to simplify maintenance. Close the bottles with a little more soil on top as needed, ensuring roots can anchor well. After planting, give each bottle a thorough watering to settle the soil around the roots.
Step 8:
Hang Your Vertical GardenOnce your bottles are filled and planted, it's time to attach them to your pallet frame. Using wire or twine, carefully secure each bottle into place. If attaching to a wall, consider using brackets or screws to provide extra support. Ensure each bottle has enough room for growth. If you only want to create a Freeng unit, you can use wooden supports on either side to keep it stable.
Step 9:
Maintenance and CareAfter your vertical garden is complete, it’s crucial to establish a watering routine. Generally, vertical gardens will need more frequent watering than traditional gardens due to the limited soil amounts. Monitor the soil moisture levels and adjust your watering schedule accordingly. Ensure to prune plants as necessary to mote healthy growth and prevent overcrowding.
Step 10:
Harvest and Enjoy!As your plants begin to grow, watch for their gress and enjoy fresh herbs, vibrant flowers, or greens. Your vertical garden can be a beautiful and ductive space, encouraging you to connect with nature. Gather duce safely and sustainably, considering adding more bottles if space permits in the future.
2026 •