Introduction
Garden Using Upcycled Plastic Bottles And Drip Irrigation System
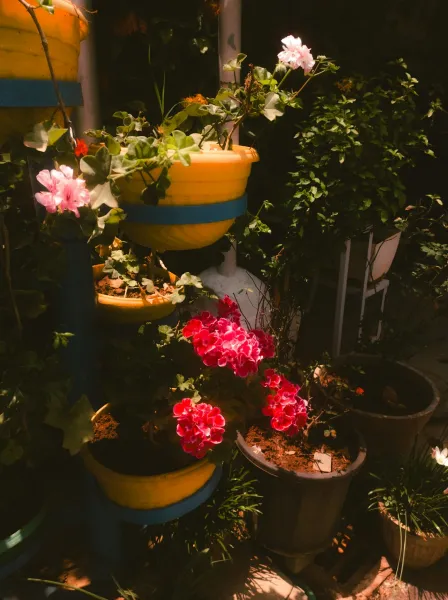
Garden Using Upcycled Plastic Bottles And Drip Irrigation Systembody.navh1.rating.hero-img.share.btn Garden Using Upcycled Plastic Bottles And Drip Irrigation System5 (39In today’s rapidly urbanizing world, the loss of green spaces often leads to a disconnect from nature. Many of us long for lush greenery, but regular gardening can be challenging due to limited space, especially for urban dwellers. This is where vertical gardens come into play. They allow us to maximize space while also promoting sustainability by repurposing
materials
Creating a vertical garden using upcycled plastic bottles not only brightens your living space but also reduces plastic waste, making it a more eco-friendly choice.Vertical gardens are a growing trend, perfect for those looking to cultivate herbs, vegetables, or ornamental plants within small areas, whether on balconies, patios, or sunlit walls. This DIY adopts a sustainable approach by utilizing old plastic bottles. The added bonus of a drip irrigation system means your plants get the nourishment they need without you constantly lugging around a watering can.This guide is designed for beginners looking to explore gardening while fostering a sense of environmental responsibility. With a few simple tools and
materials
, you can create a functional and decorative vertical garden, even if you’ve never gardened before. Let’s dive in!
Tools
- Needed
- Utility Knife: Essential for cutting the plastic bottles. A sharp blade provides clean cuts and reduces plastic shavings that could hinder plant growth.Drill with
- Drill Bits: Useful for making drainage holes in the bottles as well as creating holes for the drip irrigation tubing. A power drill saves time compared to hand tools.
- Measuring Tape or Ruler: Ensures accurate measurements when cutting bottles and arranging them in the vertical garden. This helps maintain aesthetics and uniformity.
- String or Twine: Necessary for securing the bottles to the frame. proper binding helps the structure remain stable and withstand environmental elements.
- Garden Trowel: Helps in filling the bottles with soil and planting seeds or seedlings. Its small size is ideal for working in tight spaces.
- Pliers: Useful for adjusting and securing fittings in the drip irrigation system. They provide leverage for ensuring tight seals and connections.
- Gloves: protect your hands from sharp edges of the plastic and potential soil contaminants. Safety is paramount, especially for beginners.
- Watering Can or Hose: Needed for initially saturating the plants and soil before the drip system is up and running. Regular watering will help establish plants.
Materials
- Plastic Bottles: 10-15 bottles (2-liter or 1-liter sizes) to create enough planting spaces.Wire
- Mesh or Chicken Wire: One piece, approximately 3 feet by 3 feet, to provide support for the bottles.
- Wooden Pallet or Wooden Frame: One unit (or you can build your own frame), which will serve as the main structure for the vertical garden.
- Potting Soil: 2 bags (about 1 cf each) to fill your bottles adequately. This provides the nutrients needed for plant growth.
- Seeds or Seedlings: Depending on your preference, 10-15 packets of seeds or seedlings (such as herbs, lettuce, or flowers) for a varied garden.
- Drip Irrigation System: A basic kit that usually includes tubing, emitters, connectors, and a water source. This will automate watering.
- Screws or Zip Ties: A pack of each (about 20) will help in securing the wire mesh and bottles to the frame as well as connecting items.
- Fertilizer: One bag (Slowe type is preferable) to enrich the soil periodically.
- This is essential for boosting plant health
- Paint (Optional): One or two cans of waterof paint, if you want to customize or Weatherproof the wood frame for durability.Steps to Garden#Planning YourBefore jumping into action, take time to plan your vertical garden. Choose a location that gets ample sunlight for at least 6 hours a day, as most plants require it for optimum growth. Sketch your design — consider the arrangement of your bottles and the types of plants you want to cultivate. Will it be primarily herbs or flowers? Assess how many bottles you'll need based on your design.
Tips: Choose plants that grow well together, sometimes referred to as companion planting, to enhance growth potential.
Safety: When planning, ensure the area is free from obstructions and hazardous
materials
#Collecting and Preparing Plastic BottlesGather all the plastic bottles you plan to use. Clean them thoroughly, removing any labels and residues to prevent mold growth.How to cut: Use a utility knife to make clean cuts, creating openings from the sides or the bottom. Holes are vital to ensure they can drain properly; create small holes at the bottom as well for water continuity.
Tips: Use gloves while cutting to protect your hands from sharp edges. Consider a design where the bottle openings face outward for easy access to your plants.#Creating Drainage HolesAfter preparing your bottles, make several small holes at the bottom of each bottle to aid drainage. You may drill 5-8 holes, depending on the bottle size. This allows excess water to escape and prevents root rot.How to drill: Secure the bottle in a vise or use a solid base. Drill through the base gently; plastics can crack if overheated, so keep the drill speed moderate.
Tips: Ensure drainage holes are clear after drilling. This can also serve as a test to check if your drill and technique are working, as free water flow indicates successful drainage.#Constructing the Support FrameUse a wooden pallet or build a wooden frame to hold your bottles. A height of 5-6 feet is ideal, but customize according to your space constraints. Attach the vertical and horizontal pieces firmly using screws to create a sturdy structure.
Tip: If using a single piece of wood, consider using a support at the back to prevent tipping.
Safety: If creating your frame, wear gloves and goggles while handling wood and sharp tools.#Securing the Wire MeshAttach wire mesh to the frame, making sure it's taut. This structure will hold the plastic bottles in place while allowing sunlight and ventilation.Use screws or zip ties to secure it firmly to the wooden frame or pallet.
Tips: Ensure the mesh holes are small enough to hold the bottles securely without them slipping out.#Arranging the BottlesPlace the bottles into your frame, threading them through the wire mesh. Ensure they’re securely positioned to prevent them from falling. Alternate the heights and directions of the bottles for aesthetics and plant needs, with taller plants at the back or higher up.How to arrange: Start with the bottom row first, securing them in place before working your way up. Fill them after placement.
Tips: Mix shorter and taller plants. Vining plants can also cascade beautifully.#Filling and PlantingNow, fill your bottles with potting soil to the brim. Add fertilizer to the soil mixture if needed. Carefully plant your seeds or seedlings into the soil.How to plant: Make a small hole in the soil for each seedling, gently place them, and cover them softly. Pat down to eliminate air gaps.
Tips: Water the filled bottles without flooding them before the drip system takes over.#Setting Up the Drip Irrigation SystemIt’s time to establish the drip irrigation system. Follow the instructions provided with the kit. Connect your tubing to a water source, ensuring proper placement of emitters to deliver water to the roots of your plants.How to install: Attach emitters to each bottle. Use pliers to ensure they are tightly fitted. Make sure the water source is low pressure to avoid flooding.
Tips: Test the system regularly to confirm it’s working effectively. Adjust or add emitters if necessary.#Final Touches and AestheticsConsider painting the wooden frame to enhance its look while also protecting it against water and rot. You can use any color that matches your decor or personal style.Add decorative elements such as garden stakes, planters, or hanging decorations that align with the vertical garden theme.
Tips: Waterof paint will guarantee a Longerg finish. Always allow paint to dry completely before watering.#Caring for Your Vertical GardenRegular maintenance is crucial. Monitor plant growth, pinch back overgrown areas, and check the drip irrigation system at least once a week. Watering can initially help build a strong root system.Additionally, consider fertilizing every 4-6 weeks to provide adequate nutrients.
Safety: Always wear gloves while working in the soil to prevent any irritation.
2026 •