How to create a vertical garden using upcycled pallets and natural moss for urban spaces
Introduction
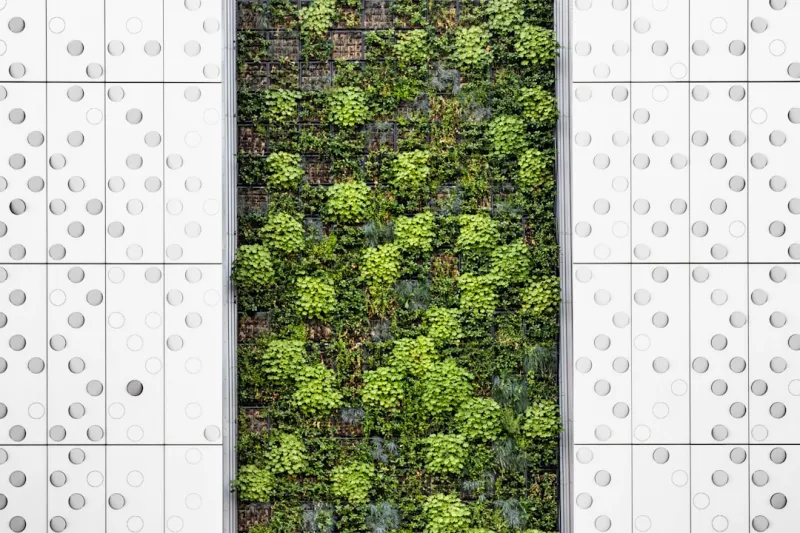
In today’s urbanized world, space for gardening is increasingly limited. As cities grow vertically, many urban dwellers find themselves bereft of the soil and sunlight necessary to cultivate greenery. But what if we told you there’s a way to bring nature into your life without sacrificing precious floor space? Vertical gardens, specifically those that incorporate upcycled pallets and natural moss, are an eco-friendly and stylish solution for creating a lush, inviting atmosphere in any urban environment.
This DIY vertical garden project enables you to transform old wooden pallets into stunning living art while also contributing to environmental sustainability through upcycling. By using natural moss and other low-maintenance plants, you can create a thriving vertical garden that requires minimal upkeep, making it perfect for busy city dwellers who want to reconnect with nature without the hassle of traditional gardening.
The benefits of cultivating a vertical garden are numerous:
- Aesthetic Appeal: Adding lush greenery to your walls can enhance the overall look of your living space.
- Space Efficiency: Vertical gardens allow you to garden where horizontal space is limited.
- Air Purification: Plants naturally filter toxins and improve air quality in urban environments.
- Sustainability: Upcycling pallets reduces waste and lowers your carbon footprint.
- Diverse Plant Life: Using moss and other plants provides a unique, textured look while being low-maintenance.
Tools Needed
1. Screwdriver/Drill: Essential for securing the pallets and drilling drainage holes if needed. 2. Saw: Necessary for cutting the pallets to your desired size or adjusting them to fit your available wall space. 3. Sandpaper: For smoothing any rough edges on the wood to prevent splinters and enhance visual appeal. 4. Measuring Tape: Important for ensuring your vertical garden fits in the chosen spot correctly. 5. Paintbrush (if you plan to stain or paint your pallets): Useful for applying wood treatments to protect the wood from moisture. 6. Gardening Gloves: To protect your hands while handling plants and soil. 7. Hose or Watering Can: To keep your plants hydrated and for initial cleaning of the pallet. 8. Level: To ensure your vertical garden is hung straight on the wall.
Materials
- 1-2 Wooden Pallets: Ensure they are in good condition; usually, you’ll want at least one for a smaller garden.
- Natural Moss: Approximately 2-4 packs, depending on the size and coverage you envision. Choose live moss to ensure it thrives.
- Potting Soil: 2-3 bags, as you will need this to fill the sections of the pallet where plants are placed.
- Small Plants or Herbs: 6-12 plants, such as ferns, succulents, or herbs, based on the size of the pallets and your personal preference.
- Watering Tray: 1-2 depending on the size of the pallets; this helps catch water drainage and prevent mess.
- Wood Stain or Paint (optional): 1 can, to apply a protective layer to the pallets.
- Burlap or Landscape Fabric: 1-2 yards for lining the back of the pallets to hold soil and prevent it from falling out.
- Nails or Screws: About 20-30 pieces to secure everything in place.
- Wire Mesh or Chicken Wire (optional): A small piece to create additional structural support if desired.
- Screws for wall mounting: Ensure they can hold the weight of the plants and soil, at least 4-6 screws.
Steps to Create Your Vertical Garden
### 1. Choose Your Location
The first step is to identify the perfect location for your vertical garden. Look for a spot that gets adequate sunlight - typically, most plants thrive in 6-8 hours of indirect sunlight. Balconies, patios, or walls adjacent to windows are ideal choices. Tip: Observe the area for a few days to gauge the light conditions before making your decision.
Safety Note: If you’re working at heights, ensure you have a sturdy ladder for doing any overhead work, and never lean over too far.
### 2. Prepare Your Pallet
Take one or more wooden pallets and inspect them for any damage or loose slats. If the pallet is rough, use sandpaper to smooth out any splinters or rough areas. If you choose to stain or paint the pallet, this is the time to do so. Let it dry completely before proceeding. Tip: Choose a non-toxic stain or paint if you’re planning to grow edible plants.
Safety Note: Properly ventilate the area when using stain or paint and protect your skin and eyes with gloves and goggles.
### 3. Line the Back of the Pallet
To prevent soil from falling through the gaps, line the back of the pallet with burlap or landscape fabric. Cut it to size and use a staple gun to secure it, ensuring you cover all openings. If you want added stability, attaching chicken wire can help keep soil contained as well.
Tip: Reinforce areas that seem weaker where the soil might escape. Ensure that the lining is taut for the best results.
### 4. Secure the Pallet for Mounting
If you plan to hang your vertical garden, you need to secure the pallet for appropriate mounting. Attach mounting brackets for added safety, and align it to a wall or vertical fence. Ensure it's level using your level tool, as a crooked garden can look unappealing.
Tip: If possible, use a stud finder to secure the screws into wall studs for additional support.
### 5. Add Potting Soil
Once the pallet is secured, fill the lined areas of the pallet with potting soil. Be generous; the soil should be mounded slightly above the wood to allow for settling. Water it lightly to compact it, ensuring there are no dry pockets where plants won’t grow.
Tip: Leave some space at the top to avoid spillage when watering your planned plants.
### 6. Plant Your Herb or Plants
Now for the fun part! Begin adding your chosen plants, herbs, or moss into the soil. Press the roots gently into the soil while occupying enough space between plants for air circulation and growth. Ensure that the plants are not crowded, which would stunt their growth.
Tip: If you’re using different types of plants, research their growth patterns to ensure they can coexist in the same environment.
### 7. Add Natural Moss
The beauty of natural moss adds a unique texture to your vertical garden. Place clumps of moss strategically around the plants, firmly pressing them into the soil. Moss acts as a natural mulch, retaining moisture and keeping the soil cooler and healthier for your plants.
Tip: Mist the moss lightly with water as you place it; moss tends to thrive in damp conditions.
### 8. Water and Maintain Your Vertical Garden
After all the planting is done, give your new garden a thorough watering. It will help settle the soil around your new plants. Moving forward, check the moisture level regularly, as vertical gardens can dry out faster than traditional gardens.
Tip: Keep a spray bottle handy to mist the moss regularly, as this will help maintain the humidity it thrives on.
### 9. Monitor Sunlight and Growth
As your plants start to grow, monitor how much sunlight they receive. Depending on the plants you chose, you may need to rotate their position or provide shade during particularly hot days. Watch out for any signs of stress in the leaves, which can indicate overwatering or insufficient light.
Tip: Be mindful of changing seasons, as the light quality changes and may require movement of your vertical garden to optimize growth.
### 10. Enjoy and Customize
Now that your vertical garden is established, take time to sit back and enjoy your handiwork! Consider customizing it as you go, adding decorative elements such as small stones, decorative accessories, or additional plant species.
Tip: Make a note of which plants are thriving or struggling—this can help inform future gardening adventures!
Troubleshooting
1. Plant Leaves Turning Yellow: This might indicate overwatering. Check to ensure they’re not sitting in water, adjust your watering schedule, and consider adding drainage holes if needed.
2. Moss Dying: If your moss dries up, it could be due to insufficient humidity levels. Regular misting and checking the moisture level of the moss will help; consider relocating it slightly if it's getting too much direct sunlight.
3. Pallet Warping: If the wooden pallet starts to warp over time, check if it has absorbed too much water. Ensure proper drainage when watering, and reinforce the area affected with screws to improve stability.
4. Plant Growth Stagnating: Lack of growth can mean the plants are too crowded. If you notice certain plants struggling, consider spacing them out more next planting season to allow for better growth.
5. Pests and Disease: Keep an eye on invasive pests or fungal growth. A simple mixture of soap and water can help control most pests organically.
Conclusion
Creating a vertical garden using upcycled pallets and natural moss isn't just a sustainable and beautiful project—it's a statement about your commitment to the environment. This rewarding undertaking allows you to incorporate lush greenery into compact urban spaces while showcasing your creativity. As you become familiar with your garden routine, explore variations that suit your preferences: introducing aromatic herbs for culinary adventures, incorporating decorative elements, or even planting seasonal flowers for bursts of color year-round.
Maintaining your vertical garden involves regular monitoring and care, but the joy it brings from the greenery will far outweigh the upkeep. With consistent watering and a little TLC, your vertical garden will flourish, serving as a stunning focal point and a source of pride in your urban space.