Introduction
Garden Using Repurposed Shipping Pallets And Drip Irrigation
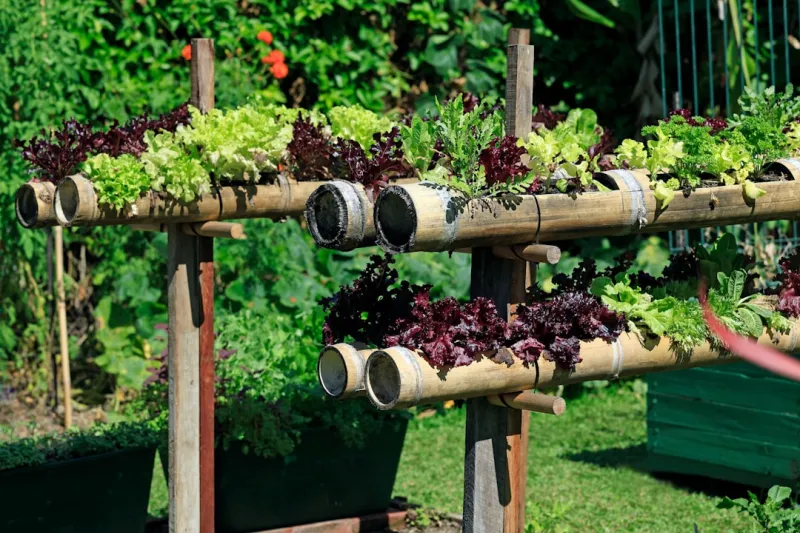
Garden Using Repurposed Shipping Pallets And Drip Irrigationbody.navh1.rating.hero-img.share.btn Garden Using Repurposed Shipping Pallets And Drip Irrigation Garden Using Repurposed Shipping Pallets And Drip Irrigationh2.content p Garden Using Repurposed Shipping Pallets And Drip Irrigation Garden Using Repurposed Shipping Pallets And Drip Irrigation Garden Using Repurposed Shipping Pallets And Drip Irrigation Garden Using Repurposed Shipping Pallets And Drip Irrigationh2a Garden Using Repurposed Shipping Pallets And Drip Irrigation Garden Using Repurposed Shipping Pallets And Drip Irrigationh2a Garden Using Repurposed Shipping Pallets And Drip Irrigation Garden Using Repurposed Shipping Pallets And Drip Irrigationh2a Garden Using Repurposed Shipping Pallets And Drip Irrigation Garden Using Repurposed Shipping Pallets And Drip Irrigationh2a Garden Using Repurposed Shipping Pallets And Drip Irrigation Garden Using Repurposed Shipping Pallets And Drip Irrigationh2a Garden Using Repurposed Shipping Pallets And Drip Irrigation Garden Using Repurposed Shipping Pallets And Drip Irrigationh2a Garden Using Repurposed Shipping Pallets And Drip Irrigation Garden Using Repurposed Shipping Pallets And Drip Irrigationbody.Nav.Nav ah1.rating-chip.hero-imgh2pulli.social-share.share-grid.btn#fb-root} Garden Using Repurposed Shipping Pallets And Drip Irrigation Garden Using Repurposed Shipping Pallets And Drip Irrigationimgh2.btn-box.btn Garden Using Repurposed Shipping Pallets And Drip Irrigation Garden Using Repurposed Shipping Pallets And Drip IrrigationCreating a vertical garden is not only an innovative way to utilize limited space in our homes but also a rewarding, Environmentallyly . Utilizing repurposed shipping pallets adds an element of sustainability to the endeavor, allowing you to give new life to
materials
that would otherwise contribute to waste. With the added benefit of drip irrigation, maintaining a vertical garden becomes significantly easier, ensuring that your plants receive the right amount of water while conserving resources.Why This ?In urban environments, space for traditional gardening is often limited. This makes vertical gardens an excellent alternative, allowing you to cultivate herbs, vegetables, and flowers while utilizing both horizontal and vertical spaces. A vertical garden can boost the aesthetic appeal of your home or outdoor area, transforming bare walls into vibrant living installations. Plus, the benefits extend beyond beauty: they can improve air quality, provide fresh duce, and even enhance your mental well-being.Skill
- Level: This is Beginner-friendly, requiring no advanced gardening techniques or woodworking skills. While some tools and techniques are involved, they are straightforward enough for anyone willing to follow instructions and experiment.
Tools Needed
- Drill and Drill Bits: Essential for creating holes in the pallets for drainage and irrigation lines. Ensure you have bits suitable for wood.Saw (Hand or
- Power): Used to cut the pallets to the desired sizes. A hand saw can work, but a circular or recicating saw can save time.Stapler (Heavy-Duty): Necessary for securing landscape fabric to the pallet, which helps retain soil while allowing water drainage.Level: Ensures that your vertical garden is even and stable. This is crucial for both aesthetics and effective water drainage.Measuring
- Tape: For accurately measuring dimensions and aligning your pallets correctly during assembly.PVC Pipe or
- Tubing: Used as part of the drip irrigation system, making it easy to direct water precisely where it’s needed.Garden
- Hose: Select a piece long enough to connect to your PVC system and reach your water source efficiently.protective
- Gloves: To protect your hands while handling wood and planting, ensuring safety and cleanliness.
Materials
Shipping Pallets (2-3, depending on size): Repurposed wood for the vertical planter structure.Landscape Fabric (1-2 rolls): To line the pallets and keep the soil intact while letting water through.Wood Screws (1 box): For securing the pallets and any additional structure you may need.Soil (2-3 bags, depending on size): A Topy potting mix will ensure your plants thrive.Plants or
- Seeds (Variety): Choose herbs, vegetables, or flowers according to your preference and climate conditions.Drip Irrigation Kit (1 set): Includes tubing, emitters, and connectors for the watering system.Paint or
- Wood Stain (Optional): For finishing the pallets to make them visually appealing and protect them from the elements.Mulch (1-2 bags): To cover the top soil and retain moisture while keeping weeds at bay.Wooden Brackets (4-8): For extra support to secure your vertical garden against a wall.
Step 1:
Choosing the
- Right Pallets
What: Start by sourcing shipping pallets. Look for ones that are in good condition, without chemical treatments.
How: Check for the “HT” stamp, indicating that the pallets have been HEatd and are safe for gardening. Avoid pallets with the “MB” stamp, as they may contain harmful chemicals. Seek local businesses for free or inexpensive pallets, or explore online marketplaces.
Tips: Ensure that the pallets are sturdy and free of rot or damage.
Safety: Wear gloves when inspecting the pallets to prevent splinters.
Step 2:
Preparing the
- Pallets
What: Clean and prepare the pallets for planting.
How: Use a power washer or a stiff brush to clean the wood thoroughly. This removes dirt, debris, and any residual chemicals. Once clean, let the pallets dry completely.
Tips: Inspect for truding nails or rough edges and hammer them down or pull them out. Sand where necessary to prevent splinters.
Safety: Be cautious with sharp tools and splintered wood.
Step 3:
Adding
- Landscape Fabric
What: Line the pallets with landscape fabric to hold soil while allowing drainage.
How: Cut enough fabric to cover the back and inside walls of the pallets. Use the heavy-duty stapler to secure it into place.
Tips: Leave an overhang of fabric at the top, which will help to keep the soil from spilling out. Make sure the fabric covers all openings.
Safety: Take care when using the stapler to avoid pinching fingers.
Step 4:
Installing the
- Drip Irrigation System
What: Set up a drip irrigation system.
How: Use the PVC pipe to create a main water line at the top of the pallet arrangement. Drill small holes along the pipe to connect the emitters, directing water to each plant.
Tips: Consider using a timer to control watering schedules, especially beneficial if you’re unable to water daily. Make sure emitters are properly positioned and tested for leaks.
Safety: Always ensure that any power tools are handled with care and that hoses are stored neatly to avoid tripping hazards.
Step 5:
Cutting and
- Assembling the Pallets
What: Cut the pallets to the size you’ll be using for your vertical garden.
How: Using the measuring tape, determine how tall or wide you want your garden. Cut to size using your saw.
Tips: Assemble your pallets in a staggered manner to maximize space and aesthetic appeal.
Safety: Wear protective eyewear when using saws.
Step 6:
Securing the
- Structure
What: Build your vertical garden by securing the pallets to the wall or other support structures.
How: Use wooden brackets to hold the pallets against the wall. You can also stack them on top of one another safely for an added vertical effect.
Tips: Ensure your structure is level before fastening. This will help with even watering distribution.
Safety: If you are lifting heavy pallets, use proper lifting techniques to avoid injuries.
Step 7:
Adding
- Soil and Plants
What: Fill the lined pallets with soil and plant your desired vegetation.
How: Carefully fill each section with potting soil, leaving enough space for the plants or seeds.
Tips: Consider the sunlight each plant needs when positioning them within the pallets. Place larger plants at the bottom and smaller ones at the top for visibility.
Safety: Use gloves when handling soil and plants to maintain hygiene.
Step 8:
Implementing
- Watering Schedule
What: Set a consistent watering schedule using your drip irrigation setup.
How: Depending on the plants used, adjust the emitters or timer to deliver the right amount of water. Monitor the moisture levels in the soil.
Tips: Observe how your plants react to the watering schedule and adjust accordingly.
Safety: Ensure the hoses from the water source are safely routed to avoid tripping.
2026 •