How to create a vertical garden using repurposed plastic bottles and natural dyes
Setup & Materials
By Alex • November 14, 2025 • DIY Guide
Creating a vertical garden is not only a fantastic way to beautify your living space but also an innovative method to recycle plastic waste. In recent years, there has been a noticeable shift towards sustainability and eco-friendliness in gardening practices. Using repurposed plastic bottles to craft your vertical garden is a brilliant, low-cost solution that helps reduce waste while providing you with a functional and aesthetic green space.
This project embodies creativity and environmental responsibility, making it accessible to anyone, irrespective of their gardening experience. By opting for natural dyes, you further enhance the artistic aspect of your garden while being gentler on the earth and your health. In addition, vertical gardens are excellent for limited spaces in urban environments, giving you the opportunity to grow a variety of plants—even in a small balcony or patio.
The benefits of this DIY vertical garden project extend beyond saving the environment. You can cultivate herbs, flowers, and even small vegetables right at home, ensuring that you have fresh produce at your fingertips. This project encourages mindfulness, provides educational opportunities for you and your family, and stimulates a genuine connection with nature.
Skill Level: This project is rated for beginners, meaning that anyone can try their hand at it. All you need is a bit of creativity, patience, and dedication. Let’s roll up our sleeves and get started!
Tools Needed
Utility Knife/Scissors: Essential for cutting the plastic bottles to the desired sizes. Make sure it’s sharp to ensure clean cuts.
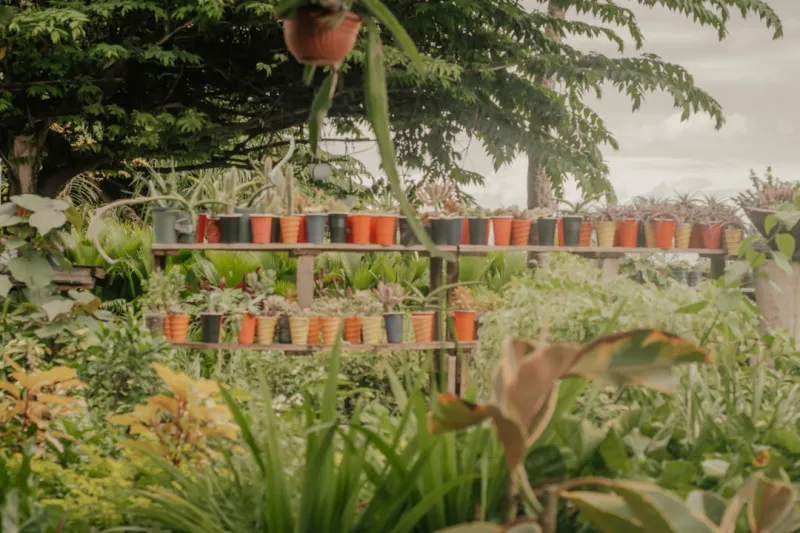
Final Result
Drill with a Drill Bit: Used for creating drainage holes in the bottom of the plastic bottles. Proper drainage is crucial for plant health.
Paintbrush: Needed for applying natural dyes onto the bottles, adding vibrant colors and personal flair.
Ruler or Measuring Tape: To ensure accurate measurements when cutting and arranging your bottles.
Marker/Pen: Used for marking where you need to cut or what plants correspond with each bottle.
Screwdriver: Handy for attaching or securing your vertical garden to the wall or support structures.
Gloves: To protect your hands when cutting bottles and working with natural dyes.
Sponge or Cloth: Useful for cleaning up spills and messes during the dyeing process.
Materials
Plastic Bottles: Approximately 10–15 2-liter bottles (for planting)
Natural Dyes:
Turmeric (1/4 cup)
Beetroot (1 cup)
Spinach (1 cup)
Soil: About 10 quarts of potting mix suitable for your plant choices.
Gardening Plants/Seeds: Choose a variety such as herbs (basil, mint), small flowers, or veggies (lettuce, radishes) based on your preference.
Support Structure: Wooden pallets, lattice, or a sturdy board for mounting your vertical garden.
Watering Can: To provide proper hydration for your plants periodically.
Sandpaper: Useful for smoothing out sharp edges of the cut bottles.
Wire or String: To hang the bottles if required.
Project Steps
### 1. Gather Your Materials and Tools
First and foremost, gather all the materials and tools you will need for the project. This preparation not only saves time but also helps you visualize your project. Make sure that your space is clean and well organized. Have your utility knife, drill, and paintbrush ready, and open your packaging for natural dyes. Collect a few containers for dyeing the bottles. Keep your gloves on hand to protect your skin during the dyeing process.
Tip: If you’re crafting this garden with children or pets around, consider doing the more dangerous tasks, like cutting and drilling, separately, or supervising closely.
### 2. Preparing the Plastic Bottles
Take your bottles and thoroughly clean them to remove any residue from the contents. Once clean, cut each bottle in half horizontally. This will allow you to use the bottom half as the planting pot while leaving the top half available for hanging. Make sure that the edges are smooth, as any sharp edges could irritate your skin. Sandpaper can come in handy here!
Tip: Instead of discarding the tops, consider using them as funnels or lids for watering your plants.
### 3. Create Drainage Holes
Using your drill and the appropriate drill bit, create three to four small drainage holes at the bottom of each bottle. This step is crucial as it allows excess water to escape, preventing root rot and other issues related to overwatering.
Safety Tip: Always wear protective eyewear when operating power tools to avoid injury.
### 4. Non-Toxic Dye Preparation
Now it's time to prepare the natural dyes. Boil the ingredients in separate pots. For turmeric, mix it with water and boil until the desired hue is reached. Do the same for beetroot and spinach, straining out unnecessary solids. Let the dyes cool down before using them.
Tip: For vibrant colors, you can leave the materials boiling longer, but be cautious not to evaporate all the water.
### 5. Dye the Plastic Bottles
Use a paintbrush to apply the natural dyes onto the exterior of the bottles. You can create patterns, solid colors, or ombre effects depending on your artistic style. Place your dyed bottles on a protective surface and let them dry completely before moving on to the next step.
Tip: If you want a more permanent finish, consider sealing the dye with a non-toxic sealant after it dries.
### 6. Assemble Your Vertical Garden
Decide on a structure for your vertical garden. Securely attach the bottles to your support system using nails, screws, or wire. Ensure that the drainage holes at the bottom are facing downward. Space the bottles appropriately to enable easy access for watering and harvesting.
Tip: The placement of your vertical garden should allow adequate sunlight for the plants; consider west or south-facing walls for optimal growth.
### 7. Fill with Soil
Fill each of the bottom halves of the bottles with nutrient-rich potting soil, leaving about an inch of space from the top. It’s best to use a soil mix that retains moisture but also allows for good drainage and aeration.
Tip: Introduce a layer of small stones or gravel at the bottom before adding soil to help enhance drainage.
### 8. Plant Your Choice of Seeds/Plants
Now comes the fun part: planting! Carefully place hardwood or flower seeds into the soil or transplant your starter plants. Ensure they are spaced out evenly to allow for healthy growth. Gently pat down the soil around each plant and add more if needed.
Tip: Research your plants to determine specific planting depths and spacing for optimal growth.
### 9. Watering and Maintenance
Using your watering can, ensure the plants get a good drink of water to help settle the soil around the roots. Going forward, monitor the moisture levels in the soil.
Safety Tip: Avoid overwatering, especially in a vertical garden where water may not drain properly if there's too much soil or overcrowding.
### 10. Create an Ongoing Care Schedule
Consider creating a care schedule that includes watering, fertilization, and pruning if necessary. Keep an eye on the health of your plants and be ready to solve any emerging problems.
Tip: Each plant may have different requirements, so adjust your care routine according to individual needs.
Troubleshooting
Sometimes, gardening doesn’t go as planned. Here are some common issues you might encounter with your vertical garden and how to fix them:
Water Stagnation: If you notice water pooling in the bottles, inspect the drainage holes and ensure they aren’t blocked. You may need to drill additional holes.
Faded Colors: Natural dyes can fade over time, especially in direct sunlight. Consider reapplying the dyes or using a non-toxic sealant for durability.
Overcrowded Plants: If plants are growing too close together, gently remove some to ensure they have room to thrive. This will allow better airflow and nutrient absorption.
Dying Plants: If plants are wilting or yellowing, check for overwatering or insufficient light. Move the garden to a sunnier spot if needed.
Pests: If you notice bugs or other pests, remove the affected plants and treat them with eco-friendly pesticides or organic solutions, such as neem oil.
Conclusion
Creating a vertical garden using repurposed plastic bottles and natural dyes is a rewarding project that brings life, color, and sustainability into your space. Not only do you get to express your creativity through vibrant designs, but you also contribute positively to the planet by turning waste into a beautiful green sanctuary.
As you care for your garden, feel free to experiment with different plants and color patterns. Maintenance requires just a bit of regular attention, allowing you ample opportunity to enjoy your flourishing vertical garden throughout the seasons.
Remember, gardening is a journey of trial, error, and discovery. Each variation you explore, every crop you nurture, and all the learning along the way enriches your experience. Happy planting!