Introduction
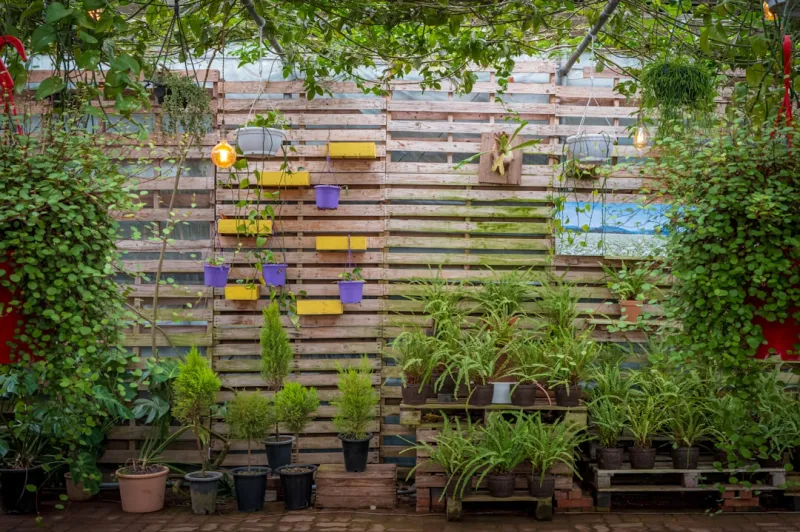
Garden Using Repurposed Pallets And Repotted Herbs For Small Spaces
5 (63)
with repurposed
materials
that breathe new life into your limited space!
Tools Needed
Here’s a list of essential tools you’ll need for your vertical garden : Screwdriver/Wrench
- Set: To tighten or loosen any screws or bolts on your pallet. These tools will ensure that your structure is sturdy and safe.Final
- ResultDrill: A power drill will make it easier to create holes for drainage and to secure the pallet to a wall or upright structure.
- Saw: If you need to cut your pallet down to size, a handsaw or jigsaw will allow you to customize the dimensions according to your space.
- Landscape Fabric or Burlap: This material will help retain soil while allowing water to drain out. It’s essential for the longevity of your herbs.
- Staple Gun: Used to secure the landscape fabric or burlap to the pallet. This tool provides a firm hold that will last even in outdoor conditions
Paintbrush & Outdoor
- Sealant (optional): If you choose to paint or stain your pallet for aesthetic purposes, a paintbrush along with a non-toxic outdoor sealant will protect the wood from the elements.
- Gloves: To protect your hands from splinters or soil while working with pallets and plants.
- Measuring Tape: For precise measurements, especially if you’re adapting the pallet to snugly fit your available space.
Materials
Needed Here’s what you’ll need to gather to create your vertical garden: 1 Wooden Pallet (standard-sized, preferably HEatd)1-2 Bags of Potting Soil (depending on the size of your pallet and how many plants you’d like to add) 8-10 Small Herb Plants (such as basil, mint, parsley, chives, or oregano—choose those you often use in cooking) Landscape Fabric or Burlap (1 yard, sufficient to cover the back and sides of your pallet) Wood Screws or Nails (about 25, for securing the landscape fabric and any additional sections) Wooden Planter Boxes or Plastic Pots (optional, but best if you want a more organized look; typically, 6-8 small containers) Hanging Brackets or Wall Anchors (2-4, depending on your installation method; these will secure the pallet to a wall) Outdoor Sealant (1 small bottle, if you plan to treat the wood) Step-by-Step Instructions
Step 1:
Choose and
- Prepare Your Pallet
What: Select a suitable wooden pallet for your .
How: Look for pallets labeled "HT" (Heatd), which indicates they are safe for planting. Inspect the pallet for structural integrity—make sure it’s not broken or infested with pests. If necessary, sand down rough areas to create a smoother surface.
Tips: Choose a pallet that fits your style—some people prefer a weathered look that matches rustic themes.
Safety: Use gloves to protect your hands from splinters. If you’ll be sanding, wear a dust mask to avoid inhaling fine particles.
Step 2:
Clean and
- Treat the Pallet
What: Clean your pallet thoroughly to remove dirt and debris.
How: Use a garden hose to wash down the pallet and a stiff brush to scrub any stubborn spots. Allow it to dry completely before ceeding. If desired, apply a natural wood treatment or eco-friendly sealant to extend its life outdoors.
Tips: Ensure that the sealant is safe for plants, especially if you’ll be planting directly into the pallet.
Safety: Always work in a Wellated area if applying any treatment to the wood.
Step 3:
Attach
- Landscape Fabric or Burlap
What: The landscape fabric will help in containing the soil while providing drainage.
How: Cut the landscape fabric to size so that it covers the back and sides of the pallet. Use the staple gun to secure it tightly to the wood, ensuring that fabric extends over the edges slightly, creating pockets for planting.
Tips: Make sure there are no gaps in the fabric; otherwise, soil will escape, and water won’t drain properly.
Safety: Be careful when using a staple gun; always point it away from you and others around.
Step 4:
Secure the
- Pallet
What: It’s essential to ensure that your pallet is adequately secured, especially if it will be hung on a wall.
How: If you’re mounting the pallet vertically against a wall, attach wall brackets to the back of the pallet, ensuring they are balanced for even weight distribution.
Tips: Use a level to ensure that your pallet hangs straight. If possible, locate studs in the wall for maximum stability.
Safety: Use a ladder safely if working at heights, and ensure your mounting hardware is appropriate for the weight of the pallet.
Step 5:
Insert
- Your Planters
What: Depending on your design, you might want to use individual planters.
How: Place small pots or wooden planter boxes into the openings created by the fabric without the fabric completely covering them. If directly planting in the pallet, ensure the fabric pockets are large enough to hold soil and plants.
Tips: Opt for all herbs that thrive under similar light and water conditions for the best growth.
Safety: Make sure your plants are healthy and free from pests before planting.
Step 6:
Fill with
- Potting Soil
What: It’s time to provide your herbs with the essential nutrients they need.
How: Carefully fill each planter or pocket with potting soil, leaving a little space at the top for watering without overflow. Press down lightly to eliminate air pockets but do not compact it too much to maintain aeration.
Tips: Mix in a Slowe fertilizer to give your herbs a good head start.
Safety: Avoid overfilling, as soil can shift when watering later on.
Step 7:
Plant
- Your Herbs
What: Now, you can place your chosen herbs into the soil.
How: Remove each herb from its original pot, loosening the roots gently. Create a small hole in the potting soil and place the herb inside, covering it just enough so that the base of the plant is level with the soil.
Tips: Mix taller plants in the back and shorter ones in the front for visibility.
Safety: Watch for any sharp points on the pots, as they can cause injury.
Step 8:
Watering and
- Initial Care
What: It is crucial to establish your plants in their new home.
How: After planting, give each herb a thorough watering but ensure that the pallet has good drainage. Monitor the soil moisture for the first week closely as they settle.
Tips: Plan to water in the mornings or evenings to avoid evaporation during the hottest parts of the day.
Safety: Don’t flood your plants, as too much water can lead to root rot.
Step 9:
Monitor
- Growth and Adjust
What: Once planted and established, keep a close eye on your garden.
How: Regularly inspect your herbs for signs of pests, wilting, or nutrient deficiencies. Some plants might grow faster than others, and it's crucial to become familiar with nurturing each type of herb.
Tips: Rotate herbs that need more sunlight to ensure even growth and freshness.
Safety: If you spot any pest activity, wear gloves when managing any organic pest control methods.
Step 10:
Harvest and
- Maintain
What: Enjoy the fruits of your labor!
How: Start harvesting herbs once they’ve reached a sufficient height and allow them to duce new growth. Make sure to regularly prune and deadhead your plants to encourage bushy growth.
Tips: Use scissors to snip off the herbs rather than pulling them; this prevents damage to the plant.
Safety: Always wash your hands after handling plants, especially after harvesting for food.
2026 •