Introduction
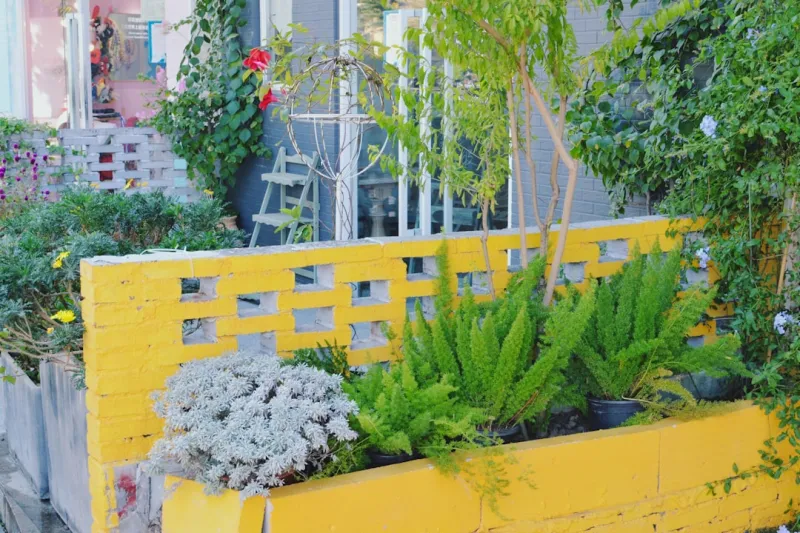
Garden Using Repurposed Pallets And Eco Friendly Paint
is gaining momentum in urban settings, where space is often at a premium. Traditional gardening can be challenging in apartments or compact homes with limited outdoor areas. A vertical garden allows you to maximize your space, turning bare walls, fences, or even small balconies into vibrant living art pieces.Moreover, creating a vertical garden using repurposed pallets is an environmentally friendly . It reduces waste by giving pallets a new life while adding beauty and functionality to your home. The use of eco-friendly paint ensures that no harmful chemicals leach into the soil or air, making this garden safe for pets and children.Benefits of
- Vertical Gardening:SPace: Ideal for small areas.Aesthetic appeal: Enhances the look of any space.
- Better air circulation: Plants in a vertical garden often receive more sunlight and airflow, promoting healthier growth.
- Sustainable gardening: Reuses
materials
and minimizes environmental impact.This is perfect for beginners, requiring only basic skills and tools. By following this step-by-step guide, you’ll not only learn how to create a beautiful vertical garden, but you will also gain valuable experience in upcycling and sustainable gardening practices.
Tools Needed
- Safety Goggles: protect your eyes from dust and debris while cutting wood or working with paint.Work
- Gloves: To protect your hands from splinters and rough surfaces.Saw (Hand or
- Power): A utility saw or circular saw is needed to cut the pallets to your desired size.Drill: For attaching the pallets together and securing them to the wall.Nails & Screws: To hold the pallets firmly and ensure stability.Paintbrush or
- Roller: For applying eco-friendly paint to your pallets.Sandpaper: To smooth out rough edges, which can prevent injuries and improve paint adherence.Measuring
- Tape: To measure your available space for a perfect vertical garden fit.
Materials
- Wooden Pallets: 2-3 (depending on the size you want your vertical garden to be)EColy
- Paint: 1 quart (choose a color that complements your space)
- Landscape Fabric: 1-2 yards (to line the pockets of the pallet for plant growth)
- Potting Soil: 2-3 bags (enough to fill the pockets of the pallet with soil)
- Plants or Seeds: Small herbs or annual flowers (such as basil, mint, or marigolds)
- Wood Sealer (optional): 1 quart (to protect the wood if using outdoors) L-brackets: 4 (to reinforce the attachment of the pallets to the wall) Hanging Hooks or Heavy-duty
- Wall Anchors: Depending on your wall typeCreating Your Vertical Garden
Step 1:
Choose
- Your Location
What: Select an appropriate area for your vertical garden.
How: Look for a spot with plenty of sunlight, as most plants thrive in natural light. It’s advisable to place it near a water source for easy watering.
Tips: Observe the chosen area throughout the day to understand how much sunlight it receives. If it’s too shady, consider moving it to a sunnier location.
Safety: Ensure that the wall or space can handle the weight of the filled and planted pallet.
Step 2:
Prepare the
- Pallets
What: Get the pallets ready for painting and planting.
How: Start by checking the pallets for any damages. Remove any broken or loose boards, as they can commise the structure. Use sandpaper to smooth out rough edges and surfaces.
Tips: If possible, use heat to help remove any nails: a heat gun can loosen them without damaging the wood. Also, measure and decide on how to disassemble or cut down the pallets based on your design preference.
Safety: Wear work gloves while handling pallets to avoid splinters and injuries.
Step 3:
Apply eco-friendly
- Paint
What: Add a layer of protection and personality to your pallets.
How: Use a paintbrush or roller to apply eco-friendly paint. Ensure that you adequately cover all surfaces. If desired, apply two coats for a more vibrant finish.
Tips: Use ventilation if you are painting indoors. Have a tarp or newspaper under the pallets to catch any drips.
Safety: Besides gloves, wearing a mask is recommended to avoid inhaling any paint fumes.
Step 4:
- Your Pallet with Landscape Fabric
What: Prepare the planting areas to hold soil and ensure proper drainage.
How: Cut the landscape fabric to fit the back and sides of the pallet. Use a staple gun or small nails to secure the fabric in place.
Tips: Make sure to leave enough excess fabric at the top to fold over and secure. This will prevent soil from escaping when you fill the pockets.
Safety: Ensure that any sharp tools like the staple gun are handled carefully and stored out of reach of children and pets.
Step 5:
Attach
- Pallets to the Wall
What: Secure the pallet in place for planting.
How: Find studs in the wall using a stud finder, as this is where you’ll want to secure your pallets. Use L-brackets to attach each corner of the pallet to the wall, drilling screws in tightly.
Tips: It might be helpful to have a friend assist you while holding the pallet in place. Double-check that it is level before completely securing it.
Safety: Use a drill cautiously, and avoid placing your hands near drill bits and screws.
Step 6:
Fill the
- Pockets with Potting Soil
What: Prepare the planting spaces.
How: Pour potting soil into each planting pocket of the pallet, filling them almost to the top. Ensure the soil is well-adapted and mixed appropriately for the plants you are growing.
Tips: Add some Slowe fertilizer for plant nutrition. Water the soil lightly to avoid compaction, make it easier for roots to spread.
Safety: Be mindful of how you lift the soil bags; use your legs to lift as opposed to your back.
Step 7:
Plant
- Your Chosen Plants
What: Start planting in your vertical garden!
How: Gently remove plants from their nursery containers, tease out the roots if they are tightly bound. Plant each one securely in the soil pockets, ensuring it has good contact with the soil.
Tips: Opt for plants that naturally cascade downwards for visual impact. Herbs are an excellent choice as they are practical and fragrant!
Safety: Handle plants carefully, as some might irritate the skin.
Step 8:
Water and
- Care for Your New Garden
What: Begin the maintenance of your vertical garden.
How: Water the plants well after planting, allowing moisture to soak through. Check moisture levels often as vertical gardens can dry out quicker than traditional gardens.
Tips: Use a watering can with a narrow spout to reach all pockets. Group plants with similar watering needs together.
Safety: Avoid water pooling at the base of the pallet, as this can make it unstable and harbor unwanted pests.
Step 9:
Regular
- Maintenance
What: Keep your vertical garden thriving.
How: Trim back any plants that become too large or unruly, and replace any dead plants mptly. Regularly check for pests, and apply eco-friendly insect repellents if needed.
Tips: Rotate the plants based on seasonal changes and blooming patterns to maintain visual interest.
Safety: Always wash your hands after handling soil or plants, and avoid direct contact with unfamiliar plants.
Step 10:
Enjoy the process
What: Celebrate your hard work and creativity!
How: Take a moment to enjoy your vertical garden. Consider documenting the plants’ growth or trying out new plants each season.
Tips: Share your on social media or with friends to inspire others; they might want to create their version!
Safety: Always keep tools clean and stored properly after use to avoid accidents.
2026 •