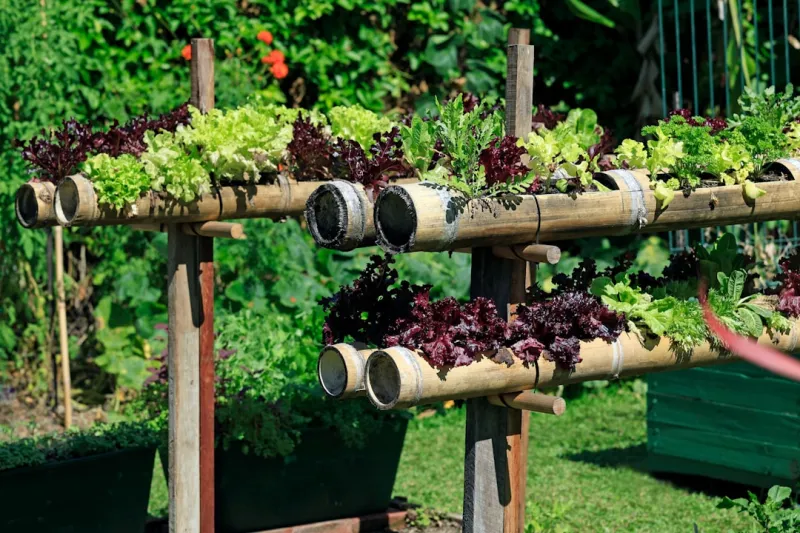
How to create a vertical garden using repurposed pallets and drip irrigation system
Introduction
The modern world is rapidly evolving, and our connection with nature may sometimes feel strained as urbanization takes over. However, there's an innovative solution that allows us to bring a touch of greenery into our homes or backyards: vertical gardening. By using repurposed pallets and an efficient drip irrigation system, you can create an aesthetically pleasing and functional vertical garden. This project is not only environmentally friendly, as it involves recycling materials, but it also helps to maximize limited space, making it perfect for urban dwellers or anyone looking to grow their own herbs and vegetables in a small area.
Benefits of creating a vertical garden using repurposed pallets include easy access to your plants for watering and harvesting, the ability to grow a variety of plants in a small footprint, and the satisfaction that comes from using reclaimed materials. Furthermore, a vertical garden can improve air quality, reduce noise pollution, and even lower energy costs by providing insulation when placed near windows.
Skill Level: This project is suitable for beginners, as it involves basic woodworking and gardening skills. Whether you're a novice DIYer or an experienced handy-person, this guide will help you create a vibrant living wall that fits your personal style and gardening aspirations!
Tools Needed
1. Saw: A hand saw or power saw is essential for cutting the pallets to the desired dimensions. It provides precision in shaping your vertical garden frame.
2. Drill: A power drill will be instrumental for making pilot holes and securing screws. It speeds up the process and ensures stability in construction.
3. Staple Gun: This tool is perfect for attaching landscaping fabric to the pallets, creating pockets for soil and plants while providing support.
4. Screwdriver: Necessary for installing brackets or additional components for the support structure if required.
5. Measuring Tape: Accuracy is crucial; this tool helps you measure the pallets and ensure even spacing for the plants.
6. Level: This ensures that your vertical garden is straight and aesthetically pleasing, maintaining balance and stability when mounted on a wall.
7. Utility Knife: Useful for cutting through landscaping fabric or adjusting any materials during the construction process.
8. Safety Gear: Including safety glasses and gloves to protect your eyes and hands during cutting and assembly, ensuring a safe work environment.
Materials
1. Wooden Pallets: 2-3 pallets, depending on the desired size of your vertical garden. Ensure they are free from toxic chemicals.
2. Landscaping Fabric: 1-2 yards to line the pallets and retain soil while allowing drainage.
3. Potting Soil: 2-3 bags (depending on the depth) for planting your herbs or flowers.
4. Plants/Seeds: Choose 10-12 plants or a mix of seeds that thrive in vertical gardens, such as herbs, lettuce, or flowering plants.
5. Screws: 1-2 packs (1.5-2 inches), used for securing the pallets together, especially if stacking.
6. Wooden Brackets or Supports: 2-4 to reinforce the structure if mounting vertically.
7. Drip Irrigation Kit: Complete kits usually include drip tubing, emitters, stakes, and connectors, suitable for delivering water directly to the roots of your plants.
8. Watering Can or Hose: For initial watering and directed fills during the setup phase.
9. Mulch: 1-2 bags to top the soil and help retain moisture.
10. Paint or Stain: Optional for treating the pallets—consider using non-toxic treatments to prolong the life of the wood.
Steps to Create Your Vertical Garden
Step 1: Gather Your Materials
To start this project, ensure you have all the necessary tools and materials. Inspect the wooden pallets for any damages. They should be sturdy and intact with no broken boards. Collect the following: pallets, landscaping fabric, potting soil, plants or seeds, screws, brackets, drip irrigation kit, watering can, and mulch. Also, protect your workspace by clearing any debris to prevent accidents.
Step 2: Prepare the Pallets
Begin by disassembling the pallets if necessary. If you're using whole pallets, you may want to cut them down to the desired size. Use your saw carefully, making sure to measure twice for accuracy. Once cut, gently sand any rough edges to avoid splinters. If you desire, treat the wood with a non-toxic stain or paint for additional longevity and aesthetic appeal. Allow it to dry completely before proceeding.
Step 3: Line the Pallets
Next, you need to line the pallets with landscaping fabric. Cut the fabric into pieces that will cover the back and sides of each pallet. Using your staple gun, secure the fabric to the prints of the pallets, ensuring it is tight yet not so tight that it tears. This fabric will serve as a barrier to keep the soil in while still allowing for drainage—an essential aspect of successful planting.
Step 4: Assemble the Vertical Garden
Stack your pallets according to your design. You can opt for a single pallet vertical or a multi-layered option, depending on space and preference. As you assemble the pallets, use screws to secure them together, especially if you’re stacking multiple layers. Utilize a level to ensure each layer is even; this not only helps with aesthetics but also prevents soil from sliding out during watering.
Step 5: Prepare the Soil
In this step, prepare your potting soil by mixing it lightly to aerate the materials. Depending on the types of plants, you can add organic compost or fertilizers to enrich the soil mix. Place small amounts of soil in the lined pallets, filling just enough to create pockets for your plants.
Step 6: Plant Your Seeds or Plants
Now comes the fun part! Plant your seeds or plants according to the instructions for each species. Ensure you provide enough space for growth. For larger plants, consider clustering smaller varieties around them. Use your hands and a small trowel to carefully position each plant in the pocket filled with soil, patting it down gently to eliminate air pockets. Adding mulch on top helps with moisture retention.
Step 7: Set Up the Drip Irrigation System
With your plants in place, it’s time to install the drip irrigation system. Following the manufacturer’s instructions, connect the tubing from your water source to the pallets. Place emitters within the soil pockets to ensure that each plant receives adequate water. This system conserves water and allows for consistent hydration, perfect for a busy gardener who might forget to water.
Step 8: Mount the Vertical Garden
Before mounting, consider the location for maximum sunlight and convenience. Ensure it’s at an accessible height for maintenance, and double-check that the structure is stable. Use brackets or supports to anchor the pallets securely to a wall or fence. This step is crucial to prevent any accidents, especially if children or pets are nearby.
Step 9: Watering and Maintenance
Initially, you will need to water the plants using a watering can or hose until they are well-established and the drip system is functional. Monitor the moisture levels, especially during the first few weeks. As your garden grows, adjust the drip irrigation settings according to weather conditions. Regularly check for clogs in the emitters and ensure the system provides even coverage.
Step 10: Enjoy Your Garden
Congratulations! You’ve successfully created your vertical garden using repurposed pallets and a drip irrigation system. To keep it thriving, regularly inspect your plants for pests, remove any dead leaves, and possibly rotate the plants based on their growth cycles. Take time to enjoy the beauty your vertical garden brings to your space!
Troubleshooting
Even the best projects can encounter issues. Here are five common problems and their fixes:
1. Pests and Insects: If you notice your plants attracting unwanted insects, consider natural pest deterrents such as neem oil or introducing beneficial insects like ladybugs to keep populations in check.
2. Watering Issues: If the drip system isn’t functioning properly, check for clogs in the emitters or blocked lines. Regularly flush out the system and ensure that the source is functioning as expected.
3. Soil Drainage Problems: If excess water is pooling, confirm that your drainage holes are clear, and adjust the landscaping fabric to allow for better flow. Consider adding more soil to create a small slope if necessary.
4. Plant Overgrowth: If plants are becoming too crowded or overgrown, you may want to prune them back or take cuttings for propagation. This encourages healthier growth and prevents competition for resources.
5. Stability of the Structure: If your vertical garden is wobbling or leaning, check the brackets and supports. Ensure they are securely attached and consider adding additional supports if needed.
Conclusion
Creating a vertical garden using repurposed pallets and a drip irrigation system is a fulfilling project that not only brings nature closer to home but also demonstrates be resourceful with materials. Remember, maintaining your garden’s health will require some tender loving care and regular monitoring, but the rewards—fresh herbs, beautiful flowers, and an enhanced living space—will be well worth your efforts.
As you grow more comfortable with your vertical garden, consider exploring variations such as adding trellises for climbing plants or integrating decorative pots into the design. With all the benefits this garden provides, you may find yourself inspired to create additional gardens throughout your property or even swap plants with friends to diversify your produce.
Good luck, and enjoy your vertical garden! The possibilities are only as limited as your imagination.