Introduction
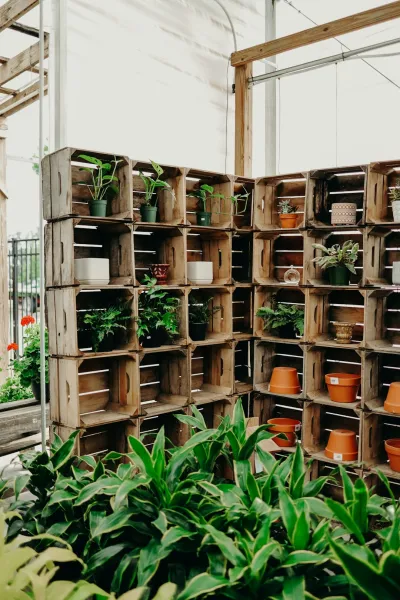
Garden Using Repurposed Grocery Store Crates
has gained immense popularity over the last few years as urbanization increases and outdoor space becomes increasingly limited. One of the most creative and Budgetly ways to dive into this green trend is by utilizing repurposed grocery store crates. These crates not only serve as eco-friendly planters but also add rustic charm to your garden, balcony, or even within your home. The is not only rewarding but also allows you to contribute to reducing waste, emphasizing the importance of sustainability in our lives. Creating a vertical garden enhances your living space visually and offers numerous benefits, such as improved air quality, relaxation, and proximity to homegrown herbs, vegetables, and flowers. The act of gardening itself can be therapeutic, encouraging mindfulness and providing a sense of achievement as you witness your plants thrive. This can be done easily, allowing even beginners to explore their gardening skills. In this guide, you will learn about the tools and
materials
needed for creating a vertical garden using grocery store crates. We will walk you through each step of the process with detailed instructions and helpful tips. Whether you're looking to beautify your space or grow fresh herbs right on your balcony, this DIY is perfect for anyone willing to get their hands a little dirty. Now let's dig into the essentials!
Tools
- Needed
- Drill and Drill Bits: Essential for creating drainage holes in your crates, which is crucial for plant health. A drill makes the job faster and more efficient than hand tools.Final
- ResultScrewdriver: Useful for assembling the crates or attaching them to a backing wall if needed. A manual or power screwdriver does the trick.
- Measuring Tape: Important for measuring the height and width of your available space, ensuring your vertical garden fits perfectly.
- Garden Trowel: A small shovel is needed for planting soil into your crates and helping to rearrange or mix soil as necessary.
- Pruning Shears: Ideal for trimming plants and maintaining their shape as they grow. This ensures your vertical garden remains tidy and healthy.
- Gloves: protect your hands while handling soil and plants. Wearing gloves also minimizes the risk of thorn scratches or allergic reactions.
- Level: In case you choose to stack or align crates vertically, a level ensures everything is even, which is aesthetically pleasing and prevents tipping.
- Watering Can or Hose with Nozzle: Water management is key in gardening. A watering can or hose allows you to distribute water evenly without Overting your plants.
Materials
Grocery Store Crates (4-6): Depending on your vertical garden size, collect sturdy crates that can support plant growth.Potting Soil (2 bags of 10 quarts each): A good quality potting mix that will provide essential nutrients to your plants. Plants/Seeds (5-10 varieties): Choose plants suitable for vertical gardening, such as herbs (basil, parsley), compact veggies (lettuce, radishes), or flowering plants. Landscape Fabric or Cheesecloth (1-2 yards): To line the inside of the crates, preventing soil from leaking out while allowing for proper drainage.
- Wooden Pallet or Wooden Frame (if necessary for support): Used as a backing structure for your vertical garden to keep crates securely aligned.
- Staple Gun or Staples: Helpful for securing the landscape fabric to the inside of the crates, preventing soil movement.
- Plant Labels (optional): If growing multiple plant varieties, labels are great for keeping track of what's where. Mulch (1 bag): To top off soil in the crates, preventing moisture loss and controlling weed growth.
- Fertilizer (optional): A Slowe fertilizer will provide your plants with nutrients as they grow.
- Watering Tray (optional): Placing under the lower crates to catch any excess water drainage, protecting your floors or garden area. StepsGather Your
Materials
The first step in creating a vertical garden is to gather all the necessary
materials
Head to local grocery stores, farmer’s markets, or online marketplaces to obtain sturdy crates. Ensure they haven't been chemically treated, as you want to keep your herbs and veggies free of harmful substances. You may want to clean the crates to remove any residue or dirt. Plan your plant choice by considering how much sunlight your garden space receives daily to pick the right herbs, vegetables, or flowers.Prepare the CratesBefore planting, prepare each crate for optimal drainage and plant growth. Using the drill, create several small holes in the bottom of each crate. This step prevents water from accumulating and potentially drowning the roots. To fit the crates, you may want to use a landscape fabric or cheesecloth to line the insides. Cut the fabric to size, and using the staple gun, secure the edges to the interior of the crate just above the drainage holes, ensuring it creates a barrier between the soil and wood.Choose Your LocationFinding the right location for your vertical garden is crucial. Assess how much sunlight the space receives throughout the day. Most herbs and vegetables prefer full sun, ideally 6-8 hours a day. To maximize exposure, place your crates where they'll be directly illuminated by sunlight. If the sun exposure is limited, you may need to adjust your plant choices to those that can manage with partial shade. Consider plant viability based on your location's climate as well.Stack and Secure CratesOnce the crates are prepped and you've identified your sunniest location, it's time to create the vertical aspect of your garden. Position the crates in your desired vertical formation. You can stack them directly on top of each other or against a wall for support. Ensure that each crate is stable and won't tip over. If using a wooden frame or pallet for added support, secure the crates to that framework with screws or brackets for additional stability.Fill with SoilFill each crate with potting soil, leaving about an inch of space at the top. Use the garden trowel to help you distribute the soil evenly. It's essential to choose a quality potting mix, as these blends are designed to provide optimal drainage and aeration for plant roots. As you fill each crate, tap it gently to settle the soil, which helps reduce air pockets. You can mix in some Slowe fertilizer at this stage to boost nutrient availability as your plants grow.Plant Your SelectionsNow comes the fun part! Depending on your chosen plants' size, plant them about 4-6 inches apart in each crate to allow for sufficient space as they grow. If using seeds, follow the instructions on the seed packet for spacing. When placing plants, ensure the root ball is level with the soil line. Water the soil lightly after planting to help settle the roots. Label each section if you’re growing different herbs or vegetables; it’s an easy way to keep track of what you have planted.Watering and MaintenanceAfter the initial watering, continue to check the moisture levels in your crates. It's important not to over-water, as this can lead to root rot. Aim to keep the soil consistently moist, especially during the early stages of growth. Once plants develop, you might reduce watering slightly, checking soil moisture by sticking your finger two inches into the soil. As your plants grow, maintain them by pruning dead leaves, fertilizing every 4-6 weeks, and removing any pests.Positioning and AestheticsWith the plants in place, consider adding personal touches to enhance your vertical garden's aesthetics. Hanging decorative items or utilizing Solard lights can add character to your space. If you want a cascading effect, choose trailing plants for the top crates. Container plants with vibrant colors and textures create a beautiful contrast when combined. Ensure that your finished vertical garden adheres to your personal tastes, whether you desire a minimalistic look or a vibrant explosion of greenery.Seasonal AdjustmentsAs seasons change, your vertical garden might require different care. Be mindful of winterizing your plants if you're in a colder climate. You may need to bring potted plants inside or insulate the crates to protect roots from freezing. Conversely, during warmer months, keep an eye on sunlight exposure and temperature, adjusting watering schedules accordingly. Consider rotating plants between crates to evenly distribute sunlight and moisture requirements throughout the garden to enhance growth.Enjoy and HarvestTake the time to enjoy your vertical garden as it flourishes. Harvest herbs and veggies when they're ready; this encourages the plants to duce more. Regularly engage with your plants and develop a routine for occasional cleaning, watering, and inspecting for pests. Your vertical garden will become a beautiful and vital part of your living space, providing not only culinary delights but also a quiet place of refuge and growth.
2026 •