Introduction
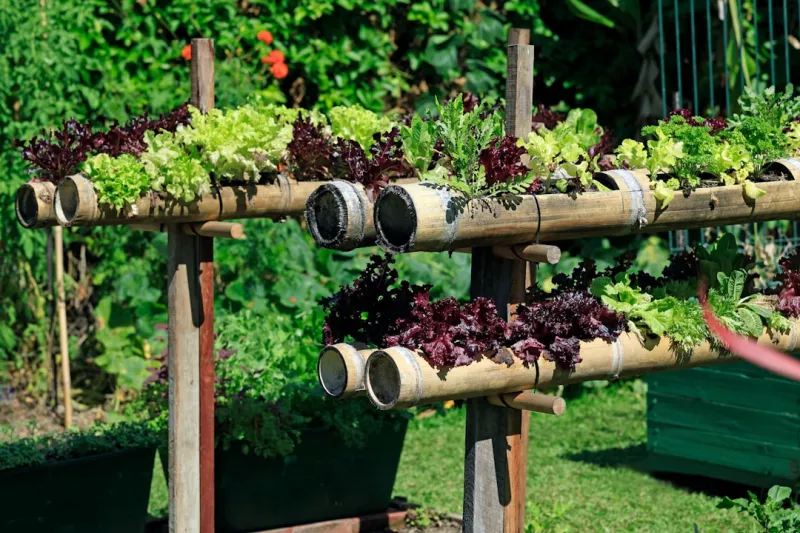
Garden Using Reclaimed Pallets And A Drip Irrigation System
5 (95)
a perfect solution for those wishing to grow herbs, vegetables, or ornamental plants while conserving precious ground space. Utilizing reclaimed pallets not only motes sustainability but also adds a unique rustic charm to your garden.Benefits of
- Vertical GardeningVertical gardens offer various advantages:Space
- Saving: Ideal for small yards, balconies, and patios, maximizing space usage for more significant returns.Imved
- Aesthetics: They create stunning visual impact, enhancing your home’s exterior while providing greenery.
- Enhanced Air Quality: Plants filter air by absorbing carbon dioxide and releasing oxygen, imving indoor and outdoor air quality.
- Easier Maintenance: Elevated growing areas reduce bending over, making it easier on your back while allowing for better drainage.
- Water Efficiency: Implementing a drip irrigation system conserves water while ensuring that plants receive the necessary moisture at their roots.Skill Level This is designed for beginners, making it accessible to everyone, from hobbyist gardeners to Ecoous households. With just a splash of creativity and a willingness to learn, anyone can create an inviting and functional vertical garden.
Tools Needed
- Power Drill: Essential for making holes in the pallet for drainage and anchoring your irrigation system.Saw (Hand or
- Power): For cutting the pallets to the desired size and possibly for shaping the planter boxes.Staple
- Gun: Ideal for securing landscaping fabric to the pallet for soil retention, creating a barrier that holds soil in place.Level: Ensures that your vertical garden is properly aligned. A level garden not only looks nicer but also allows even moisture distribution.Measuring
- Tape: crucial for determining the dimensions of your area and ensuring your pallets fit snugly against the wall or Freeng.Garden
- Gloves: protects your hands from splinters and dirt, ensuring safety as you work with wood and soil.Garden
- Trowel: Perfect for planting and digging within the pallet’s planters once constructed.Pliers: Handy for removing nails or adjusting items as needed during the assembly process.
Materials
Reclaimed wooden pallets (2-4): Look for sturdy pallets in good condition; the quantity depends on your desired garden size.Landscaping fabric (1 roll): This will hold the soil while allowing excess water to drain.Soil (3-4 bags): Potting soil or a mix suitable for your chosen plants. The number of bags might vary based on the pallet size.Plants/Seeds (various): Select a mix of herbs, vegetables, or flowers that thrive well vertically.Nails or screws (1 box): Used for securing the pallets together and the irrigation system components.Drip irrigation kit (1): A complete system will ensure efficient watering with minimal effort.Wood stain or sealant (1 can): To treat the pallets, protecting the wood from rot and enhancing its visual appeal.Brackets or wall anchors (4-8): Needed if you plan to mount the pallet on a wall, providing stability.Watering hose (1 roll): Connecting your drip irrigation system to a water source.Timer (optional): If you want to automate the irrigation process, investing in a timer is wise.Steps to Create Your Vertical Garden
Step 1:
Choose and Prepare Your LocationDetermine where you want to install your vertical garden. Look for locations that receive ample sunlight (at least 6-8 hours) daily. Ensure there are no overhanging trees or structures that could block sunlight or precipitation. Once you’ve identified the right spot, clear the area of any debris to create a clean working environment. If mounting against a wall, it’s beneficial to test the area for moisture levels and confirm it is free from pests.
Step 2:
Gather Your
Materials
and ToolsBefore starting, organize all your
materials
and tools. Having everything on hand ensures a smoother workflow. Double-check that you have the right quantity of soil, plants, and irrigation supplies. Spending a little time preparing can prevent headaches later and allow you to focus on the fun aspects of building your garden.
Step 3:
Prepare Your PalletsInspect your reclaimed pallets carefully. Remove any loose or broken boards, splinters, or sharp points to avoid injury. If desired, apply a coat of wood stain or sealant to protect the wood from moisture and pests. Let the stain dry completely before ceeding. Use a level to set the pallets on a flat surface, making sure they’re stable if standing alone. This attention to detail is crucial for the long lifespan of your vertical garden.
Step 4:
Attach Landscaping FabricUsing the staple gun, attach the landscaping fabric to the back and sides of the pallet. This will act as a barrier that keeps the soil in while allowing water to drain. Ensure that the fabric extends to the bottom of the pallet and is tightly secured, as loose fabric can cause the soil to escape during watering. For better soil retention, you can fold the fabric over at the corners for extra support.
Step 5:
Fill the Pallet with SoilBegin filling the pallet with potting soil. It’s best to pack the soil firmly to eliminate air pockets while ensuring it doesn't become too compacted. When using multiple pallets, you may want to identify which plants will be placed in each. For example, place Deepg plants in lower sections to support their growth better, while Shallow plants can be positioned higher.
Step 6:
Arrange Your PlantsPlan how you want to arrange your plants. It’s helpful to think about plant height, color, and growth patterns.
- As a guide:Top
- Section: FAstg herbs like basil or mint.Middle
- Section: Lettuce, strawberries, or small flowering plants.
- Bottom Section: Taller plants like tomatoes or vining crops like cucumbers. Creating diversity will improve aesthetics and increase ductivity. Carefully remove plants from their pots, loosening root balls gently before arranging them in your pallet.
Step 7:
Install the Drip Irrigation SystemFollow the instructions in your drip irrigation kit to set up the system effectively. Generally, this involves laying the main hose along the top of the pallets and attaching drip tubing that leads to each plant. Ensure that the hoses are securely anchored to prevent any movement that could disrupt watering. Check for even distribution of water by running the system and examining if all plants are getting adequate moisture.
Step 8:
Secure Your Vertical GardenIf the vertical garden will be freestanding, you may not need additional supports. However, if it’s mounted against a wall, secure it using brackets or wall anchors. Follow the manufacturer's instructions and ensure that the structure is stable enough to support the weight of soil and plants. Remember, safety is paramount; it’s essential to double-check your mounting to prevent accidents due to instability.
Step 9:
Water and MonitorInitially, water your vertical garden gently to allow the soil to settle. Monitor your drip irrigation system closely to ensure it operates without leaks or blockages. This step is critical during the first few weeks as plants acclimate. You’ll want to check moisture levels in the soil regularly, adjusting drip settings as necessary to avoid over or Underng.
Step 10:
Enjoy and MaintainOnce everything is set up, take time to enjoy your new vertical garden! Regular maintenance is essential; trimming dead leaves, ensuring plants get enough sunlight, and checking the irrigation system should become part of your routine. Consider adding fertilizer or compost as needed based on your plants’ requirements, adjusting for seasonal changes and growth patterns.
2026 •