Introduction
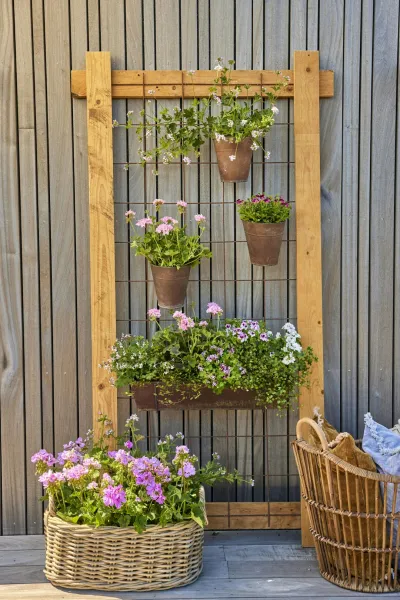
Garden Using Old Pallets And Biodegradable Plant Pots
has gained immense popularity, especially among urban dwellers with limited space. These small, dynamic gardens not only act as a beautiful focal point in your outdoor environment but also create a sustainable way to grow your own food, beautify your space, and contribute to a green lifestyle. A vertical garden allows you to maximize your growing area by utilizing space vertically rather than horizontally. Vertical gardening using pallets and biodegradable pots adds another layer of sustainability and Ecoliness to this rewarding hobby.There are numerous benefits to embarking on this DIY journey. First and foremost, it motes sustainability—using reclaimed wood and biodegradable pots reduces waste and encourages a more circular approach to gardening. Additionally, vertical gardens offer efficient use of space; you can grow a variety of plants in a compact area. They also provide accessible gardening, making it easier to tend to plants without the need for bending down or kneeling. Moreover, vertical gardens can improve the aesthetic appeal of your home, providing a lush backdrop that invites nature into your living space and motes biodiversity.Don’t worry about your skill level; this is suited for beginners. With basic tools and a willingness to learn, anyone can garden using old pallets and biodegradable plant pots.Step-by-Step Guide
Step 1:
Select and
- Prepare Your Pallet
What: Before you start building, locate a wooden pallet. Check for any rotten sections or damages that could affect its integrity.
How: You can often find pallets for free or at low-cost from local stores or warehouses. Look for “HT” stamped pallets, indicating they are HEatd and free of harmful chemicals.
Tips: If the pallet is dirty or has been exposed to moisture, consider cleaning it with mild soap and water. After cleaning, allow it to dry thoroughly. If you find rough edges or splinters, use sandpaper to smooth them out, thus ensuring your safety while working with the wood.
Safety: Always wear gloves when handling pallets to protect your hands from splinters. If the pallet has a strong odor, it may indicate it’s not safe to use, so opt for another one.
Step 2:
Measure and
- Cut the Pallet
What: Make sure the pallet’s size fits your desired garden location.
How: Use a measuring tape to determine the ideal height and width of the vertical garden. If the pallet is too large, use a saw to cut it down to your preferred size.
Tips: A pallet height of about 4-5 feet works well for vertical gardens, and a width of around 3 feet allows ample planting space.
Safety: Use goggles when cutting to protect your eyes from any wood shavings or splinters. A stable and clean workspace will ensure safety while you work.
Step 3:
Create
- Drainage Holes
What: proper drainage is crucial to prevent overwatering and root rot in your plants.
How: Use a drill to create several drainage holes at the bottom of the pallet. If you plan to lay it flat on the ground or lean it against a wall, ensure there are holes on the back for water drainage as well.
Tips: A drill with a medium-sized drill bit works best. Space the holes evenly to ensure good drainage across the pallet.
Safety: When using power tools, maintain a firm grip and keep your fingers away from the drill's bit while it’s operating.
Step 4:
Attach
- Landscape Fabric
What: Landscape fabric will provide a barrier that holds soil while allowing moisture to escape.
How: Cut a piece of landscape fabric to fit the back and sides of the pallet. Use a staple gun to secure it in place, ensuring there are no gaps where soil can escape.
Tips: Make sure to fold the fabric over the top as well, so when you pour in the soil, it won’t spill out. Trim any excess fabric after securing it.
Safety: Handle the staple gun carefully, ensuring your fingers are kept away from the trigger when loading staples.
Step 5:
Secure
- Potting Soil in the Pots
What: Preparing your biodegradable pots is vital for preparing them for planting.
How: Fill each biodegradable pot with the potting soil, leaving room at the top for your plants or seeds. Depending on the size of the pots, you may want to use a small hand trowel for this task.
Tips: Make sure the soil is moist but not soaking wet. A lightly dampened soil will hold together better in the pots and allow your plants to establish quickly.
Safety: Maintain a clean workspace as soil can become muddy and slippery.
Step 6:
Plant
- Your Seeds or Plants
What: Now it’s time to introduce your greenery into the pots!
How: Depending on your chosen plants, either transplant seedlings or sow seeds directly into your pots. Make sure to follow the specific instructions for depth and spacing, particularly for seeds, as this can significantly impact their growth.
Tips: Select plants that thrive in vertical arrangements, such as herbs (basil, mint), trailing plants (ivy, strawberries), or compact vegetables (lettuce, radishes).
Safety: Ensure you are not pulling or pushing too hard on seedlings to avoid damaging roots.
Step 7:
Mount
- Your Vertical Garden
What: With your pots planted and secured, it’s time to install the vertical garden in its designated location.
How: If mounting it against a wall, use brackets or screws to ensure it’s stable and secure. Alternatively, you can p it against a sturdy surface.
Tips: When mounting, check for a balance between stability and accessibility for watering and maintenance. Ensure that the weight of the soil and plants will not topple the pallet.
Safety: Ensure that any added weight does not make the structure unstable. If possible, have a friend help you while mounting for extra stability.
Step 8:
Water
- Your Plants
What: After planting, it’s crucial to give your new garden a drink.
How: Using a watering can or hose, gently water your plants, ensuring the soil is damp but not oversaturated.
Tips: Observe how your vertical garden drains—if water pools at the base, consider adding more drainage holes or adjusting the soil composition.
Safety: Be careful when watering to avoid spills that may create slippery surfaces, making the area unsafe.
Step 9:
Monitor and
- Maintain
What: Establishing a routine for monitoring your plants’ health is critical.
How: Check your plants regularly for signs of wilting, discoloration, or pests. Water them as needed, generally much once a week or more frequently in hot weather.
Tips: Take notes on which plants grow best in your vertical garden, so you can optimize your planting choices in future seasons.
Safety: Always stay aware of the tools around you, especially if you’re emoji with soil and watering; slip hazards can arise.
Step 10:
Harvest and Enjoy!
What: Once your vertical garden thrives, it’s time to enjoy the fruits of your labor!
How: Harvest herbs and vegetables as they mature, which will encourage fresh growth. Regularly pruning will lead to healthier plants over time.
Tips: Make it a family affair—invite friends and family to partake in harvesting while enjoying the sights and smells of your urban oasis.
Safety: Always wash your hands after handling plants and soil, especially before eating any duce.
2026 •