Introduction
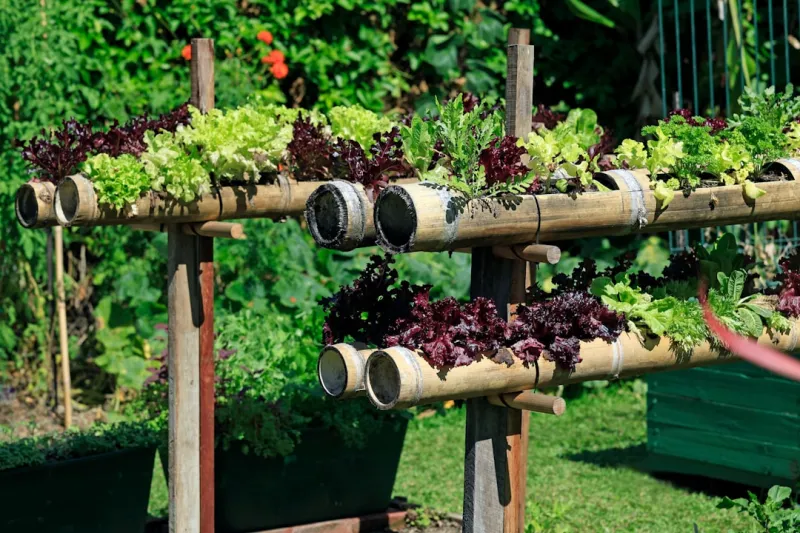
Garden Planter Using Repurposed Plastic Bottles And Old Pallets
5 (49)
are manifold. Not only do you save space, but vertical planters also provide better air circulation and sun exposure for your plants, promoting healthier growth. Additionally, they are easier to maintain than traditional gardens — particularly for those with physical limitations, as bending, stooping, and kneeling are minimized. Gardening in this manner can also help you grow fresh herbs, fruits, and vegetables, providing organic duce right at your doorstep, which is beneficial for your wallet and health alike.For beginners, this is suitable for those with minimal gardening experience or DIY skills. While some basic tools are required, the instructions provided are simple and clear, making it accessible for anyone willing to get their hands a little dirty and enjoy the outdoors. So roll up your sleeves, tap into your creative side, and let's embark on the journey of creating a vertical garden planter using recycled
materials
Tools Needed
- Utility Knife: This is essential for cutting the plastic bottles accurately. A sharp blade will make clean cuts, preventing mistakes that could lead to leaks or unevenness in the planter design.Drill with
- Drill Bits: You'll need this tool to create drainage holes in both the plastic bottles and the wooden pallets. proper drainage is key to preventing overwatering plants, so having a reliable drill is crucial.Screwdriver: You'll use this to secure the pallets together or to attach the vertical planter to a wall or frame. A cordless screwdriver can speed up the process significantly.Sandpaper: This tool will help smooth out rough edges of the pallets to prevent splinters, making handling safe and pleasant.Paintbrush or
- Spray Bottle: Use either to apply a WEatherant sealant or wood stain on the pallets. This step is important to ensure the longevity of your planter against outdoor elements.Measuring
- Tape: Essential for ensuring everything is cut to the right dimensions so that your vertical garden fits perfectly in your designated space.Gloves: protect your hands while cutting, drilling, and handling
materials
, preventing any injuries or irritations.Ruler or
- Square: Use this for precise measurements and to ensure that all sections of your planter are uniform and straight.
Materials
- Plastic Bottles: 10-15 bottles (medium size, ideally 1-2-liter soda bottles).Wooden
- Pallet: 1 standard pallet (should be in good condition without significant damage).
- Screws: 20-30 screws (preferably outdoor-rated ones to withstand weather changes).
- Potting Soil: 2-3 bags (to fill the bottles for planting).
- Seeds or Seedlings: Varies based on your preference (herbs, flowers, or small vegetables work best).
- WEatherant sealant or wood stain: 1 small can (to protect the pallet).
- Landscape fabric: 1 yard (to line the bottles and help retain soil)
- Twine or rope: 10-15 feet (to hang the planter if you choose to do so).
- Watering can or spray bottle: For easy watering (helps ensure your plants get the right amount of moisture).
- Plastic tray or saucer: (optional) To catch excess water from the bottles.
Step 1:
Gather Your
Materials
and ToolsBefore you dive into the , organize your workspace. Clear an area where you can cut, drill, and assemble your vertical garden without any distractions. Ensure you have all your tools and
materials
readily available. This step saves time and prevents frustration as you gress. Double-check that the plastic bottles are clean and free from any labels, as these can harbor bacteria and hinder plant growth.
- Safety
tip: Wear gloves during this process to avoid injuries from sharp edges.
Step 2:
Prepare the Plastic BottlesThe first major task is to prepare the plastic bottles for planting. Take your utility knife and carefully cut the bottles in half, horizontally. Depending on how many sections you want each bottle to represent, you can choose to cut them into different sections. Make sure to leave one end closed as this will hold the soil.Be mindful as you cut – go slowly to avoid slipping and injuring yourself. After cutting, use sandpaper to smooth any sharp edges. This ensures that your fingers won’t get cut when handling the bottles later.
Tip: Use the bottom section of the bottle to form a small reservoir if you wish — just poke some holes in the sides to allow for drainage if this is your plan.
Step 3:
Drill Drainage HolesNext, you'll want to ensure that your plants have proper drainage to avoid root rot. Using the drill with a drill bit, carefully make small holes in the bottom of each bottle section you’ve prepared. A few holes (3-4) proper bottle should suffice, allowing excess water to escape without commising the soil structure.Position the bottles so that they’re easy to drill without accidentally injuring yourself. If you’re using large bottles, consider making the holes slightly bigger, especially if you’re planting more Waterive species.
- Safety
tip: Ensure that you are wearing safety goggles to protect your eyes from any plastic shards.
Step 4:
Prepare the Wooden PalletNow it's time to prepare the wooden pallet for the vertical structure. Inspect the pallet for any loose or broken slats, and remove any nails or staples that could hinder your construction. Use sandpaper to smooth out any rough surfaces or splinters — you’ll want to ensure that your vertical garden is safe to handle.If you want to enhance the appearance of your pallet and ensure it lasts outdoors, apply a coat of Weatherant sealant or wood stain. Follow the instructions on the duct for best results. Let it dry completely before ceeding to the next step.
Tip: Choose a color that complements your garden’s aesthetic or blends seamlessly with your outdoor space.
Step 5:
Arrange the Bottles on the PalletBegin arranging the cut plastic bottles on the pallet in a way that is visually appealing and functional. You can choose to position them evenly across the pallet or create a staggered effect. Lay the bottles flat on the pallet and use twine or rope to temporarily secure them in place. This will give you an idea of how your vertical garden will look before you attach them permanently.Once you’re satisfied with the arrangement, always remember to check your planters' orientation. You want to place them in such a way that the openings face outwards for easy access and sunlight.
Tip: Consider planting taller plants towards the top of the pallet and shorter ones at the bottom to maximize light and space.
Step 6:
Secure the Bottles to the PalletUsing a screwdriver, attach the bottles to the pallet by securing them with screws or any other suitable fasteners. Aim to place screws strategically where they won’t disrupt the plant root systems. You might want to attach one screw to hold the bottle securely and then add additional screws if necessary.Make sure the screws go into the wooden part of the pallet and not the drainage holes in the bottles. The goal is to create a sturdy structure that can hold the weight of the filled bottles while ensuring easy access to each planter.
- Safety
tip: Don’t Overn the screws, as this can crack the plastic.
Step 7:
Line the Bottles with Landscape FabricTo ensure soil remains within the bottles while still allowing for drainage, cut pieces of landscape fabric to fit the insides of each bottle. This will act as a barrier, preventing soil from falling out while still allowing water to escape.Secure the fabric inside each bottle with staples or small screws. Be sure to leave a flap hanging over the edge — this will aid in planting and watering later on. This step is essential in creating an efficient irrigation system for your plants.
Tip: Over time, the fabric can deteriorate, so keep an eye on it and consider replacing it if you notice deterioration.
Step 8:
Fill with
- Potting Soil and PlantNow for the fun part: it's time to plant! Fill each prepared bottle with potting soil, leaving a little space at the top for planting seeds or seedlings. Choose the herbs or plants you'd like to grow based on the sunlight and climate conditions of your specific area.Once filled, plant your seeds or seedlings in accordance with their specific growing conditions. Make sure to provide ample space for roots to expand. After planting, take a moment to gently water each bottle. Using a watering can or spray bottle works best here to ensure the soil doesn't get too compacted.
Tip: Consider companion planting for enhanced growth; for example, growing basil alongside tomatoes is both beneficial and visually appealing.
Step 9:
Maintenance and Watering RoutineAfter your vertical garden is planted, establish a watering routine. Check the moisture level of the soil regularly — the benefits of vertical gardens include reduced watering frequency due to gravity drawing excess water down into the lower levels of the planter. However, it's crucial to ensure that all levels get adequate moisture. Water thoroughly when needed and consider using a soluble fertilizer every few weeks.Consider setting a specific watering day each week, along with regular checks to observe any growth or pest issues.
Tip: If your plants seem to be struggling, examine light levels or consider rotating plants for better growth.
Step 10:
Choose a Display LocationThe final step is locating the ideal display location for your vertical garden. Aim for a spot that receives adequate sunlight (most plants need at least 4-6 hours of direct sunlight a day). Position the pallet vertically against a sturdy wall or a fence, making sure it is securely anchored if necessary.
- Safety
tip: Ensure the pallet is stable, so it won't lean or tip over as the plants grow and gather weight.Once you’ve secured it in its assigned spot, step back, take a look at your creation, and celebrate your achievement!
2026 •