How to create a self-watering vertical garden using repurposed plastic bottles
Setup & Materials
By Alex • November 13, 2025 • DIY Guide
Introduction
In an age where sustainability is more important than ever, creating a self-watering vertical garden using repurposed plastic bottles offers a meaningful solution. Not only does this project contribute positively to the environment by minimizing plastic waste, it also provides an effective and efficient way to grow plants, particularly in limited spaces. Vertical gardens are ideal for urban environments, where outdoor space is at a premium. By utilizing walls, fences, or even balconies, you can grow a diverse range of plants, from herbs and vegetables to decorative flowers.
The benefits of a self-watering garden extend beyond sustainability. The system promotes easier plant care, as it reduces the frequency of watering. In addition, the vertical design allows for optimal sunlight exposure and air circulation, encouraging healthy plant growth. For those who may not have consistent time or ability to water plants regularly, a self-watering garden acts as a reliable irrigation system that keeps plants hydrated for a longer period.
This DIY project is accessible for individuals with varying levels of experience, making it perfect for beginners. With just a few items and a little creativity, you can embark on a rewarding gardening adventure that positively impacts the environment and beautifies your living space. Lightweight, cost-effective, and environmentally friendly, creating a vertical garden with plastic bottles is an engaging way to explore gardening.
Tools Needed
Utility Knife or Scissors: Essential for cutting the plastic bottles to create containers for your plants. Make sure to handle these tools carefully to avoid injury.
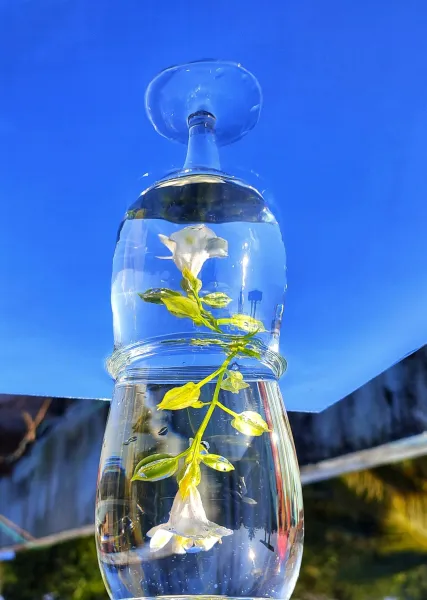
Final Result
Drill or Screwdriver: Required for making drainage holes in the bottles for proper water flow. A drill will make this task quicker and more efficient.
Ruler or Measuring Tape: To measure the dimensions of your vertical garden structure accurately and ensure everything is aligned properly.
Marker or Pen: Useful for marking where cuts or holes should be made on your bottles. This will help keep your work neat and consistent.
Hot Glue Gun: Perfect for securing components and providing extra stability to your vertical garden structure.
Plastic Funnel: Handy for filling your self-watering system with water without causing spills or mess.
Garden Soil: Of course, you’ll need soil for planting! A good potting mix will give your plants the nutrients they need.
Plants or Seeds: Select plants that will thrive in your environment, considering light and water needs.
Materials
Plastic Bottles: Around 10–15 bottles (the regular 1.5-liter size works well) to create multiple planting pockets.
Nylon String or Rope: Around 10 feet for constructing the vertical holder and to hang your bottles.
Wooden Pallet or Wooden Board: 1 to create a sturdy base for attaching the bottles together. A pallet can also add an aesthetic touch.
Plastic Container or Tray: 1 to catch excess water from the bottles and to prevent mess.
Sand or Gravel: 3 to 4 cups for base drainage at the bottom of the bottles to ensure plants do not become waterlogged.
Watering Tube: 1 (optional) to create a more efficient water delivery system to each bottle.
Plant Food: A small bag of slow-release fertilizer to ensure your plants receive adequate nutrients.
Plastic Wrap or Plastic Sheet: 1 square yard to create a water reservoir if needed.
Step-by-Step Instructions
Step 1: Gather Your Plastic Bottles
What: Collect the plastic bottles you wish to repurpose for your vertical garden.
How: Gather around 10–15 plastic bottles, ideally uniform in size. It’s best if they are 1.5-liter soda or water bottles. Remove labels and thoroughly wash them to ensure they contain no residual soda or chemicals that could affect plant growth.
Tips: A mixed collection of bottles can still work, but uniformity in size will create a more streamlined garden. Try to choose bottles that have a smooth, even texture, as those are easier to clean and cut.
Safety: Be careful when cutting or handling bottles, as the edges may be sharp.
---
Step 2: Cut the Bottles
What: Prepare the bottles to turn them into planting containers.
How: Using your utility knife or scissors, cut the bottom third of each bottle off. Ensure that you leave enough height for soil and roots while allowing for drainage. Create drainage holes on the bottom of the bottles to allow excess water to escape.
Tips: To make the cutting process smoother, consider scoring the bottle with a knife before making deeper cuts. This technique gives you better control.
Safety: Exercise caution when using sharp tools. Always cut away from your hands and body. Wear protective gloves if you have sensitive skin.
---
Step 3: Create the Water Reservoir
What: Build a self-watering mechanism for your bottles.
How: Use a plastic container or tray as a base that fits beneath the vertical structure. This will serve as a reservoir to hold water. Attach a filling pipe or a funnel to the top of the container that leads to each bottle. This will allow you to water multiple plants from one source.
Tips: Consider using a piece of PVC pipe if you have one handy, as it can direct water efficiently from your reservoir to the bottles.
Safety: When using tools to drill or create holes, always ensure factor in your safety and wear protective eyewear if necessary.
---
Step 4: Assemble the Structure
What: Create your vertical garden's framework.
How: Depending on the space available, you can use a wooden pallet or a vertical trellis structure. Secure your plastic bottles in rows using nylon string or rope. You can tie them in a way that they sit horizontally or at an angle to optimize sunlight exposure.
Tips: Use a level to ensure that your bottles are positioned evenly. If using a wooden pallet, you can attach the bottles directly to it using nails or glue.
Safety: If using a trellis or pallet, ensure it’s stable and securely positioned to avoid falling over.
---
Step 5: Add Drainage Material
What: Prepare the bottom of each bottle for enhanced drainage.
How: Add a handful of gravel or sand to the bottom of each cut bottle to provide proper drainage. This step is crucial for preventing waterlogging, which can be detrimental to your plants.
Tips: You can also mix a bit of activated charcoal with the gravel to help absorb odors and toxins.
Safety: Avoid inhaling dust from sand or gravel, and wear a mask if you have allergies.
---
Step 6: Fill With Soil
What: Fill your bottles with potting mix.
How: Stuff the bottles with a high-quality potting mix, leaving a couple of inches at the top to prevent overflow during watering. Ensure that the soil is firmly packed, as this will support the roots of your plants more effectively.
Tips: Consider pre-mixing in some slow-release fertilizer to ensure your plants get nutrients over time without the need for constant feeding.
Safety: Be cautious of lifting heavy bags of soil; use proper lifting techniques to avoid back strain.
---
Step 7: Choose and Plant
What: Select your plants and set them up for growth.
How: Choose plants that are conducive to vertical gardening, such as herbs (basil, mint), small vegetables (cherry tomatoes, radishes), or trailing flowers (petunias, ivy). Plant seeds or seedlings in each bottle, ensuring they have adequate spacing for growth.
Tips: For beginners, starting with seedlings is often easier than planting seeds. Choose plants according to your climate and sunlight availability.
Safety: Wash your hands after handling soil and plants, especially if you have any cuts or abrasions.
---
Step 8: Watering System Setup
What: Ensure your garden is watered efficiently.
How: Use the funnel or any setup that you created in the water reservoir step to fill the system with water. Fill it as needed, but do not overfill, as this can lead to overflow.
Tips: Establish a watering schedule based on your plants’ water needs and local climate conditions, which may require adjustments as plants grow.
Safety: If using a tube, ensure it's free from clogs and clear for water flow to avoid leakage.
---
Step 9: Position Your Vertical Garden
What: Find the perfect spot for your garden.
How: Place your vertical garden in a location that receives adequate sunlight—most plants prefer around 6-8 hours of sunlight a day. It should also have good air circulation.
Tips: If space is tight, consider mounting it on your balcony or the side of your home where it gets plenty of sun.
Safety: Ensure that your garden is securely mounted to avoid accidents if it ever were to fall.
---
Step 10: Care and Maintenance
What: Regular upkeep to ensure healthy plant growth.
How: Monitor your plants for growth, pests, and moss accumulation. Trim and prune as necessary to encourage healthy development. Replenish water in the reservoir according to your plants needs and consider adding additional fertilizer after several weeks.
Tips: Keep a gardening journal to track plant growth and adjustments in care. This will help you learn what works best in your unique growing environment.
Safety: If you notice any pest issues, handle pesticides according to instructions to ensure the safety of you and beneficial insects.
Troubleshooting
Even with a well-structured plan, issues may arise. Here are five common problems and how to address them:
1. Overwatering: If your plants appear wilted or yellow, they may be receiving too much water. Check the drainage holes to ensure they aren’t blocked. Remove excess water and allow them to dry out before watering again.
2. Underwatering: If plants start wilting and the soil feels dry, it could be because the reservoir is empty. Check and refill the reservoir and ensure you are watering enough.
3. Nutrient Deficiency: Yellowing leaves or poor growth can indicate a lack of nutrients. Consider applying a slow-release fertilizer or compost to boost plant health.
4. Pests: Monitor for common pests like aphids or spider mites. Use a gentle insecticidal soap or neem oil to treat affected plants, isolating them from healthy plants if possible.
5. Insufficient Sunlight: If plants appear to be stretching or leaning, they may not be getting enough light. Move your vertical garden to a sunnier location or consider supplementing with grow lights.
Conclusion
Creating a self-watering vertical garden using repurposed plastic bottles is a rewarding venture that combines creativity with sustainability. Not only does this project enhance your space, but it also nurtures your connection to nature and responsibility toward the environment. Keep in mind that every garden is a unique experience—feel free to experiment with different plants, designs, or watering methods to make the project yours. Regular maintenance and observation will ensure it thrives.
Whether you tweak your design or expand to other forms of vertical gardening, the skills you gain from this project will equip you with knowledge that can translate across various gardening adventures. Your mini-ecosystem will not only provide greenery in your home but also contribute to the growing movement toward sustainable living. Happy gardening!